I find leftover pizza is sometimes better than fresh baked. As with many tomato and herb based foods. Aging seems to increase the flavor. Especially if it is homemade.
How many of you enjoy cold left over pizza for breakfast? I certainly do. How about the re-heated version?
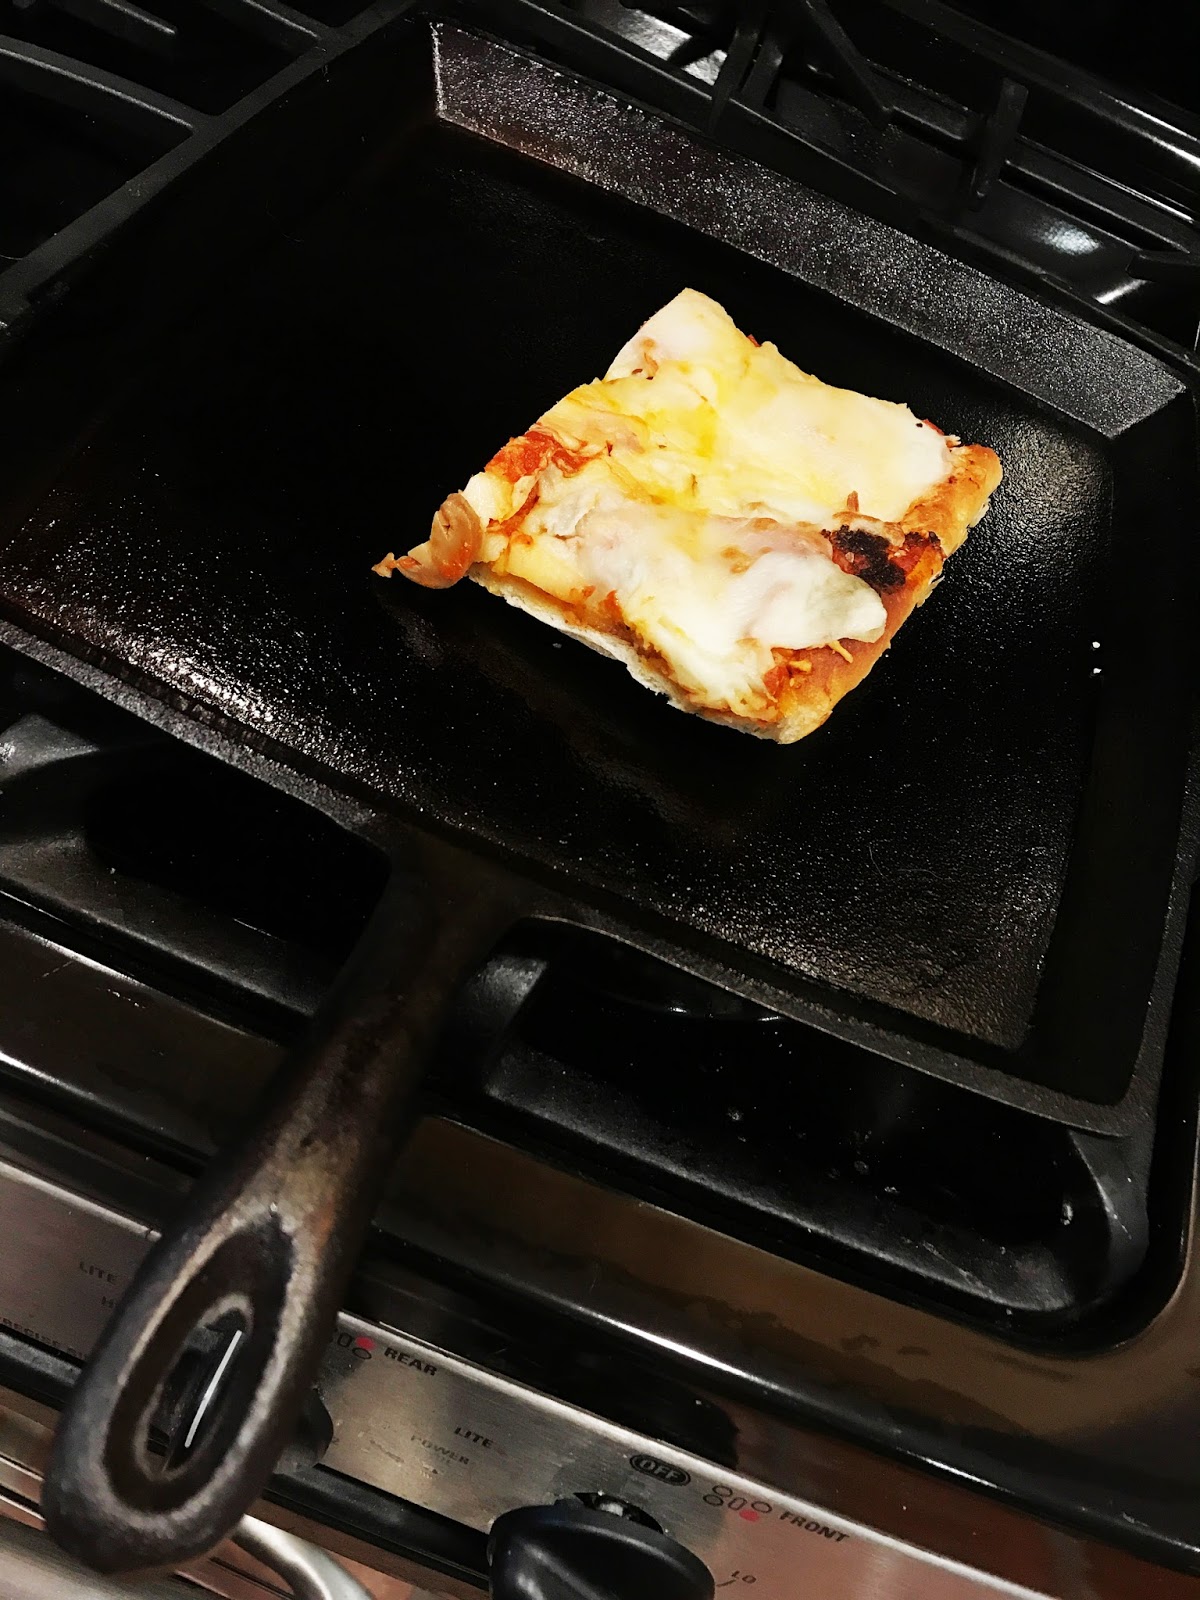
My favorite technique for re-heating leftovers is to use a cast iron skillet. You can’t be in a hurry. If you are in a big rush just throw it in the microwave. If you really want something better than just baked, try using cast iron.
I put my cast iron on a burner set at its lowest setting. I always use gas stoves. If you cook with electric you may have to experiment. As soon as the Cast Iron is warm to the touch (a minute or two) I wipe it with a very thin layer of Crisco vegetable shortening. I place the pizza on the Cast Iron and cover it with a lid or tent of aluminum foil.
I kept the heat as low as possible and allow the pizza to warm slowly until the top cheese is warm and melted. Serve at this point. You will be rewarded with a delightfully crispy bottom crust, and aged sauce that has brought out even more flavor.
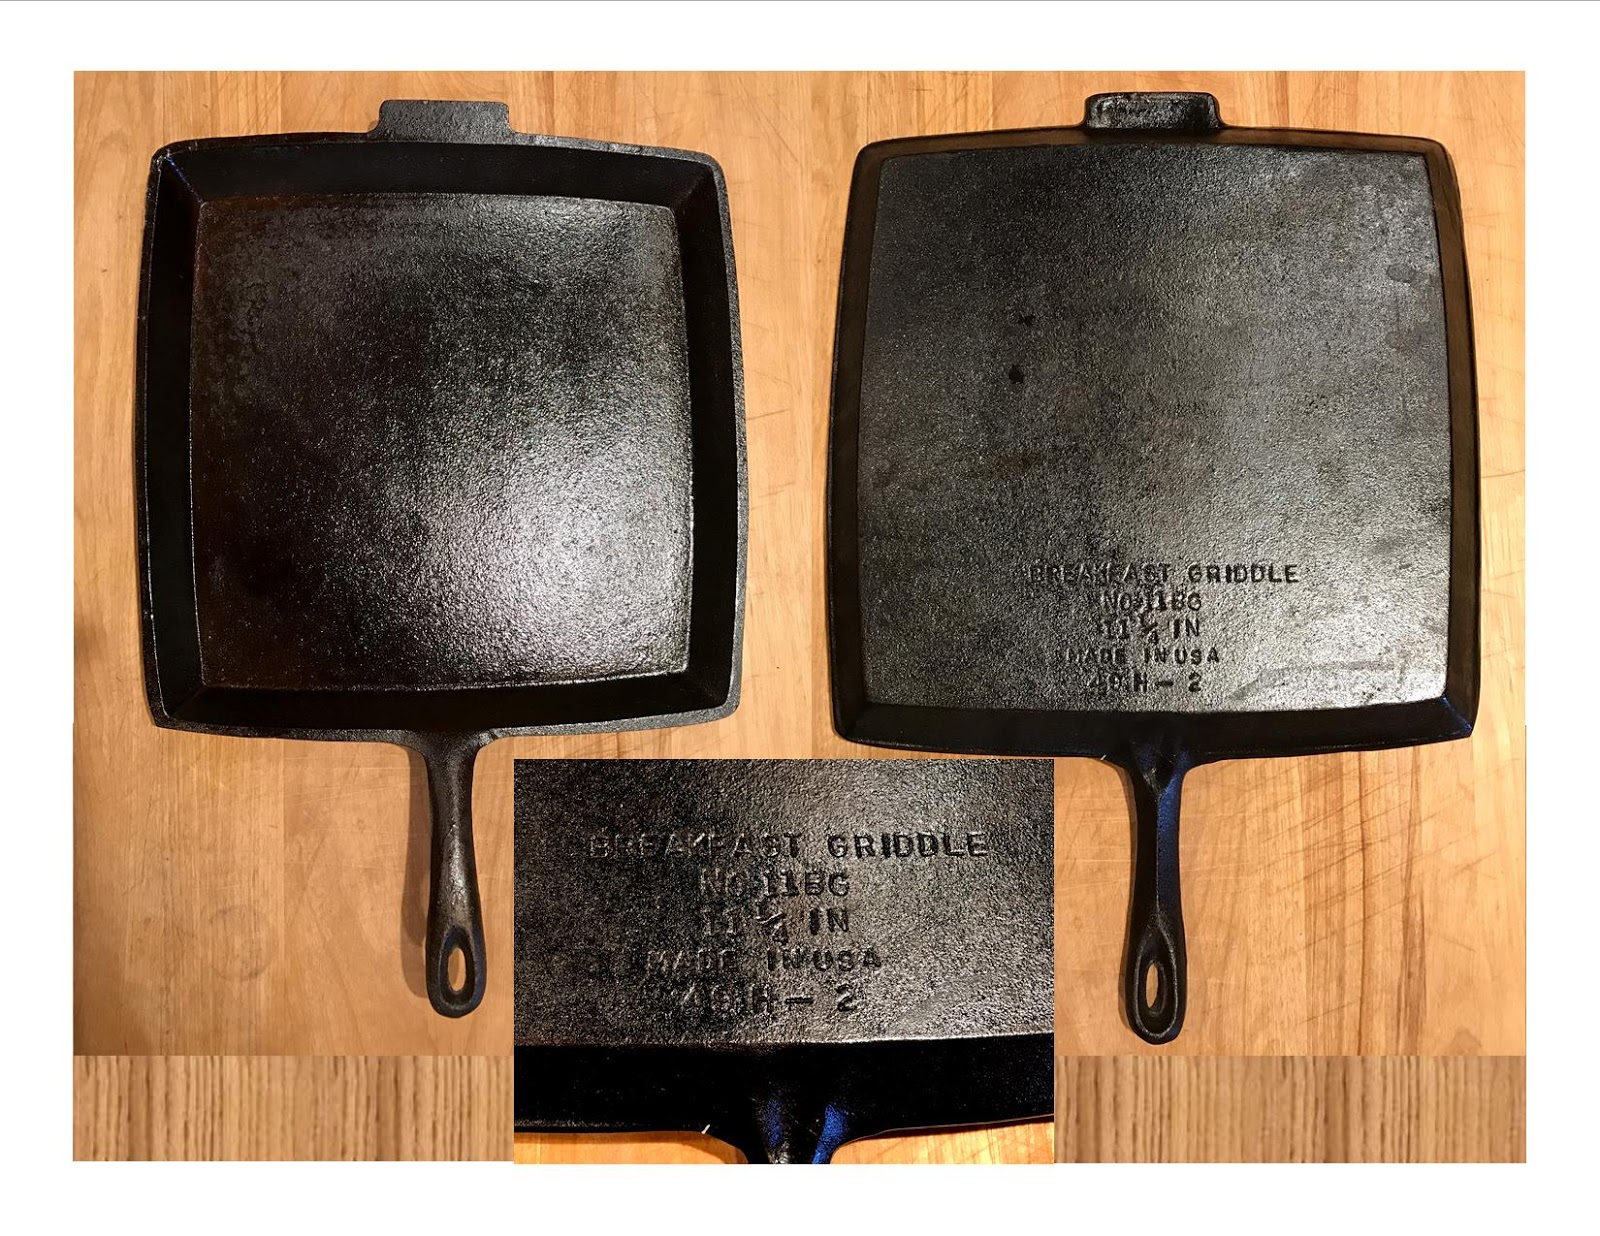
My favorite for pizza re-heating is my square vintage BSR (Birmingham Stove & Range) Breakfast Griddle.
“Tis the Season. Make up boxes of cookies, candies, chocolate dipped pretzels, etc. Have these on hand the week before Christmas to spread a little joy and love with your friends, family, and neighbors.
Here are a couple very common recipes to start out with.
Our favorite is right off the bag of Nestle’s ® Chocolate Chip Bag
Nestle’s® Toll House Chocolate Chip Cookies
Makes 5 dozen
2 ¼ Cups Flour
1 tsp Baking Soda
1 tsp Salt
1 Cup Butter softened
¾ Cup Sugar – White Granulated
¾ Cup Brown Sugar Packed
1 tsp Vanilla
2 Eggs
2 Cups Nestle’s ® Chocolate Chips
1 Cup Nuts Chopped (Optional)
Preheat oven to 375°F.
Combine Flour, Baking Soda, and salt in small bowl.
Beat butter, sugar, brown sugar, and vanilla in a large mixing bowl until creamy. Then add eggs one at a time beating well after adding each egg.
Gradually beat the Flour mixture into the creamy butter mixture.
Stir/Fold in the Chocolate Chips and Nuts.
Drop by rounded Tbsp. onto an ungreased baking sheet.
Bake 9-11 minutes until golden brown. Cool on baking sheet 2 minutes then move to wire rack to cool completely.
For cookie bars: Preheat oven to 375°F. Grease 15×10 Jelly Roll Pan
Spread prepared cookie dough into the prepared pan.
Bake 20-25 minutes or until golden brown.
Cool on rack. Once cooled, cut and remove from pan.
(A Pizza wheeled rolling cutter works great for cutting the bars)
**********************
Cookie Press Christmas Cookies
Decorate with Icing and Sprinkles
Plain/Vanilla Spritz Cookie Press Cookies
2/3 cup granulated sugar
1 cup butter
1 large egg
1/2 teaspoon salt
2 teaspoons vanilla
2 1/4 cups all-purpose flour
Heat oven to 375°F. In large mixer bowl combine sugar, butter, egg, salt, and vanilla. Beat at medium speed, scraping bowl often, until mixture is light and fluffy, 2 to 3 minutes. Add flour. Beat at low speed, scraping bowl often, until well mixed, 2 to 3 minutes. Place dough in cookie press. Form desired shapes 1 inch apart on cookie sheets. Bake for 6 to 8 minutes or until edges are lightly browned.
Chocolate Spritz Cookie Press Cookies
Makes about 60
1-1/4 cups butter
3/4 cup granulated sugar
2/3 cup packed brown sugar
1 tsp Vanilla
2 large eggs
3 ¼ Cups all-purpose flour
3/4 cups cocoa powder
1/2 teaspoon baking soda
1 teaspoon salt
Preheat oven to 375 F. In a large mixing bowl with an electric mixer, beat butter and sugars, and vanilla, until light and fluffy. Beat in eggs, one at a time, beating well after each addition. In another bowl, sift together flour, cocoa powder, baking soda and salt. Gradually stir flour mixture into butter mixture. Shape dough into a log and place in your cookie press. Press cookies out onto an ungreased baking sheet. Bake for 10 to 12 minutes. Remove to wire racks to cool completely.
Layered Vanilla and chocolate Cookies
Used press with wide saw toothed die and lay out a long strip.
On top layer a long strip of white/vanilla
Variation use crushed candy, (Crushed candy canes work good) between the layers.
Cut the strips in bite sizes and bake at 350°F for about 10 minutes.
Decorate with white or colored icing and sprinkles.
To make pinwheels
Roll a Layer of the Vanilla dough out on wax paper. On a second piece of wax paper roll out a thin lay of the Chocolate dough. Flip the chocolate layer over on top of the white. Press dough together slightly. Peel off the top layer of wax paper. Roll the double layer of white and chocolate into a log removing the bottom wax paper. Cover the dough log with wax paper. Then cover in foil and chill in the fridge for about an hour. Then remove foil and wax paper, and slice disks off the log about 1/4 inch thick. Arrange on cookie sheet and bake as directed above.
**********************
Chocolate Dipping Sauce
for Pretzels, Ritz Crackers, Oreo Cookies, etc
For every 8 oz of Chips (Chocolate, White, etc) add 2 Tbsp. of Crisco Shortening
In the microwave or double boiler heat and stir until silky smooth
Dip your items in the melted chocolate and lay out on wax paper. You can speed this up by using chilled cookie sheets.
Dipping a second time after the first dip has cooled will make a thicker layer of chocolate. Either way, before chocolate has hardened you can drizzles with sprinkles or colored sugar.
Posted for New Years celebration. Combining pork & Sauerkraut to bring you a year filled with good luck.
Sauerkraut Balls
I grew up in NE Ohio and these are favorite in that area
Rick Beach
1lb Sausage (bulk ground)
½ Onion Sweet type chopped
1 Cup Sauerkraut (drained)
4 oz Cream Cheese
1 Egg, Beaten slightly
1 Tbsp Flour
1 tsp Dry Mustard
1 tsp Cilantro (Dried Flakes)
¼ tsp Celery Seed
Salt
Ground Black Pepper
2 Cups Milk
3 Eggs beaten slightly
2 Cups Dried Bread Crumbs
Oil for frying
In a skillet Brown the sausage and onions breaking up the sausage as it cooks.
Drain any grease. Add Sauerkraut, Cream Cheese, Egg, Flour, Mustard, Celery Seed, Salt & Pepper. Combine well.
Roll in 1 inch balls. Place on cookie sheet and place in freezer until partially frozen
In a bowl combine the milk and eggs. In a second bowl place the dry Bread Crumbs. Dip each ball into the milk/egg liquid mixture, and then roll in the bread crumbs to coat.
Deep Fry or skillet fry, in oil, the balls about 5 minutes.
Serve skewered with a toothpick as an appetizer, with your favorite dipping sauce.
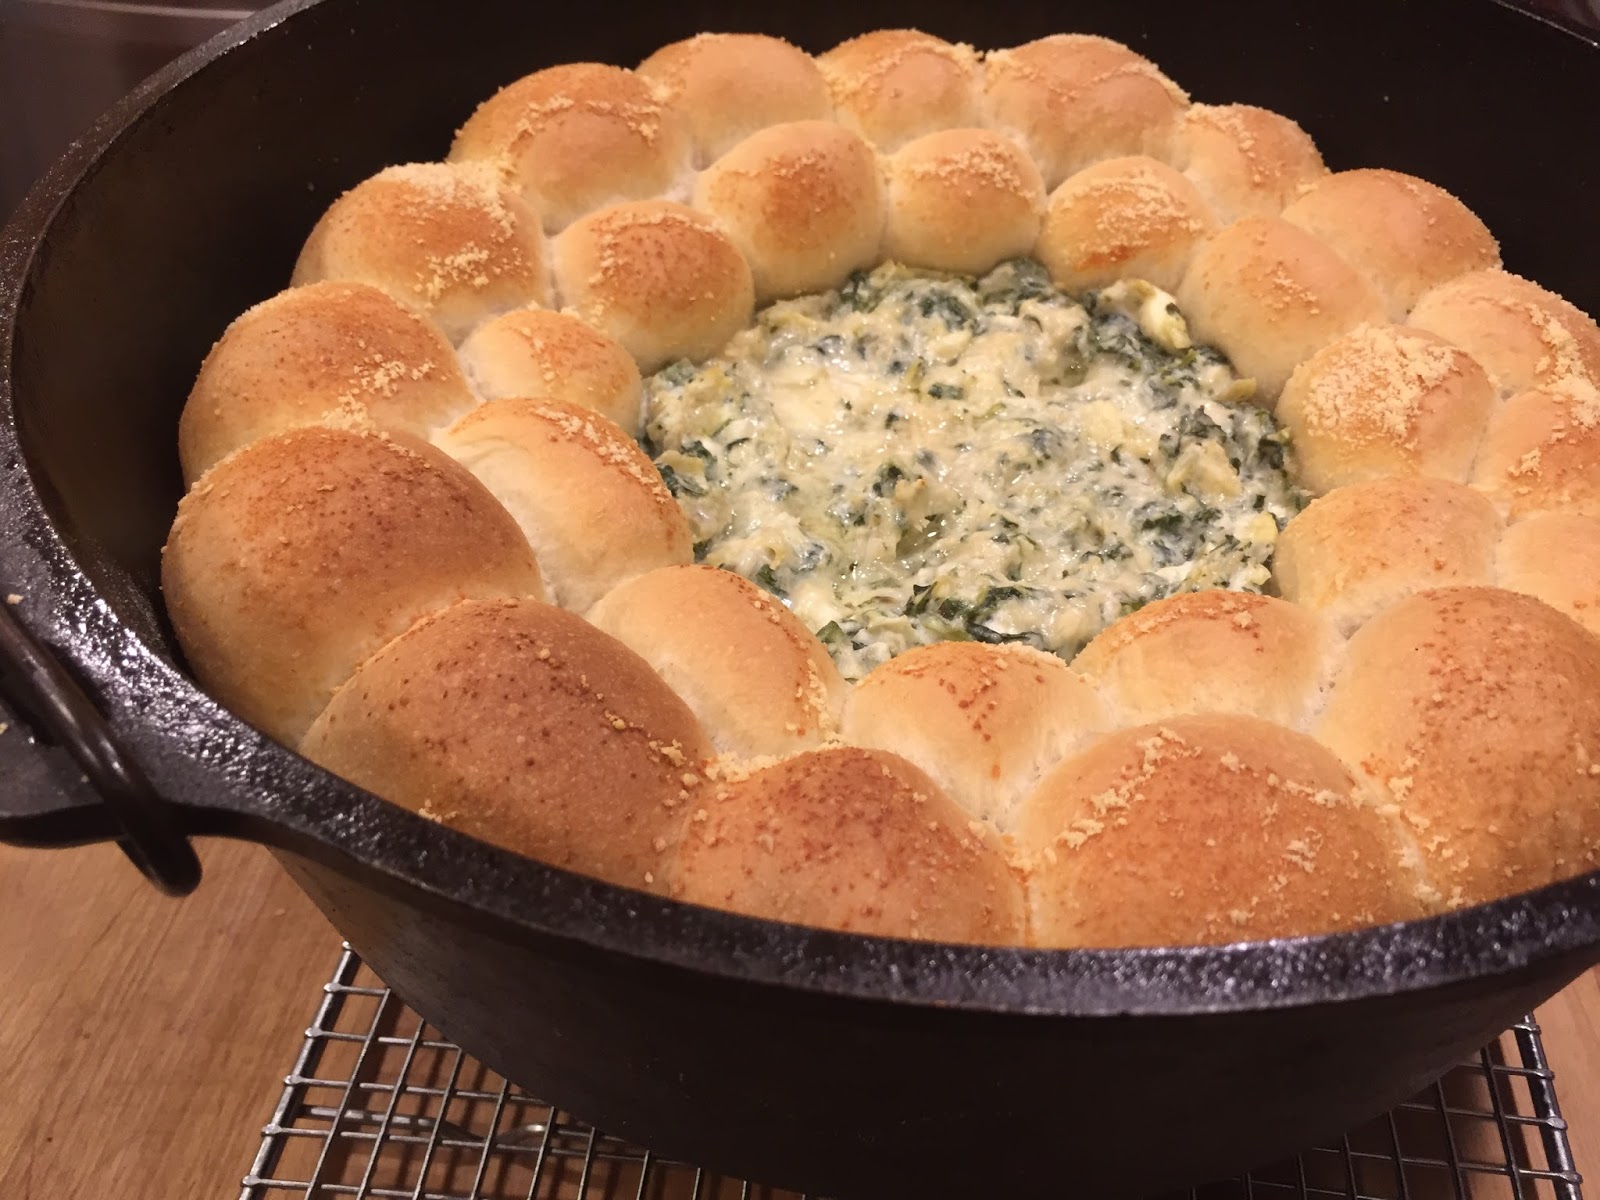
Use a 14 inch Dutch Oven that has been well greased. Grease up a relatively straight sided bowl to be placed right side up in the center of the Dutch Oven. Size it properly to get 2 rows of finished rolls. The dip will fill this space created by the bowl once removed.
Preheat oven to 375°F if using the kitchen oven.
The rolls are from our OldFashioned White Bread recipe. Use 1 Tbsp Agave or 1 ½ Tbsp white sugar in the recipe where it calls for Agave. Follow the recipe through the first rise of the dough. Turn out on a floured board and divide into 24 – 28 equal chunks of dough. Tuck each piece of dough into itself to form a roll. Arrange two rows of buns between the bowl and the side of the Dutch Oven. Spray the tops with cooking spray such as Pam, or brush with melted butter.
Cover the Dutch Oven with Plastic wrap and set in a warm draft free area (top of the pre-warming stove) to allow the dough (now rolls) raise the second time. This can take anywhere from a 1/2hr to 1hr. Allow the dough to double in size.
In the meantime prepare the ArtichokeSpinach Dip up to the point of baking. But do not bake it. Refrigerate the dip while waiting for the buns to rise.
If baking with charcoal start your coals 15 minutes prior to the following steps.
Once the buns have risen, heat the dip until warm using a sauce pan or microwave. Just to the warm point. Do not cook it.
Once the dip is just warm, gently slide the bowl out of the center of the rolls. Spoon the dip into the center hole the bowl created. Pack the dip up against the raised rolls circling the interior of the Dutch Oven. The center hole should now be filled with dip about 1 ½ to 2 inches deep. Do this gently so you don’t make the raised rolls deflate and go flat.
In a standard kitchen Oven bake uncovered at 375°F for about 40 minutes or until the rolls become golden brown.
Baking with charcoal, bake covered; applying more heat to the 14 inch Dutch Oven lid, and less underneath to get 375°F (Generally 19 coals on the top lid. 11 coals underneath the Dutch Oven. Arranged coals just inside the outer perimeter – If using a different sized Dutch Oven adjust accordingly) Bake around 40 minutes or until the rolls are golden brown.
Per the Artichoke Spinach Dip recipe remove from the heat and garnish with Mozzarella Cheese and Fresh Ground Pepper.
1 egg white, lightly beaten for bushing dough prior to baking (Do not use the yoke)
2 tablespoons sesame seeds or Cornmeal
Directions
Combine the water and yeast in the bowl and allow the yeast to work for about 5 minutes.
Add the Agave and oil to the warm water and yeast mixture. Start mixing in the flour on low speed until dough starts to form (Use Dough hook). Once combined and dough is wet sprinkle the salt onto the dough, and knead with dough hook on medium speed for 8 to 10 minutes, or until dough is firm, smooth, and elastic.
Place the dough in a large heavy lightly oiled bowl and spray the dough with a thin coating of cooking spray. Wrap the bowl with plastic wrap and set aside to raise in a warm, draft-free place for 1 1/2 hours or until doubled in size. Remove the wrap, punch down. Turn out on floured board. Flatten and roll up. Roll the dough up tightly, sealing the seam well.. The dough should be elongated and oval-shaped, with tapered and rounded (not pointed) ends.
Preheat the oven to 425 degrees F.
A heated or pizza stone can be used for baking directly on the stone. Alternately, an inverted baking sheet may be used. I prefer a double perforated French Bread Pan and make 2 loaves from this recipe.
Allow the dough to proof, loosely covered with a damp towel, for 30 minutes, or until doubled in size. This can be done on a piece of foil that is coated with spray (Pam).
I raise my dough this second time right in the double Perforated French Bread Pan. The perforated pan is sprayed with oil as well as coating the dough. Remember to cover with a damp towel.
Once raised double again, brush the dough with the egg white and sprinkle the sesame seeds or cornmeal over the top. Using a razor blade or sharp knife, score 3 (1/4-inch deep) slashes across the top of the dough at a 45 degree angle.
Spray the dough loaves with water from a water bottle and place in the oven. Immediately close the oven and bake for 3 minutes. Open the oven door and spray the dough again with the water bottle. Close the oven door and bake for an additional 3 minutes before spraying the dough for a third time (the spraying of the dough ensures a crisp golden brown crust). Bake the dough for 45 minutes or until a hollow thud is heard when the bread is whacked with the bowl of a wooden spoon. Water spraying can be omitted and you will still turn out with excellent bread. Allow the bread to cool slightly before serving.
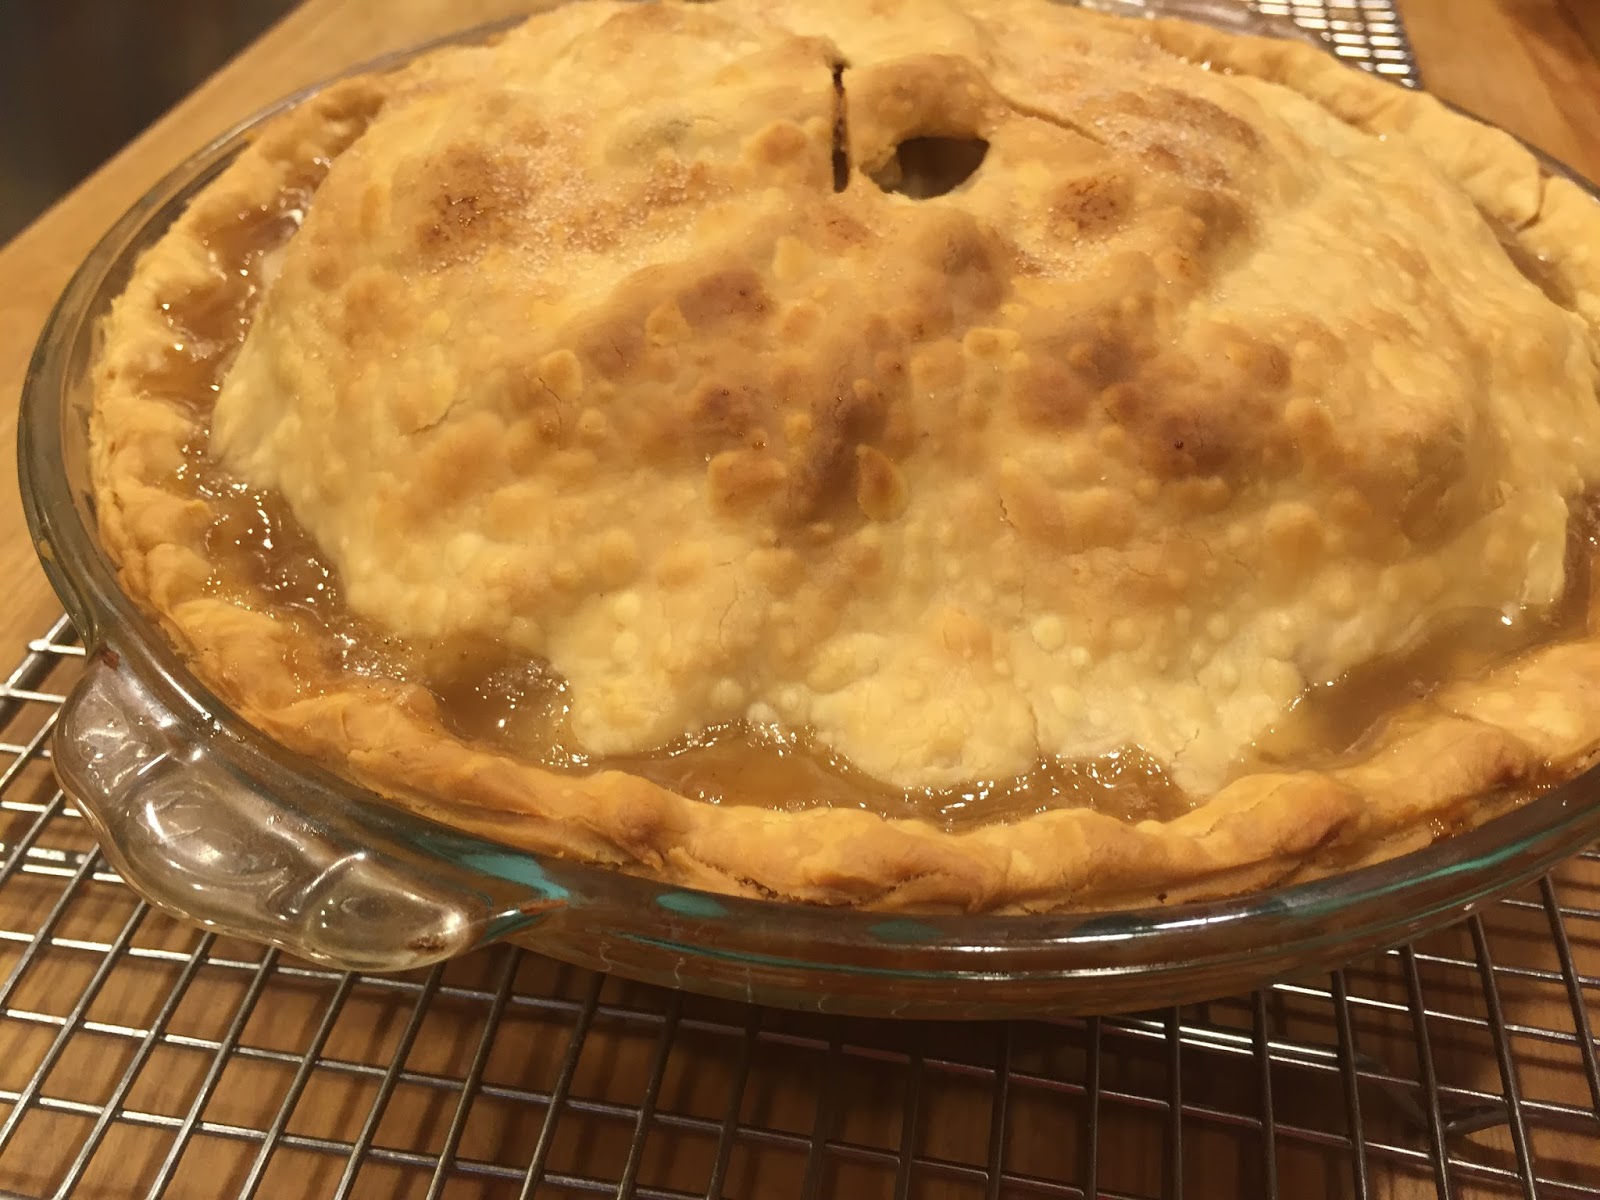
6-7 cups of medium tart apples (Granny Green), cored, peeled and thinly sliced
1/2 cup sugar
1/4 cup brown sugar
1/4 tsp. salt + a few shakes on top of apple mixture before placing the top crust on
1 tsp. cinnamon
1/4 tsp. nutmeg
½ tsp. cornstarch
3 Tbsp. flour
3 Tbsp. butter
2 Pie Crusts
Mix all ingredients in a large bowl except the butter and pie crusts.
Then pour the mixed ingredients into the pie crust lined plate/tin. Dot with chunks of the butter.
Add a few shakes of salt on top of the apple mixture now in the bottom pie shell.
Top with the other crust. Cut steam slits in the top crust and sprinkle the top with some additional sugar.
Foil protect/tent the exposed crust edge to prevent premature browning
Bake at 450°F for 15 minutes. Remove the foil that is tented over the crust edge.
Reduce heat/coals to 350°F and bake for 35-45 minutes, until apples are tender and juices are bubbling out of the steam slits.
Dutch Oven baking for pies in general. Whether using a glass pie plate or metal tin plate (Not deep dish pies with crust directly in the Dutch Oven) raise the plate/tin off the bottom of the Dutch Ovens cast iron. Several methods are used. Any type of trivet works. I personally use an adjustable leg trivet with very short legs. Mason jar metal rings work too. The trivet or spacer goes in the bottom of the Dutch Oven before the pie plate/tin is placed in the DO.
I always tent my outer perimeter exposed pie crust with foil for the first 15 minutes of any recipe. This avoids premature crust browning. Use the normal recipe for a conventional oven and adjust your charcoal coals to equal the heat settings.
A long piece of foil (double it if using cheap thin stuff) is draped in the Dutch Oven prior to the pie being placed in. The ends of this foil can be rolled up or left hanging out under the DO lid. This foil is used for lifting the pie out after baking. This foil lifter is especially useful when the pie plate/tin and the Dutch Oven sides are a tight fit.
Glass pie plate shown on an adjustable leg trivet (shown with 1 1/2 inch legs
When pie baking in a Dutch Oven the bolt legs would be removed an 1/2 inch bolts/legs used
(Idea from Kathleen Leblanc but this is my version ~Rick Beach)
Greased Glass baking dish (1) 6X8 & (1) 6X10 Or (1) Greased 12 0r 14 inch Dutch Oven
Filling
8 oz Uncooked White Fish, Shrimp, Crab, Crawdad tails, etc (Chopped or shredded)
2 Cups Cooked White Rice
10 ½ oz Can Use half the can Campbell’s Cream of Shrimp Soup (Do not add water) (Save 1/2 Can)
15 oz Can Use half the can Green Chili Enchilada Sauce (Mild) (Save 1/2 the can for the topping)
14.5 oz Can Fire Roasted Chopped Tomatoes (Drain and save the liquid)
¼ Bunch Fresh Cilantro chopped
¼ tsp Sea Salt
¼ tsp Black Pepper fresh ground
½ tsp Onion Powder
½ tsp Garlic Powder
Juice of 1 Lime
½ Cup Mex Blend Cheese Shredded (Cheddar could be used)
½ Cup Parmesan Cheese Shredded
14 6 inch soft flour tortillas
Topping Sauce
½ the above can of Cream of Shrimp Soup
½ the above can of Enchilada sauce
Part of the reserved/drained tomato liquid
Topping Cheese
¼ Parmesan Cheese Shredded
½ Cup Mex Blend Cheese shredded (Cheddar could be used)
In a mixing bowl combine the Filling ingredients and fold and mix together with a rubber spatula.
Use a 1/3 cup measuring cup and place a 1/3 scoop of the mixed filling in the tortilla. Roll the tortilla and place seam side down in a greased glass baking dish or greased Dutch Oven.
Pack the filled and rolled tortilla’s in the bottom to create a full layer.
Make the topping sauce by adding the ½ can of Cream of Shrimp soup to the ½ can of the remaining Enchilada sauce. This won’t quite fill the 15 oz Enchilada Sauce can all the way up. Top the can off with the reserved/drained tomato liquid. Stir the Soup, Enchilada sauce, and tomato liquid until combined and a uniform color. This should fill the 15 oz can. Pour and spread this sauce over the tops of the filled and rolled tortillas.
Bake Covered (Foil or glass top cover for kitchen oven) for 45-60 minutes in a 350°F oven or Dutch Oven. When checked at the ending cook time they should be stemming hot.
In the case of a foil cover, remove the foil. Sprinkle with the topping Parmesan Cheese, then the topping Mex blend cheese. Return to the heat until the cheese melts. Serve immediately.
Variation: In place of seafood, cubed or ground chicken or turkey could be used.
This is a southern style sweet BBQ that is not spicy hot.
Recipe & Images by Rick Beach
Award winning recipe by Rick Beach. Took First Place “Main Dish” in the “Old Mormon Fort Dutch Oven Cook-off Competition”, held in Las Vegas, Nevada (March 2017)
Ingredients
3 ½ lbs Pork Loin trimmed and cubed to 1 ½ inch chunks
(Could use a combination of pork and beef stew meat)
Optional ingredients such as Sriracha Sauce, or various peppers, could be added to the basic sauce to spice this up. Add in very small amounts and cook at least 30 minutes then taste test before adding more. Hot spices tend to intensify as cooked. It is easy to overdo hot spices and ruin a batch for the majority of your guests. The basic sauce has always been the most popular in large groups. Spicy is not. You can multiply this recipe based on the group you are serving. The BBQ can be made ahead and put in the freezer for later use. This is served on hamburger buns. A stack of coleslaw on the BBQ before adding the top bun makes for a killer BBQ sandwich. This recipe makes approximately 24 standard hamburger sized bun servings. Shown in the photos is a double batch (7lbs of meat) being done in a 12 inch Lodge Dutch Oven.
Place the chunked up Meat, Bay Leaves, Onion, Celery, and Garlic, in a greased heavy pot with lid for baking. Preferably a Cast Iron Dutch oven is used. Meat is slow cooked with lid on. If using a Dutch Oven, and coals, use coals for 325°F heat. If using your kitchen oven use 325°F also. Use a pot sized to be at least half filled to avoid burning.
Bake for 2 hours then stir the meat chunks to rotate the bottom pieces to avoid burning. There should be plenty of liquid remaining at this point and the meat just starting to shred apart. If liquid is completely gone add 1 cup of very hot water, cover, and bake for 1 more hour. Stir again and check for liquid. If the meat is falling apart it should be ready to shred. If not, bake an additional hour but make sure there is some liquid. I have never had to go more than 4 hours baking. Remove lid and keep on heat or in kitchen oven just until all liquid is absorbed or evaporated. Check and stir often during this process…don’t burn it.
Once the meat is falling apart easily, remove the bay leaves and discard the leaves. Use 2 forks to shred the meat….I like to use a potato masher to speed up the shredding. Break apart the meat until it is all completely shredded.
In a large mixing bowl place the remaining ingredients. Add the Soup, Water, Worcestershire Sauce, Liquid Smoke, Vinegar, Brown Sugar, Mustard, and Ketchup. Whisk until combined. Then pour liquid mixture into the baked & shredded meat mixture. Then stir and fold to combine.
Cover and bake for 1 more hour. Ideally the finished mixture is a sloppy joe consistency that doesn’t run. If you’re finished BBQ is too thin/watery, cook/bake with lid off, stirring occasionally to avoid burning. Cook/Bake uncovered until it reaches your desired consistency.