A great event to get out of the house this coming weekend. Pahrump, Nevada is about 75 miles west of Las Vegas, Nevada. If you live in the area, or are just visiting, this is a great opportunity to enjoy Nevada’s small town hospitality.
We are posting this as a public service. This event is Sponsored by the Pahrump Valley Chamber of Commerce. Please check their Facebook event and page for further info.
This is an experimental recipe for a lower glycemic index version for diabetics out there. Also no cholesterol. White sugar was omitted completely and agave nectar used instead at a lesser quantity. All eggs whites.
If done properly these are a soft muffin. Not a hard crusty muffin.
The plain version, or the basic recipe is the most healthy. But there are many options such as adding chocolate chips, pumpkin seeds, blueberries, or other fruits and nuts.
I had the blueberry version with breakfast and it was great!
Ingredients
3/8 cup Agave Nectar
1/4 Cup Vegetable Oil
4 Egg Whites
1 1/4 Cup White Flour
1/4 Cup Almond Flour/meal
3/4 tsp Baking Powder
1/2 tsp Baking Soda
1/4 tsp Ground Cloves
1/2 tsp Ground Cinnamon
1/4 tsp Salt (Using a 1/2 tsp tastes better if you need not limit salt intake)
1/4 tsp Ground Nutmeg
Options
1/2-1 Cup Chocolate Chips
1/2-1 Cup Fresh Blueberries
Combination of both
Sprinkle of roasted unsalted pumpkin seeds
Other fruits or nuts.
Preparation
Makes 12 Muffins
Preheat oven to 400°F
Line muffin tin will paper cups and spray the paper cups with Pam or spray oil
Use two bowls
Whisk all wet ingredients in the first bowl until well combined
Whisk all dry ingredients in the second bowl until well combined
Dump the mixed dry ingredients into the wet and fold in with rubber spatula until uniform
If adding nuts, chocolate chips, or fruit, fold them in last.
Spoon batter into the oiled paper liners in the muffin tin
Sprinkle with several roasted unsalted pumpkin seeds if you care to.
Bake 16 minutes until tooth pick test comes clean of batter.
The basic recipe Nutrition Facts (Adding options will of course change these numbers)
Since I am still trying to abide by my New Years Resolution, that being to strive for better eating habits, this recipe developed.
This is great for dieting, or for those diabetics attempting to reduce carbs and sugar intake. This could be for those that just want to eat lighter. There is no need to pass on many peoples favorite. That glorious pizza!
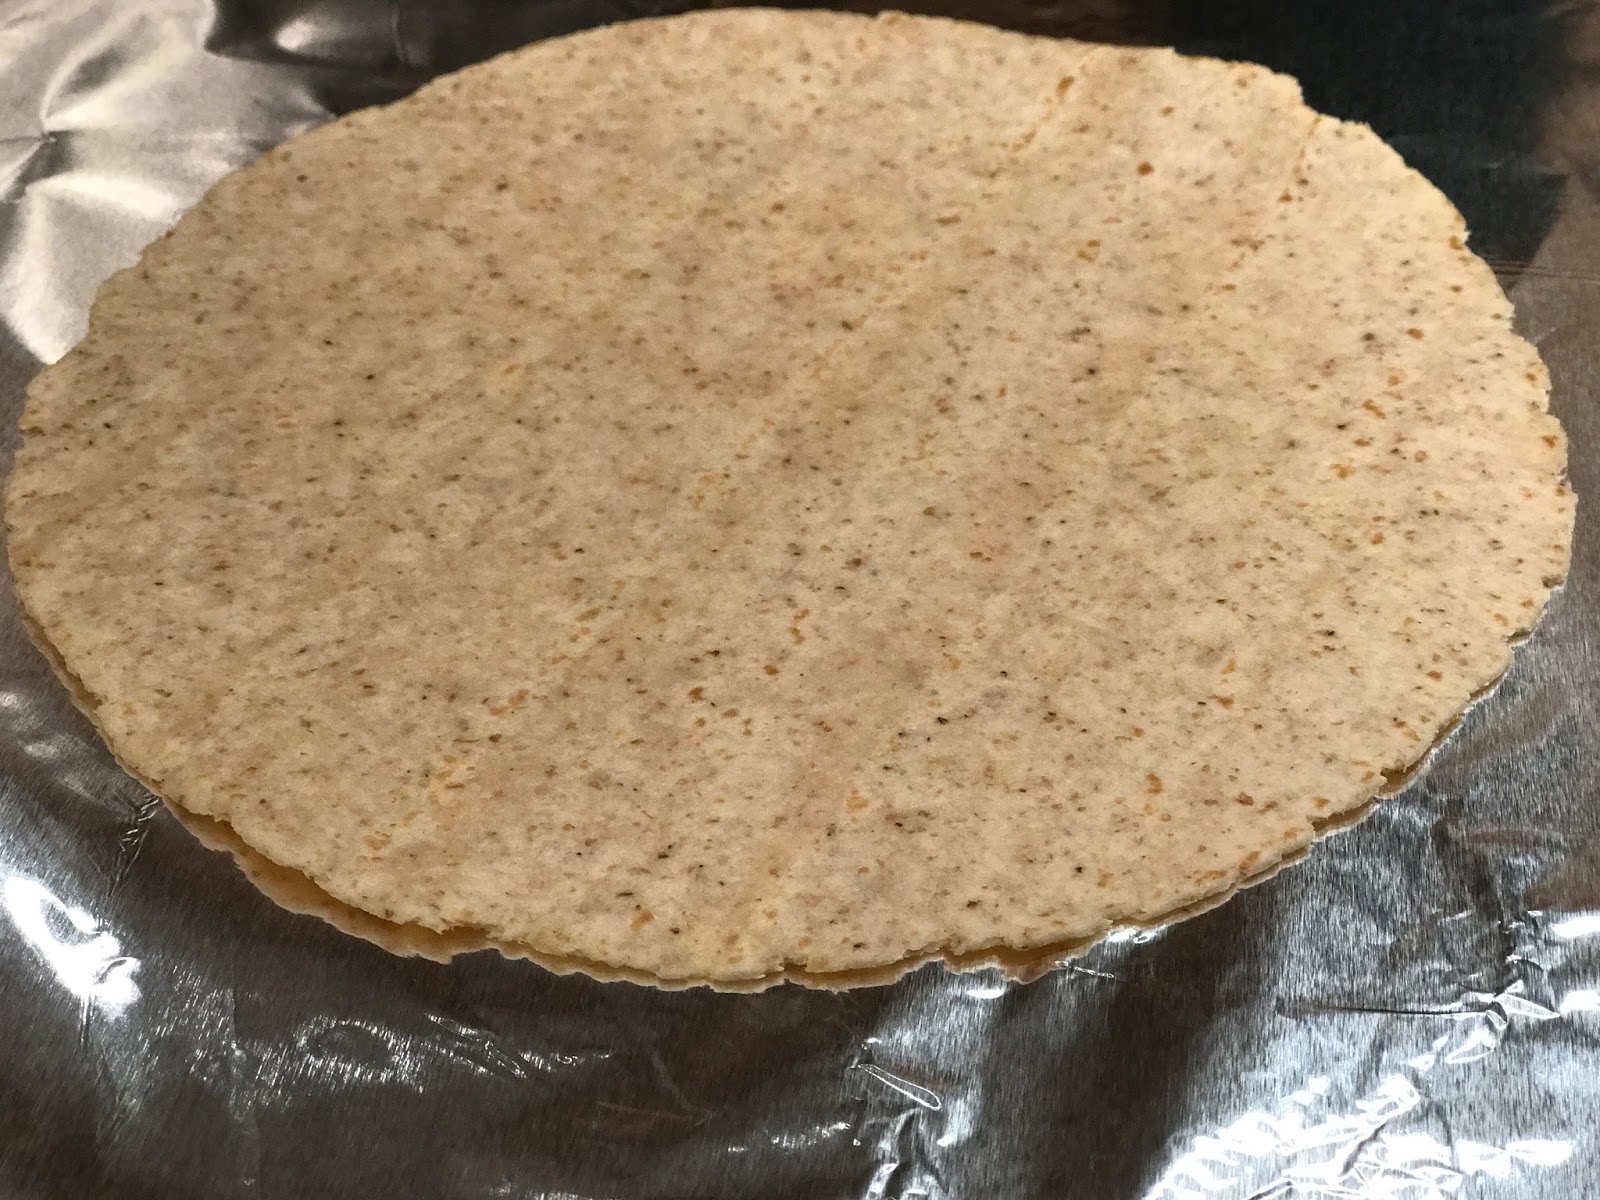
For the most part pizza ingredients are fairly healthy. That is if you can reduce the heavy filled feeling and bloating from chowing down on too much crust. This recipe uses an 8 inch Whole Wheat Low Carb tortilla. I find them at Costco but they are available at many places.
Further I take a standard 24 oz size jar of meatless spaghetti sauce and doctor it up. First to make it go further, reducing the sugars it contains per serving, and secondly to add some added nutrients.
Once the sauce has cooked down to thicken and remove excess water, I build a pizza with any of the favorite ingredients. This can vary greatly as will the resulting carbs, sugar, and fat content. Peppers, onions, mushrooms, olives, and sliced tomatoes (Roma preferably) can be heaped on with little negative effect. If you are watching your weight or blood sugar levels skimp on cheese and meats. But just getting rid of a thick crust, or even thin crust made with traditional pizza dough, will drastically cut down on calories, sugars, carbs, etc.
Limit yourself to one or less. Serve with a salad and an iced tea. It just doesn’t get much better.
The SAUCE
24 oz Spaghetti Sauce (A quality meatless choice)
1 Cup Fresh Spinach Leaves (Coarsely chopped)
1 Cup Fresh Kale Leaves (Coarsely chopped)
1 Tbsp. Garlic (Fresh minced)
Salt & Pepper to taste
In a sauce pan add all the ingredients. Simmer until the spinach and kale are tender. Continue to simmer until any excess water in the sauce has been cooked away.
Preheat Oven to 375°F.
Cover a cookie sheet with foil. Spray the foil with PAM. Sprinkle with a little corn meal. Arrange a couple of tortilla’s on the cookie sheet.
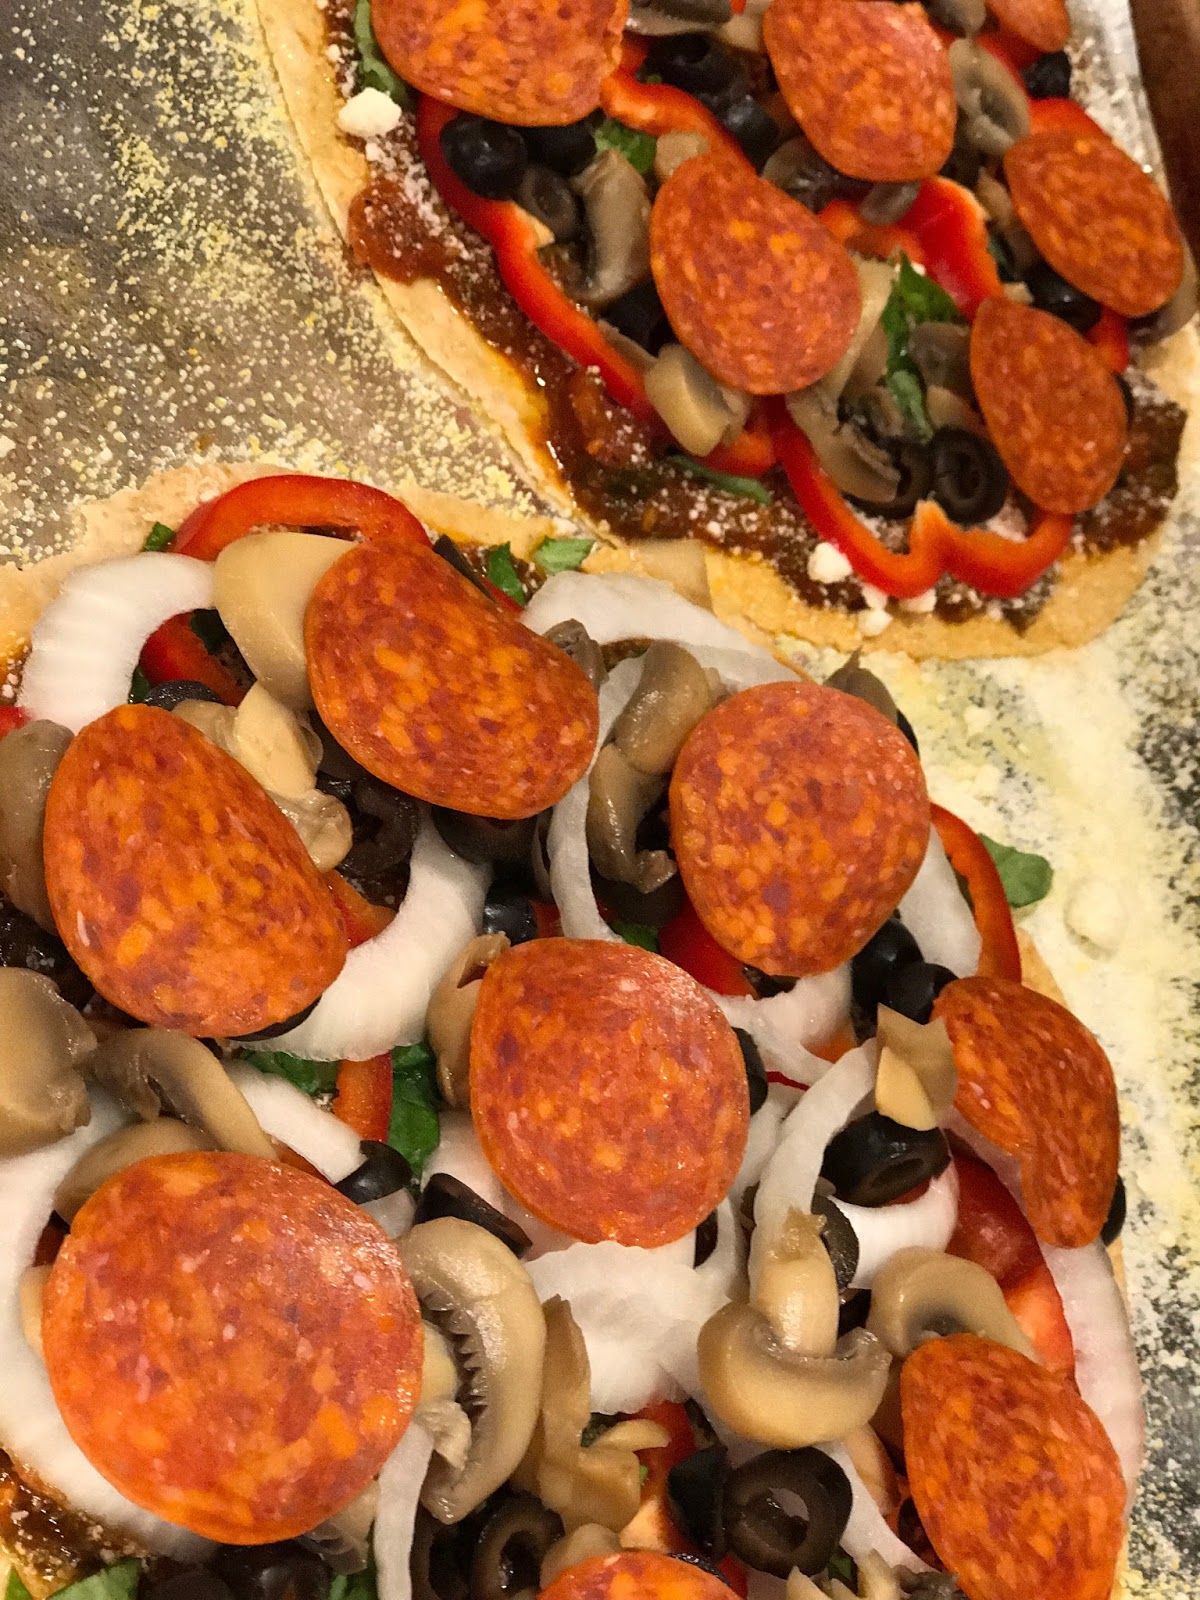
Start building your pizza.
Spread a thin brushing of olive oil on the surface of the tortilla that is facing up.
Spread a thin layer of your prepared sauce.
Sprinkle the sauce with grated Parmesan spaghetti cheese.
Arrange whole fresh basil leaves on top of the sauce.
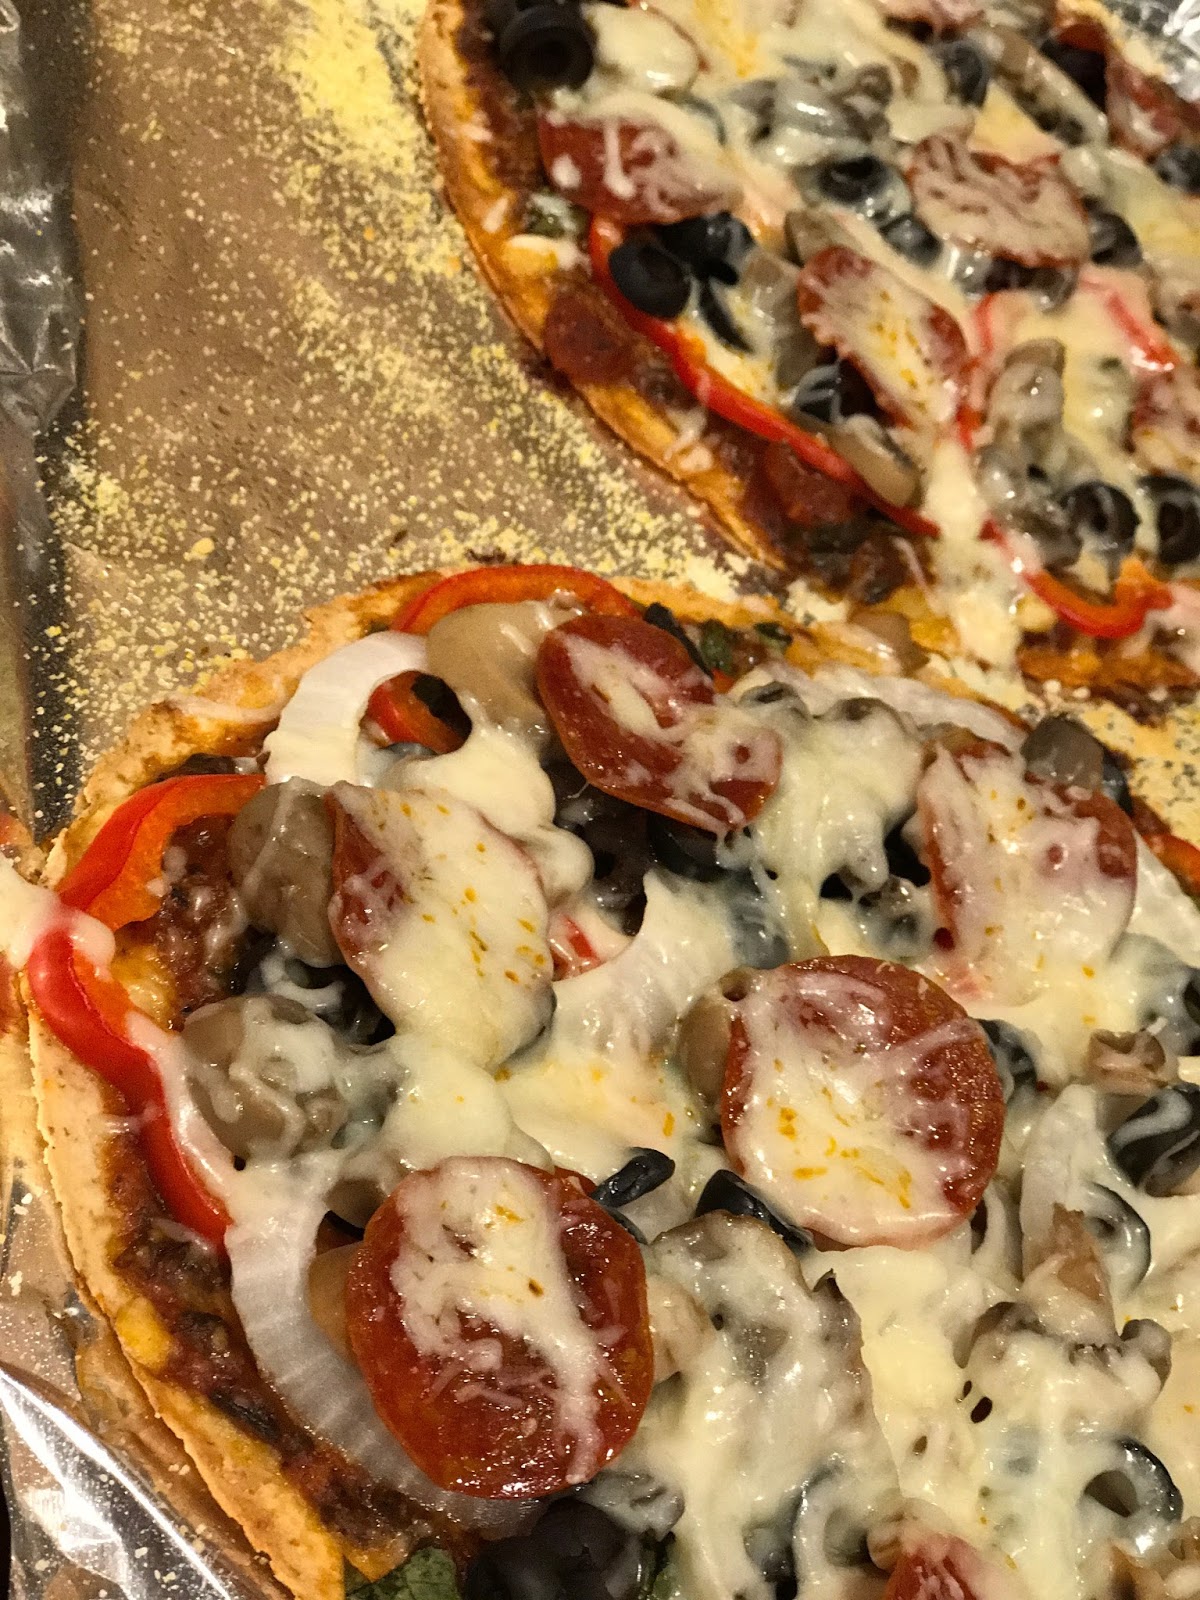
Layer your favorite toppings such as pepper slices, sliced fresh tomatoes, olives, mushrooms, pepperoni.
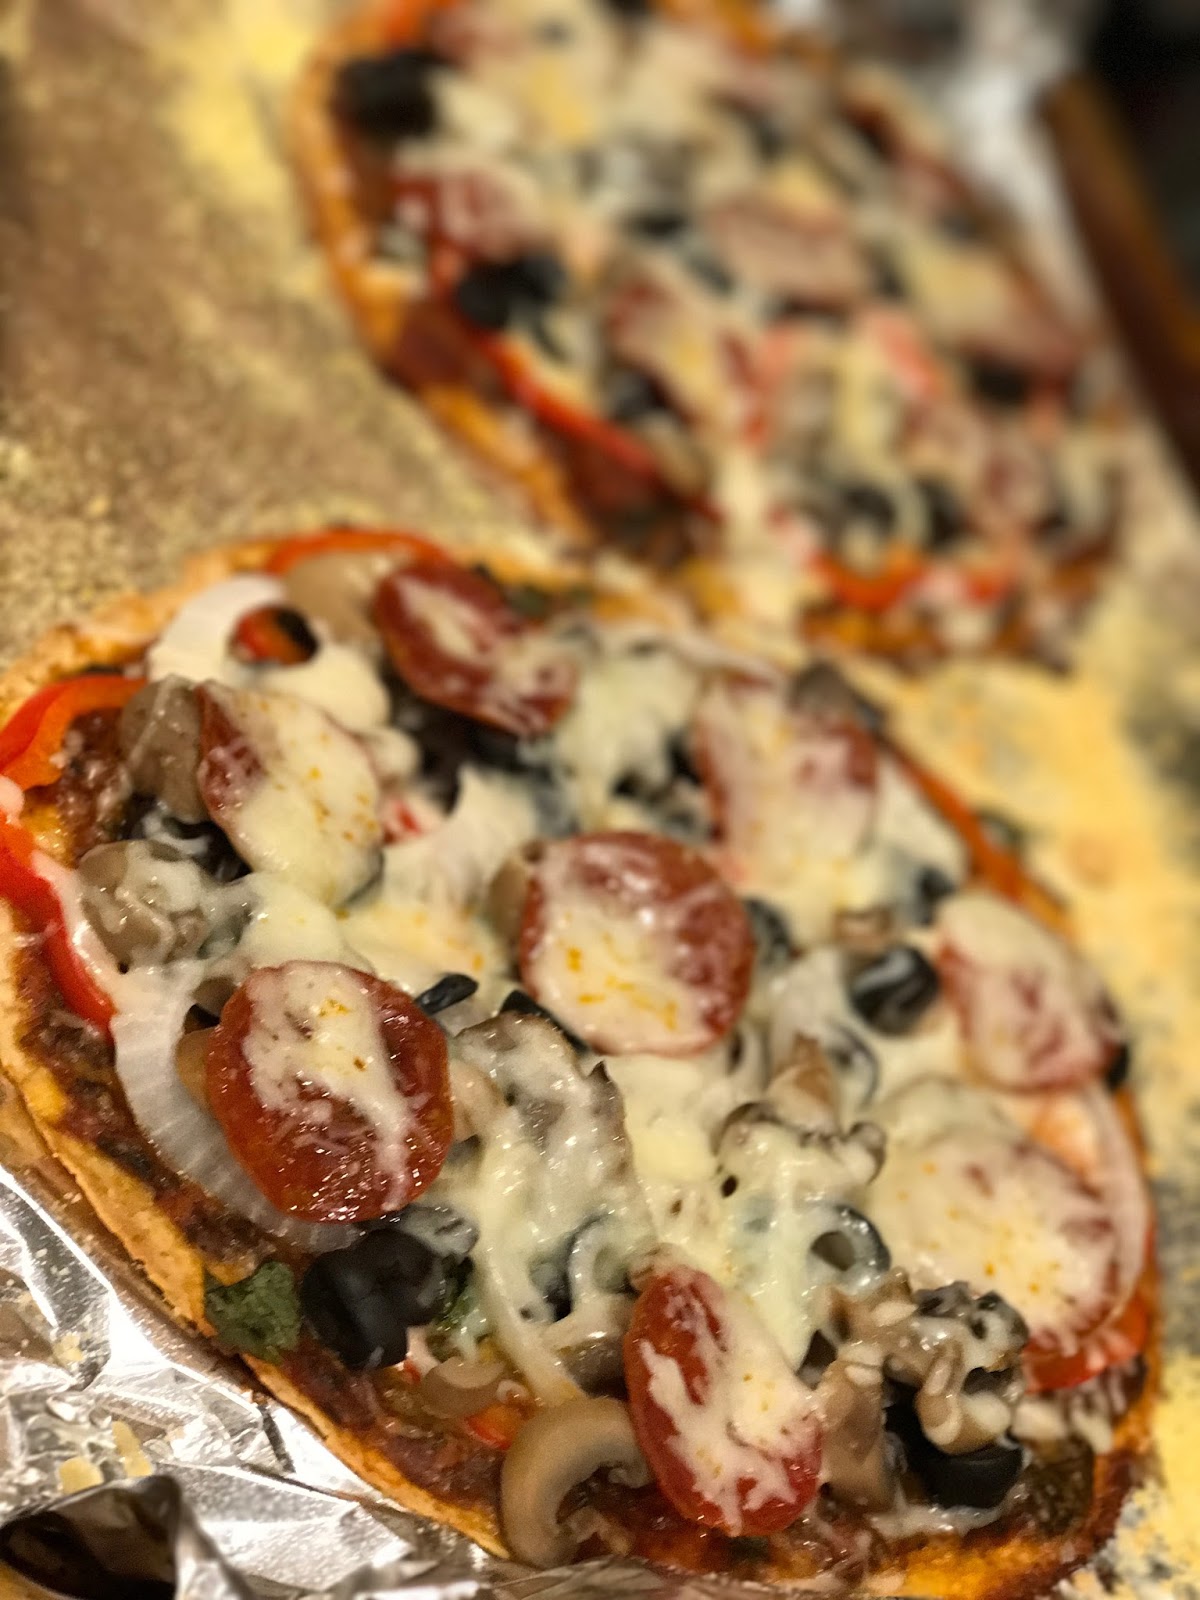
Bake for 12-15 minutes. Top with shredded Mozzarella Cheese. Return to the oven just long enough to melt the Mozzarella. These are delicious and really assists on helping to cut down on some of the bad stuff. But still enjoying life.
I have been experimenting with Almond Flour to create a Bread with lower sugar, lower carbs, and lower calories, than traditional white bread. The fact that I am diabetic I search for something I can make myself so I know what is in it. But it also has to be acceptable for use with breakfast to accompany a nice egg white omelette.
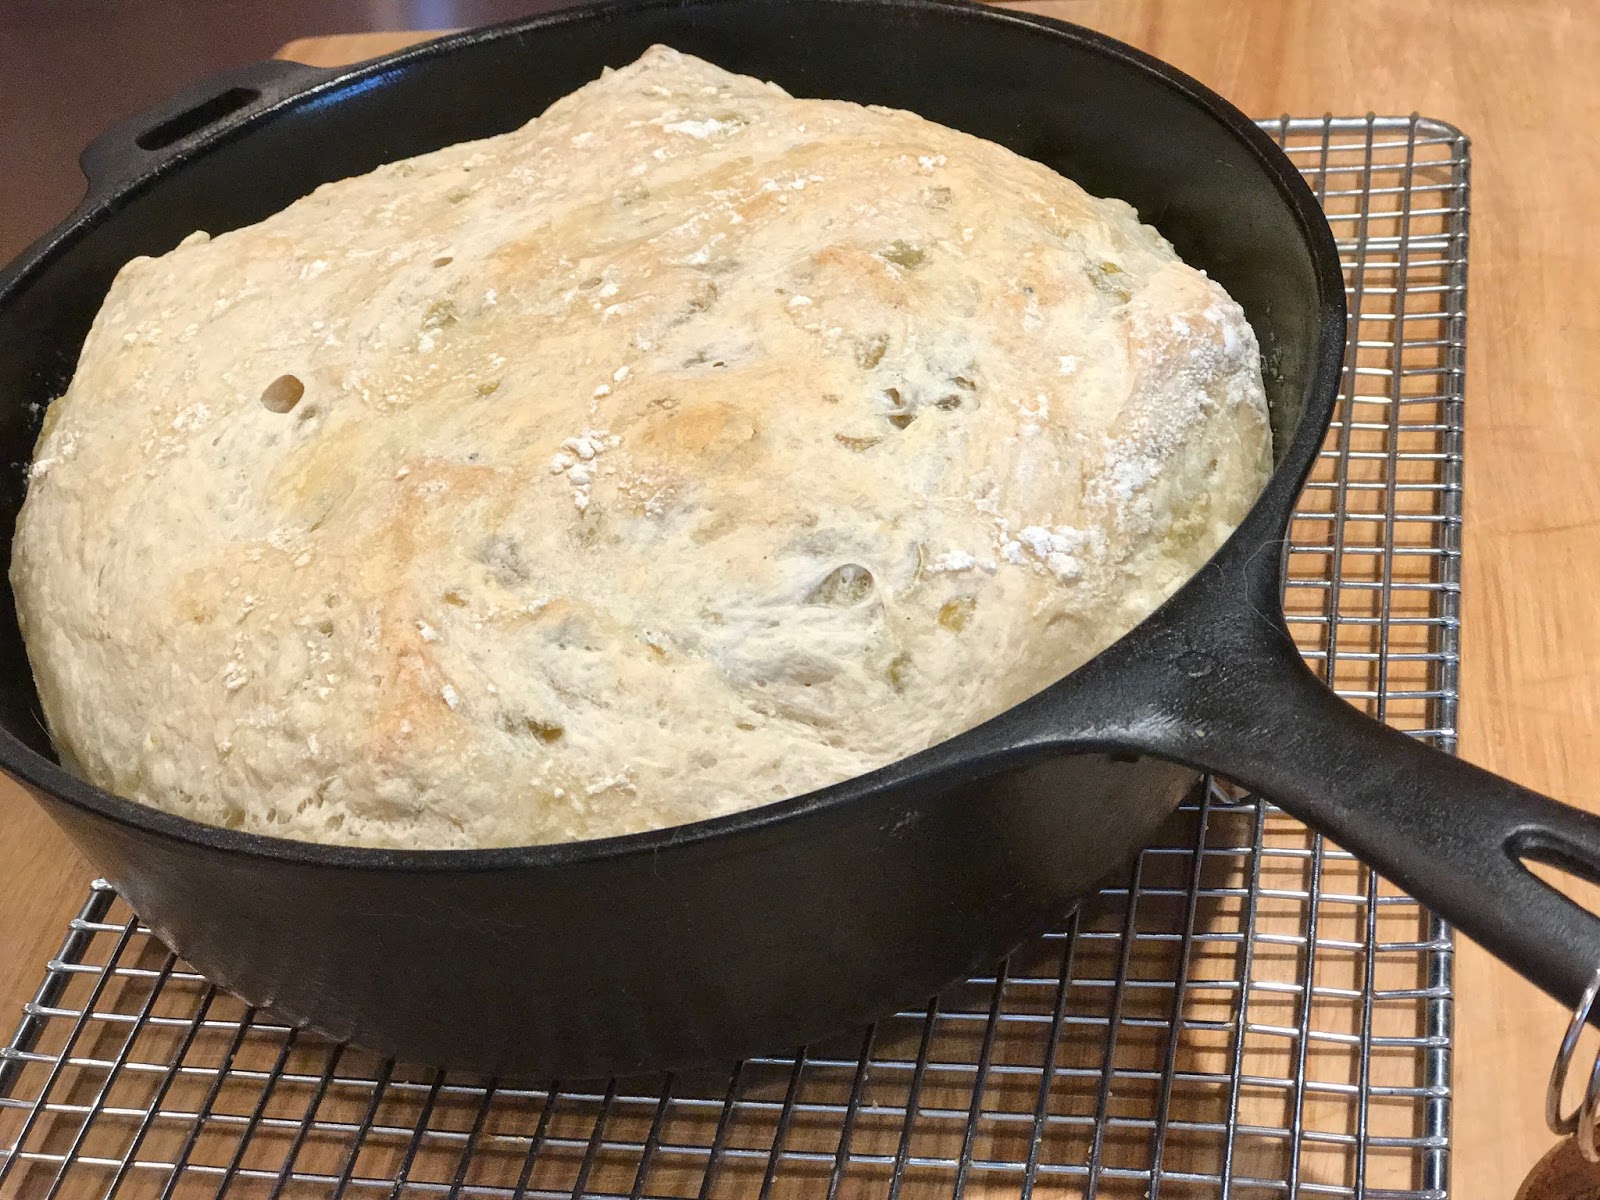
Note: This is the first run of an experimental recipe. I wouldn’t call it a failure but it is not what I want, and think it could be. The taste was quite satisfactory (Of course nothing like a bread with added sugars or sweeteners.) Though the dough raised and doubled, the top of the loaf baked with a flat surface. It did not create a domed loaf as I would have liked. The baked bread is on the dense side, but that was very much expected. As I adjust this recipe I hope to come back here and make adjustments to the recipe, notes, and photos.
I will next experiment with changing the White Flour and Almond Flour ratio, the amount of yeast, and I may even try the addition of Gluten.
The nutrition values are listed below the recipe. Sugar=0, Calories=74, Carbs=9. This is based on the assumption you make 24 servings out of one loaf made with the listed ingredients. If you have to have 2 portions then double the nutritional values.
Ingredients
2 Cups Flour (White Bread making Flour)
1 Cup Almond Flour (In my Health food store they call it Almond Meal)
1 1/2 tsp. Salt
1 tsp. Yeast (I use Bread Machine Rapid Rise)
12 oz Beer (I have been experimenting with Miller Lite.
Whisk all dry ingredients together
Pour in the beer and mix with a wooden spoon until it forms a wet sticky ball just a little more stiff than muffin batter. Place in a well greased large bowl that will allow the dough to double in size. Spray the top of the dough with oil (PAM). Then cover the bowl top tightly with plastic wrap.
Set the bowl on the counter and allow the dough to “rise” a minimum of 8 hours (Overnight), up to 16 hours.
At this point the dough should be well doubled in size.
Turn the sticky dough out on a very well floured bread board or counter top. Flour hands and the dough well. Pat the dough out until about 1 1/2 inches thick. Flour it well then turn the dough over in half on itself. Repeat the floured pat and fold 5 times. Form a ball and pinch the bottom seal shut. Oil all surfaces of the ball and then place the dough into a well greased 8 inch Cast Iron Dutch Oven. Cover loosely with a towel.
Allow the dough to rise a second time for 2 hours.
Preheat oven to 375°F. Gently remove the towel from the dough taking care not to deflate the dough. Place the Dutch Oven/Loaf into the hot oven.
Bake for 30-35 minutes or until golden brown.
Once baked shake out and place on a wire rack to cool. For a soft crust, while still hot, rub all surfaces with butter.
Nutrition Facts
Serving Size 1 slice
Servings Per Recipe 24
Amount Per Serving
Calories 74
Calories from Fat 18 (24%)
% Daily Value *
Total Fat 2 g
3 %
Saturated Fat 0.2 g
1 %
Monounsaturated Fat 0 g
Polyunsaturated Fat 1.7 g
Trans Fat 0 g
Cholesterol 0 g
0 %
Sodium 147 mg
6 %
Potassium 18 mg
1 %
Total Carbohydrate 9 g
3 %
Dietary Fiber 0 g
0 %
Sugars 0 g
NA
Protein 2 g
4 %
Vitamin A
0 %
Vitamin C
0 %
Calcium
0 %
Iron
0 %
* The Percent Daily Values are based on a 2,000 calorie diet, so your values may change depending on your calorie needs. The values here may not be 100% accurate because the recipes have not been professionally evaluated nor have they been evaluated by the U.S. FDA.
Almond flour or meal
All the dry ingredients
Adding the beer to the whisked dry ingredients
Just mixed.
Mixed and placed in large greased bowl
Mixed and covered with Plastic Wrap
Yeast is working. Plastic wrap is being inflated with gases being produced
At the end of the second “rise”. About 14 hours into the process
Artisan Green Chili Beer Bread (Yeast style)
Mix the day before baking
3 1/2 Cups Flour
1 ½ tsp Salt
½ tsp Instant Yeast (bread machine yeast)
7 oz Can Diced Green Chiles – Drained (Macayo’s Diced Green Chiles Roasted & Peeled)
12 oz Beer (Beer varieties change the flavor – Experiment)
*Whisk salt, yeast, into the Flour.
*Dump the drained green chili’s on top.
*Pour in the beer.
*Stir together and completely mixed into a rough ball.
*Cover with plastic wrap 8-18 hours and leave on the counter
*Sometime after 8 hrs (up to 18 hours), turn proofed dough out on floured board
*Pat dough flat. Fold over on itself 4 or 5 times (no kneading required)
*In a well greased baking vessel (Dutch Oven) place the oiled dough inside.
*Cover with plastic wrap and reproof about 2 hours at room temperature.
*Preheat oven to 375°F
*Bake in covered Dutch Oven 30 minutes with the lid off. Or until golden brown.
* Shake it out and cool on rack.
*For soft crust rub all surfaces with butter.
Note: I use 3 1/2 Cups of flour in this recipe. That is 1/2 Cup more than with other recipes I have posted. That is to compensate for the added liquid that comes from the Green Chile’s even though they are drained.
For photo’s I used a 10 inch Cast Iron Chicken Fryer skillet with the lid off the entire time. I think I would prefer a 8 inch Dutch Oven to get a higher loaf.
12 oz Beer (Beer varieties change the flavor – Experiment)
* Add salt, yeast, and Ground Flax Seed to the Flour.
*Add beer to the dry ingredients.
*Stir together and completely mixed into a rough ball.
*Cover with plastic wrap 8-18 hours on the counter
*Sometime after 8 hrs, turn proofed dough out on floured board
*Pat dough flat. Fold over on itself 4 or 5 times (no kneading required)
*Oil a bowl. Place dough in oiled bowl. Cover and reproof 1 2/3-3 hours to raise
*Preheat oven to 450°F and an empty Dutch Oven for 30 minutes.
*Dump the proofed dough into the hot Dutch Oven that has just been well greased.
*Bake in covered Dutch Oven 30 minutes with the lid on, 3 minutes longer with lid off.
Or bake with lid off for a hard crustier bread.
I use a 8 inch Dutch Oven with the lid off the entire time. Mine is too low to use the lid. If you have a deep 8 inch diameter perhaps the lid would work.
Shake it out and cool on rack. For soft crust (As shown in photos) rub all surfaces with butter as soon as the loaf is shaken out of the cast iron.
I just recently wrote about the latest phone scam. People calling saying they are the IRS. Trying to Phish your information or fleece you out of money. I have seen that one before. Most people won’t fall for it. But from what is out there to read, these scammers are raking in millions from some poor souls.
Then today 1/7/2017 the scammers came in the form of 10’ish year old boys selling candy bars right at the front doors of my local grocery store. (Smith’s on W. Charleston – Las Vegas, Nevada). Something quite common for the Girl Scouts and other organizations. I didn’t give things a second thought when it all happened.
This is nothing against the WFC Fund raiser company. I am sure they help many legitimate fund raisers raise well meaning proceeds. I have had kids in band and sports and know the drill. None of this will dampen my future donations to legit fund raisers using this product. I doubt they have any control over what hands their products land in. But they might want safe guards in place to save tarnishing their name? I know I am going to be much more cautious and skeptical going forward.
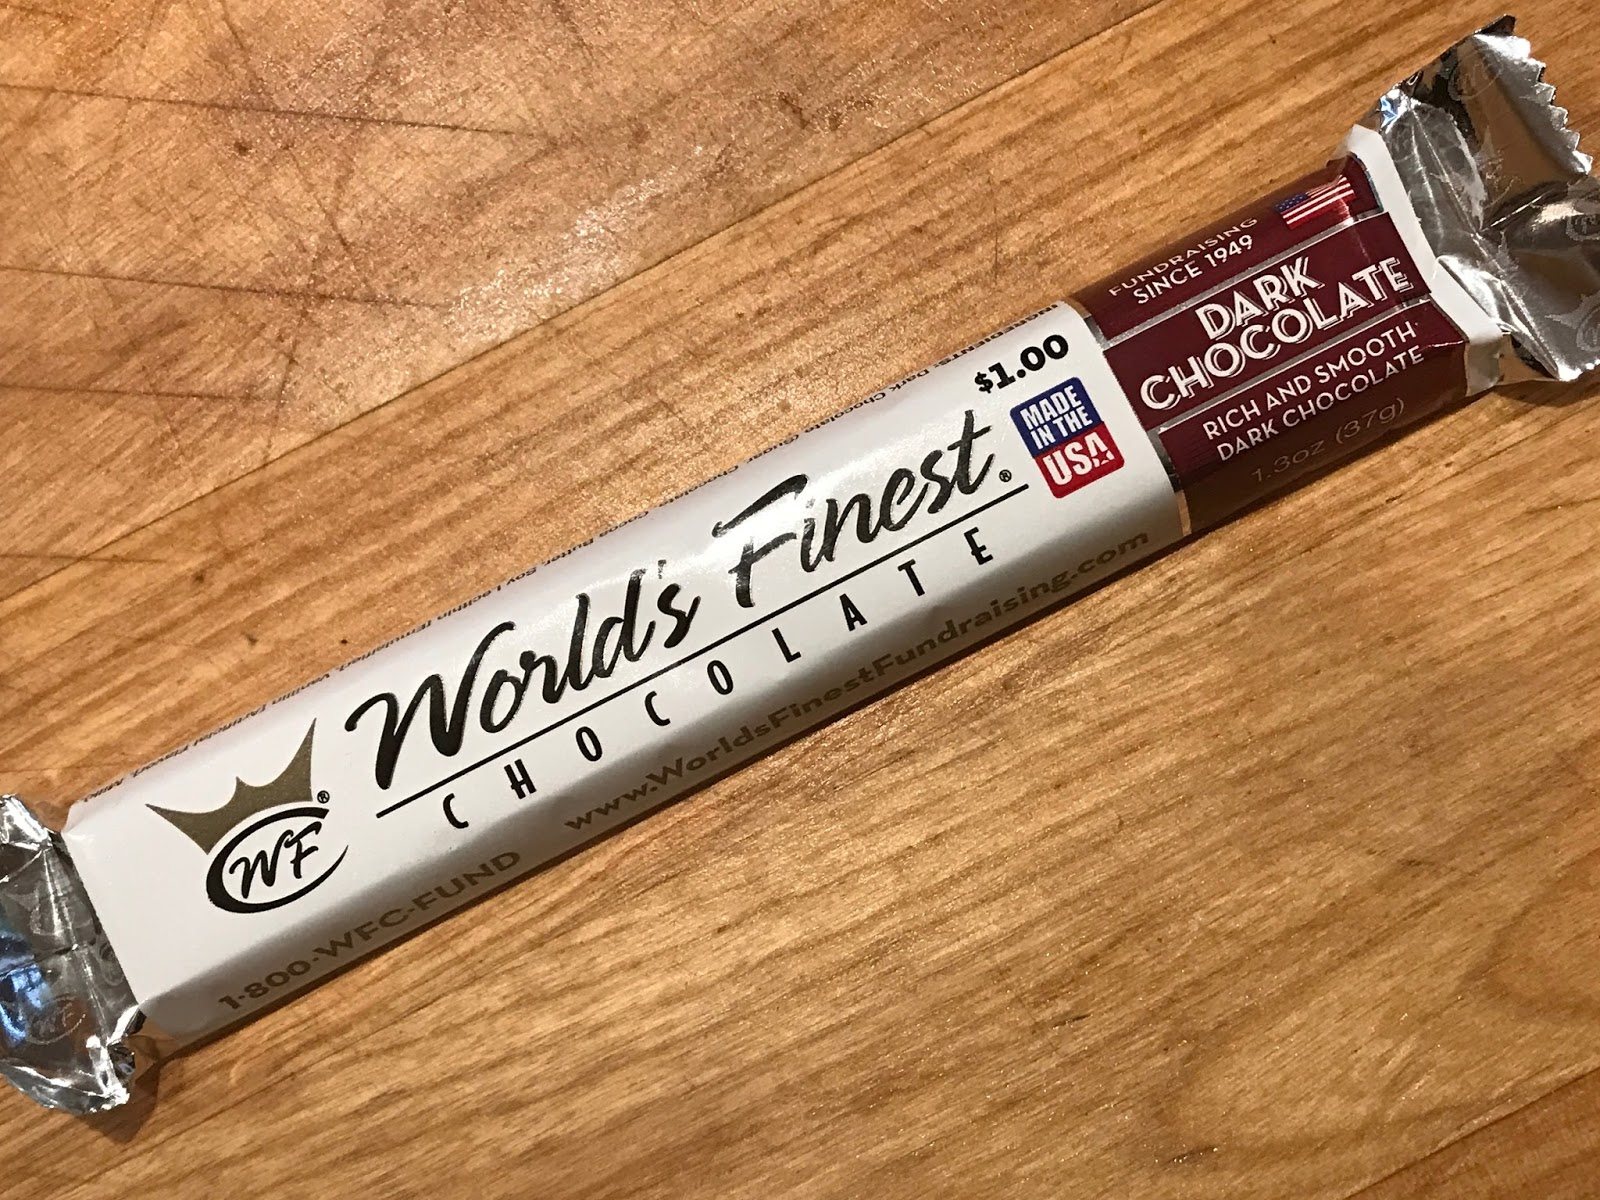
These boys were polite enough when they asked that I buy chocolate bars to raise money for their baseball team. One bar for $3, 2 for $5, or a real bargain donation of five for $8. In hindsight I remember thinking $3 for the dinky 1.3 oz bars??? I did the $5 deal and walked away with two. The whole point, at that moment in time, was all about donating. Not what I was getting in return. On the other hand I don’t want someone scamming the good natured side of me. I find that very irritating.
I had no intentions of eating the chocolate bars just because I don’t need to be eating candy. But the wife loves chocolate. So when I made it home and walked in the door I said “Honey I have a treat for you”. I noticed then the price on the chocolate bar was $1.00. We both got into a conversation over this. Thinking that is the donation price, not the fund raiser purchase price. We even did some on-line investigation because we were curious. We were thinking these could be purchased for 50 cents or less, if the donation price was suppose to be $1. Certainly something less than $1. At $3 resale, that seemed like a nice profit margin for a fund raiser. In my mind if this was all legit, it was still not an issue.
The money was not the point of all of this. If it were I would have simply walked by and not “donated” in the first place. I knew I was getting nothing of equal value in return in the form of the product. From time to time I open my heart to some of the homeless that need help. Much depends on how I am approached, where I am approached, and how I am asked. In that type of donation the only thing in return might be a smile or a thank you. I realize even some of those are simply scammers. It comes with big city living I suppose. But many have become immune and always walk by without making eye contact with someone the probably does need help. It’s hard to know.
The long story short of this candy bar scam is, we ended up calling the grocery store and spoke with the manager. At first just wanting to know if the kids fund raiser was legit. If they had some type of vetting process for people standing at the door collecting/selling for fund raisers. We kind of got the impression this fund raiser might be ripping people off unsuspecting people. I am all about price raises and cost of living increases…..the $3 bar didn’t seem too far fetched these days. So maybe we were wrong.
The store manager said these boys had no permission, they have been run off on several occasions, and that other customers are complaining and actually calling metro. So there is was. Nothing more than a scam in this case.
So the moral of this story is my soft heart is a little less soft. My wallet not so easily opened. My eyes opened a little wider now knowing this latest scam. At the very least I am going to be more observant. I have to assume there is an adult or group of adults behind this. That these young kids are being used in this scam while the adults are safely hidden, and out of the picture. If so, just think what these young kids are learning. My only pleasure is the karma that might be bestowed upon the people behind this.
I have been in third world countries where this type of thing is common place. I never thought the USA would become this way. Just more proof of the moral decay our country is experiencing in many ways.
My suggestion is before making a donation in front of a store do some fact checking first. Especially if things don’t seem right. No signs, no uniforms, no adults around. Don’t donate going in. While in the store ask an employee or manager about the fund raiser before you leave the store. Legit fund raisers get store approval. Do your donation on the way out. In hindsight these kids had no sign, no uniforms, and no adult supervision that was noticeable If it is legit, then by all means open your heart and wallet. This is the life blood of some legit organizations.
Unfortunately I am less likely to shop at stores that allow this to go on. If they choose to look away, not get serious about prevention and security, they will loose me as a customer. This usually morphs into getting approached at your vehicle in the parking lot. Those contacts becomes a more serious personal security issue for the unsuspecting and the distracted. I personally don’t shop where this goes on.
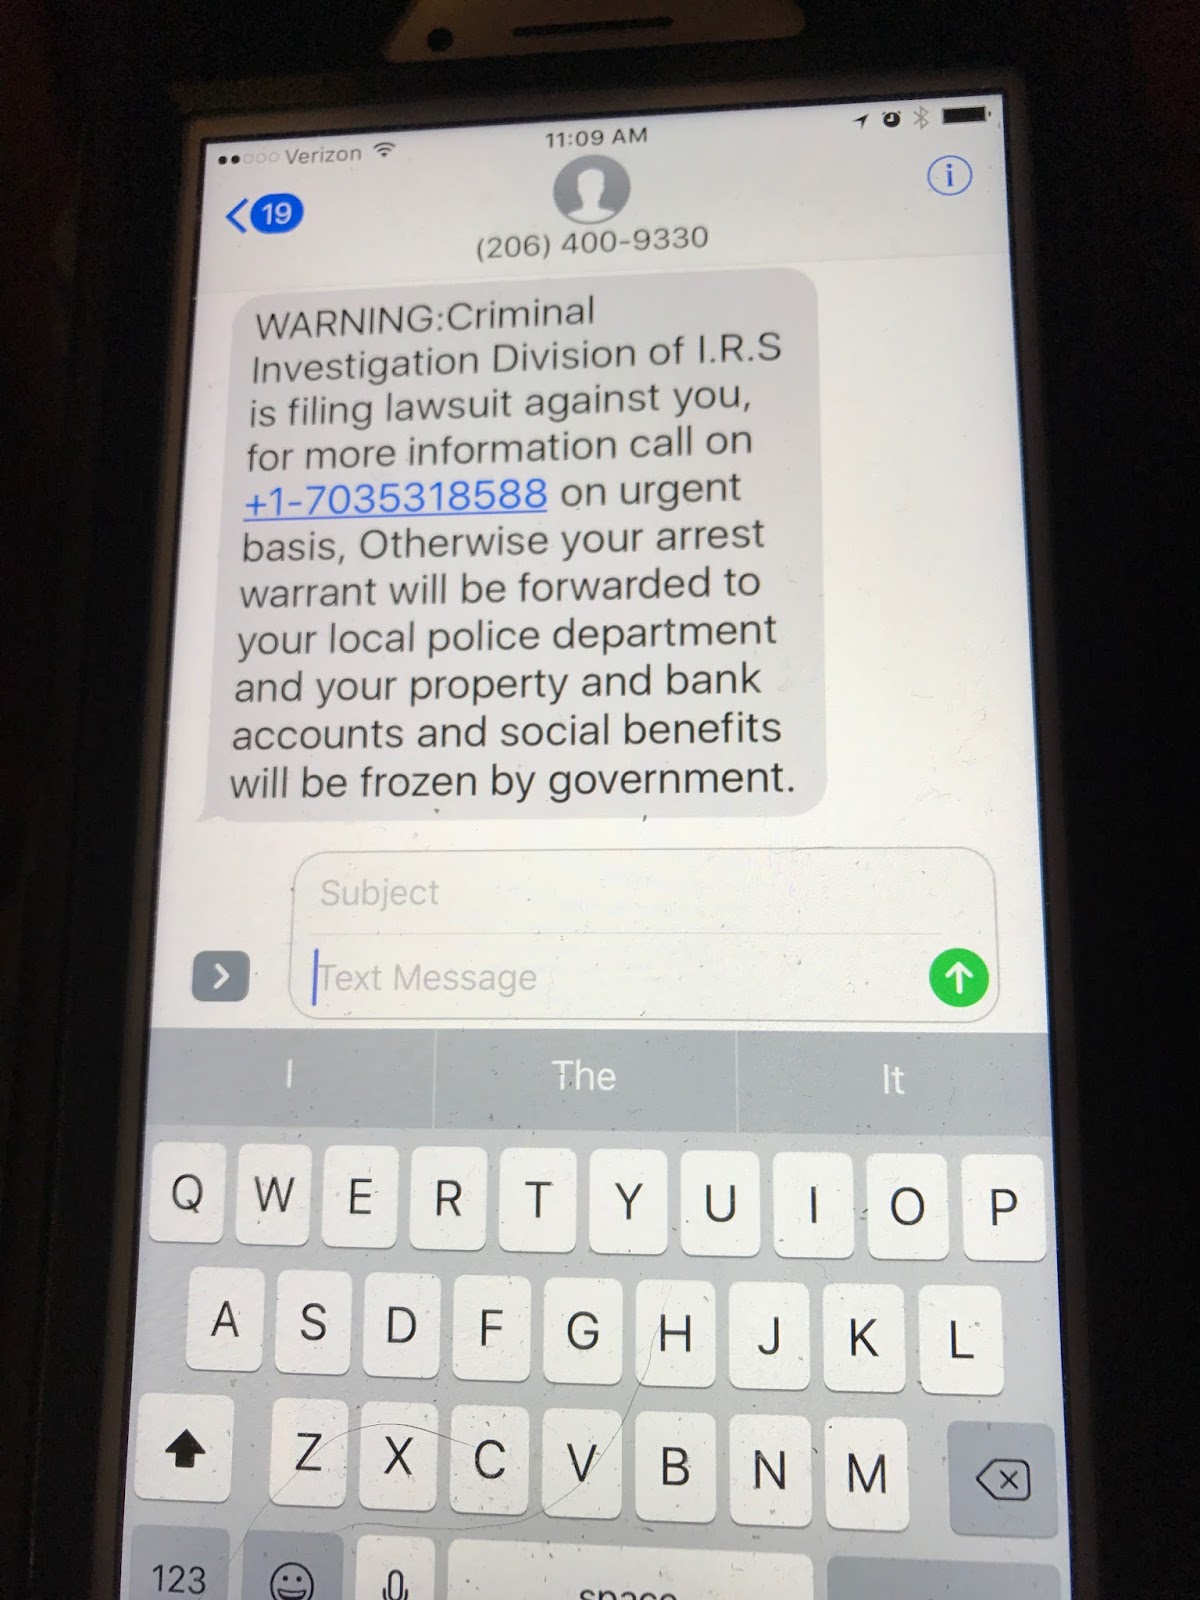
The New Year started out with a bang from those irritating spammers and scammers. The modern day version of a thieving con man. To be PC and non biased, better stated, a (Con Person). Screen copies are both from today 1/3/2017. It would be hilarious if a million people called them collect and they were stupid enough to accept.
I have seen these go from simply worded, with bad spelling, and huge grammatical errors. To these that are increasingly threatening in nature. These are the people our government should be protecting us from. Seems like some simple changes to Service Providers systems would dry this up.
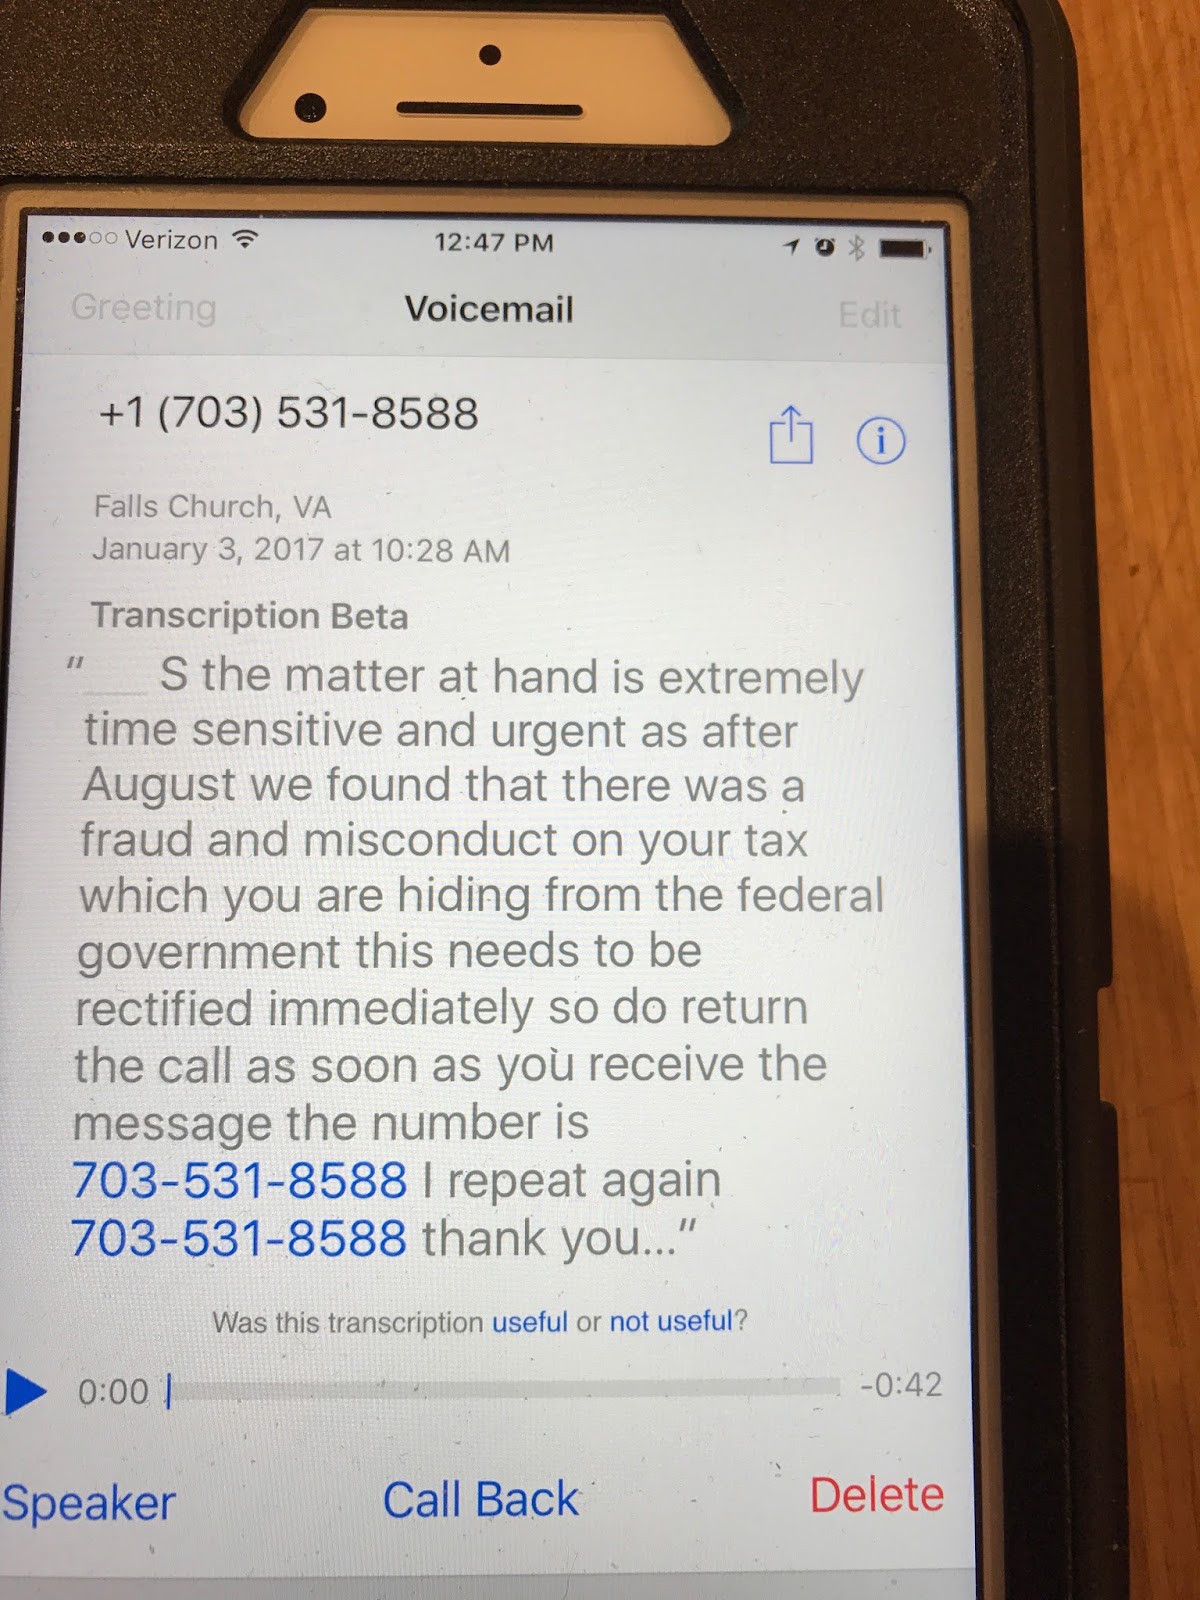
On January 3rd I first received a voice message. A call that I did not answer. Shortly after a text message that came. From different numbers. But both with a similar message and both had the same call back number.
I used to delete these. Then I realized that is how this scam perpetuates. No one takes the time or effort to even report it. I have read numerous people fall for the scam. This IRS scam is making scammers millions on a monthly basis. Unfortunately many of the older generation, and the unsuspecting, are falling for the con. As the con becomes more sophisticated I would imagine a greater chunk of the population is going to get fleeced.
This might be your elderly Grandmother, or young suspecting kids just starting out their adult lives. Once these con men/people get your financial information or payment you can kiss it goodbye. Chances of them getting caught is pretty remote. They change phone numbers and use technology that provides bogus trails that help prevent anything leading back to them. Or they are untouchable in another country.
Join the fight, to fight back. Get on the Do Not Call Registry even though that is basically useless. Then start filing complains each and every time someone attempts to victimize you. Complain to all entities involved. The Government, Your Phone Carrier, Your Internet Provider, the Entity the scammer is using for their front (i.e. the IRS), US Postal Service, and the FBI. Some notifications and complaints are based on the source of your contact. Was it a Text Message, Telephone Call, Email, something mailed to you?
Perhaps if the Government and Service Providers have to throw more money and labor at this, which takes money out of their coffers. They might wake up take a more active approach to stopping this. It seems simple enough if all Service Providers had a Reporting system that allowed victims or potential victims to report the numbers scamming them, then those numbers immediately put out of service by the Service Providers. Without pressure or legislation things will probably not change.
What you can do to fight back under the current rules of engagement are: The first thing recommended is to not answer unidentified callers. First of all you don’t have to deal with talking to one of these crooks. Con men of the current day are just as slick as those of yesteryear. Secondly most phones record information you might wish to report. iPhones and probably others now convert voice messages to written text.
Once you get one of these contacts it is highly recommended you don’t call them back and talk to them, or open up any Links within the text. After reporting the crooks to the appropriate entities, block the number. Then delete the messages. Make complaints. Provide the number that called you, the contact info you are suppose to call back to, or Email back to, and screen copies of the text info you received.
I can provide info for blocking on an iPhone running iOS 10.2
TO BLOCK A TELEPHONE NUMBER you were CALLED from:
1. Open “RECENTS” Call list
2. Tap the (circle i) off to the right of the number you wish to block
3. Scroll to the bottom of the info displayed for that number
4. Tap “BLOCK THIS CALLER”
TO BLOCK A TELEPHONE NUMBER you were TEXTED from:
This used to work pretty much the same on previous iOS versions but has now changed.
1. Go to the text/message you received
2. Tap the (circle i icon) off to the right of the number you wish to block
3. Initiate a Call to the senders phone number from that sceen and immediately cancel the call
before the call goes through.
This will put that telephone number in the “Recents” Call list.
4. Open “RECENTS” Call list
5. Tap the (circle i icon) of to the right of the number you wish to block
6. Scroll to the bottom of the info displayed for that number
7. Tap “BLOCK THIS CALLER”
The old way of blocking a SMS Text message sender no long works where you used to be able to tap (Circle i) and select BLOCK. Now the only option available from that screen is “DO NOT DISTURB”. Using DND is not the same. It does not block, only does not produce an audible notification of a text message. The message still comes through. So use the process listed above to Block Text numbers.
Useful Links for reporting.
DO NOT CALL Registry The USA National site for registering your number and filing complaints)
I find leftover pizza is sometimes better than fresh baked. As with many tomato and herb based foods. Aging seems to increase the flavor. Especially if it is homemade.
How many of you enjoy cold left over pizza for breakfast? I certainly do. How about the re-heated version?
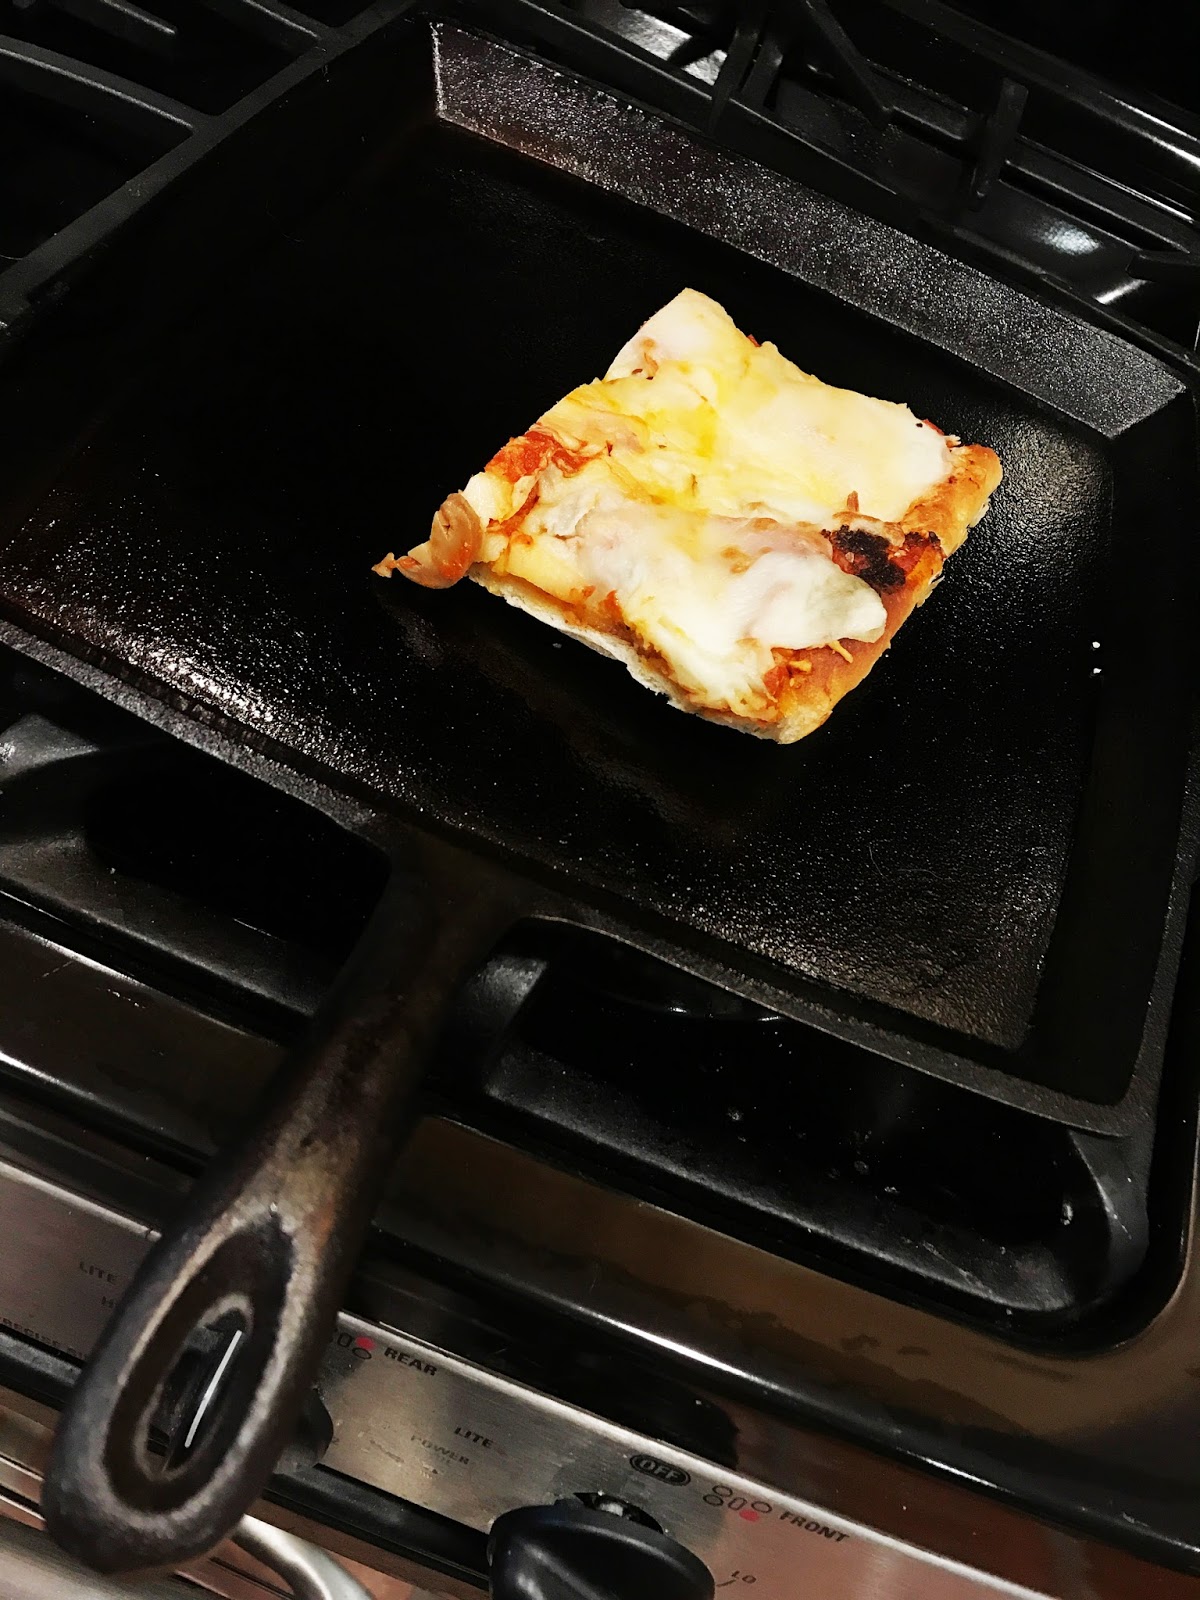
My favorite technique for re-heating leftovers is to use a cast iron skillet. You can’t be in a hurry. If you are in a big rush just throw it in the microwave. If you really want something better than just baked, try using cast iron.
I put my cast iron on a burner set at its lowest setting. I always use gas stoves. If you cook with electric you may have to experiment. As soon as the Cast Iron is warm to the touch (a minute or two) I wipe it with a very thin layer of Crisco vegetable shortening. I place the pizza on the Cast Iron and cover it with a lid or tent of aluminum foil.
I kept the heat as low as possible and allow the pizza to warm slowly until the top cheese is warm and melted. Serve at this point. You will be rewarded with a delightfully crispy bottom crust, and aged sauce that has brought out even more flavor.
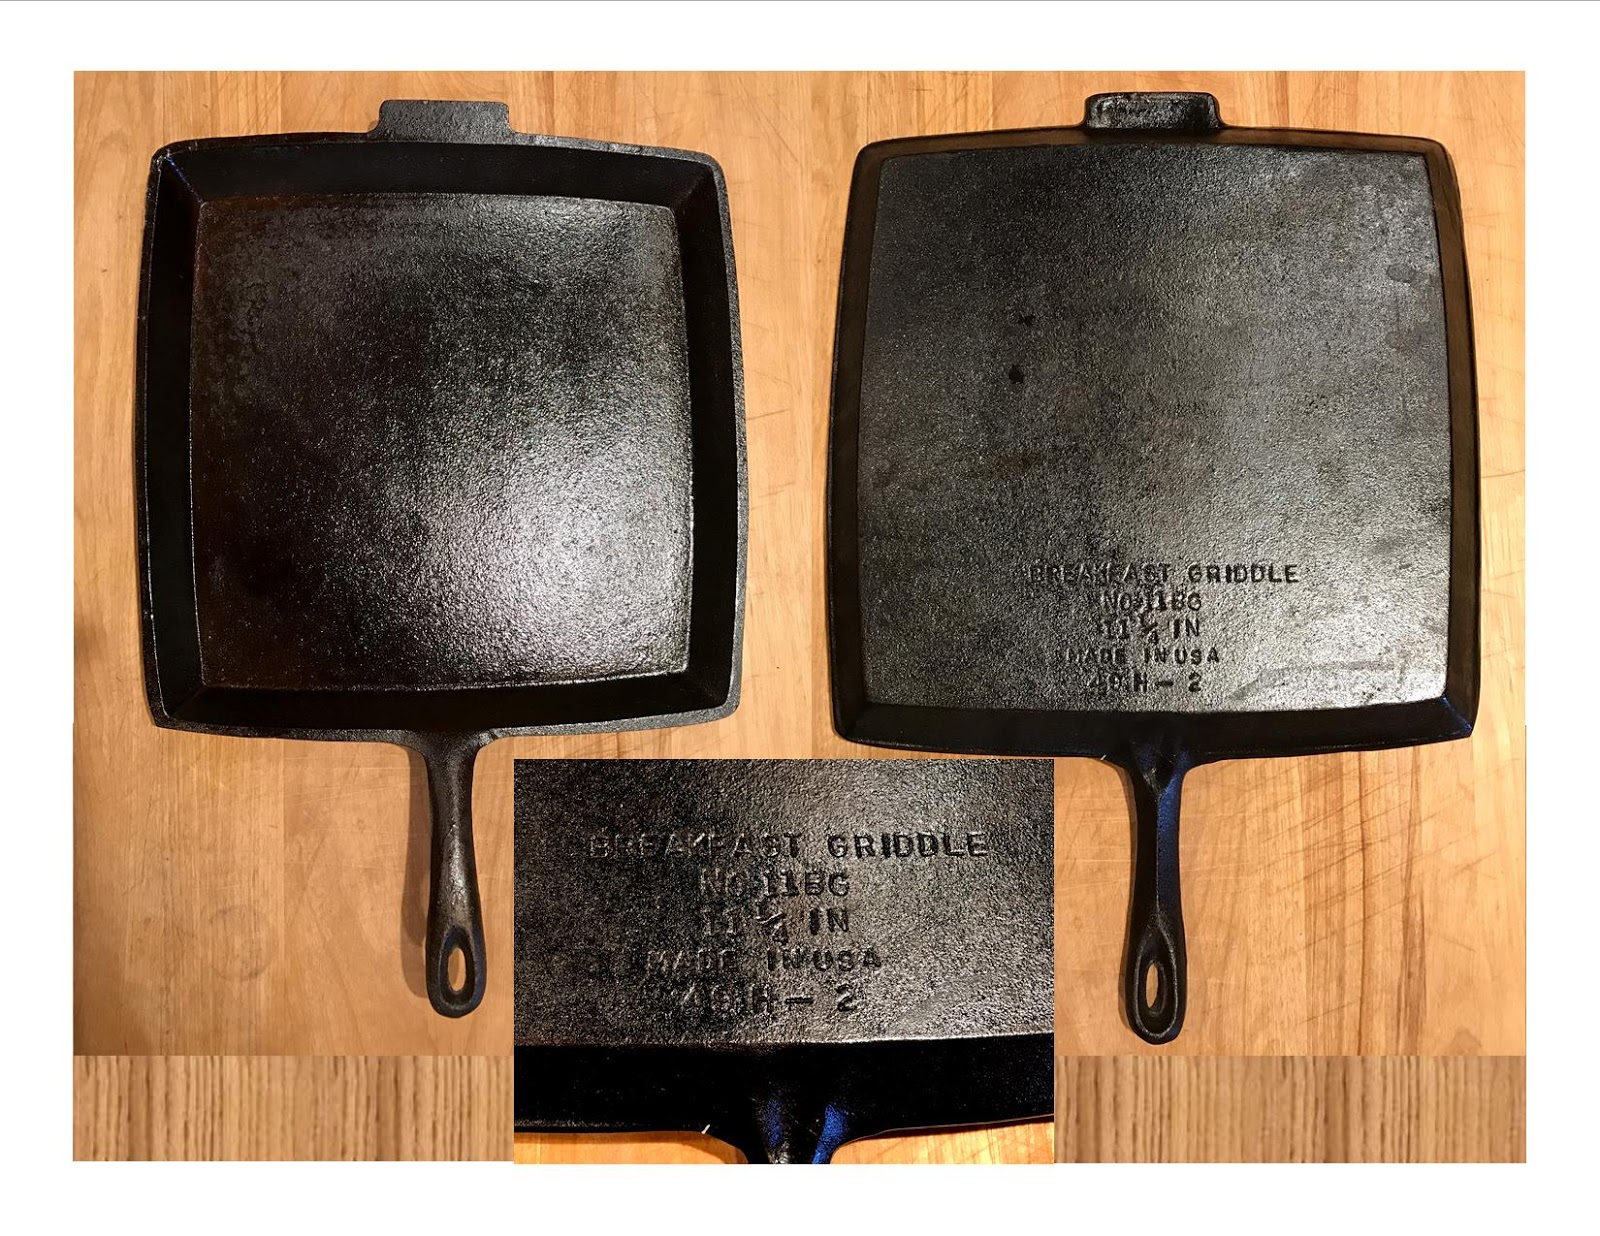
My favorite for pizza re-heating is my square vintage BSR (Birmingham Stove & Range) Breakfast Griddle.
“Tis the Season. Make up boxes of cookies, candies, chocolate dipped pretzels, etc. Have these on hand the week before Christmas to spread a little joy and love with your friends, family, and neighbors.
Here are a couple very common recipes to start out with.
Our favorite is right off the bag of Nestle’s ® Chocolate Chip Bag
Nestle’s® Toll House Chocolate Chip Cookies
Makes 5 dozen
2 ¼ Cups Flour
1 tsp Baking Soda
1 tsp Salt
1 Cup Butter softened
¾ Cup Sugar – White Granulated
¾ Cup Brown Sugar Packed
1 tsp Vanilla
2 Eggs
2 Cups Nestle’s ® Chocolate Chips
1 Cup Nuts Chopped (Optional)
Preheat oven to 375°F.
Combine Flour, Baking Soda, and salt in small bowl.
Beat butter, sugar, brown sugar, and vanilla in a large mixing bowl until creamy. Then add eggs one at a time beating well after adding each egg.
Gradually beat the Flour mixture into the creamy butter mixture.
Stir/Fold in the Chocolate Chips and Nuts.
Drop by rounded Tbsp. onto an ungreased baking sheet.
Bake 9-11 minutes until golden brown. Cool on baking sheet 2 minutes then move to wire rack to cool completely.
For cookie bars: Preheat oven to 375°F. Grease 15×10 Jelly Roll Pan
Spread prepared cookie dough into the prepared pan.
Bake 20-25 minutes or until golden brown.
Cool on rack. Once cooled, cut and remove from pan.
(A Pizza wheeled rolling cutter works great for cutting the bars)
**********************
Cookie Press Christmas Cookies
Decorate with Icing and Sprinkles
Plain/Vanilla Spritz Cookie Press Cookies
2/3 cup granulated sugar
1 cup butter
1 large egg
1/2 teaspoon salt
2 teaspoons vanilla
2 1/4 cups all-purpose flour
Heat oven to 375°F. In large mixer bowl combine sugar, butter, egg, salt, and vanilla. Beat at medium speed, scraping bowl often, until mixture is light and fluffy, 2 to 3 minutes. Add flour. Beat at low speed, scraping bowl often, until well mixed, 2 to 3 minutes. Place dough in cookie press. Form desired shapes 1 inch apart on cookie sheets. Bake for 6 to 8 minutes or until edges are lightly browned.
Chocolate Spritz Cookie Press Cookies
Makes about 60
1-1/4 cups butter
3/4 cup granulated sugar
2/3 cup packed brown sugar
1 tsp Vanilla
2 large eggs
3 ¼ Cups all-purpose flour
3/4 cups cocoa powder
1/2 teaspoon baking soda
1 teaspoon salt
Preheat oven to 375 F. In a large mixing bowl with an electric mixer, beat butter and sugars, and vanilla, until light and fluffy. Beat in eggs, one at a time, beating well after each addition. In another bowl, sift together flour, cocoa powder, baking soda and salt. Gradually stir flour mixture into butter mixture. Shape dough into a log and place in your cookie press. Press cookies out onto an ungreased baking sheet. Bake for 10 to 12 minutes. Remove to wire racks to cool completely.
Layered Vanilla and chocolate Cookies
Used press with wide saw toothed die and lay out a long strip.
On top layer a long strip of white/vanilla
Variation use crushed candy, (Crushed candy canes work good) between the layers.
Cut the strips in bite sizes and bake at 350°F for about 10 minutes.
Decorate with white or colored icing and sprinkles.
To make pinwheels
Roll a Layer of the Vanilla dough out on wax paper. On a second piece of wax paper roll out a thin lay of the Chocolate dough. Flip the chocolate layer over on top of the white. Press dough together slightly. Peel off the top layer of wax paper. Roll the double layer of white and chocolate into a log removing the bottom wax paper. Cover the dough log with wax paper. Then cover in foil and chill in the fridge for about an hour. Then remove foil and wax paper, and slice disks off the log about 1/4 inch thick. Arrange on cookie sheet and bake as directed above.
**********************
Chocolate Dipping Sauce
for Pretzels, Ritz Crackers, Oreo Cookies, etc
For every 8 oz of Chips (Chocolate, White, etc) add 2 Tbsp. of Crisco Shortening
In the microwave or double boiler heat and stir until silky smooth
Dip your items in the melted chocolate and lay out on wax paper. You can speed this up by using chilled cookie sheets.
Dipping a second time after the first dip has cooled will make a thicker layer of chocolate. Either way, before chocolate has hardened you can drizzles with sprinkles or colored sugar.


