Throughout my camping life, and I am closer to the age of 70 than 60. I have camped among pests of various sizes. Never Chiggers. I have been visited around the campfire by a solo skunk. Lost food to cunning raccoons. Had to use steel food storage lockers for bears.
In many locations the smaller pests seem to cause the most irritation.
Flies that insist on being in your face.
To mosquitoes that can drive you insane during the period around sunset. Leaving bites that reminded you all the next day. Even that pesky lone one in the tent, buzzing your ears in the dark.
I have picked ticks, checked my shoes for scorpions, and kept away from brush and rocks to avoid snakes.
All the years of camping decade after decade. Through most states of the USA, and parts of Canada I guess I was fortunate not to cross paths with chiggers. Just something I have seen in books or TV programs.
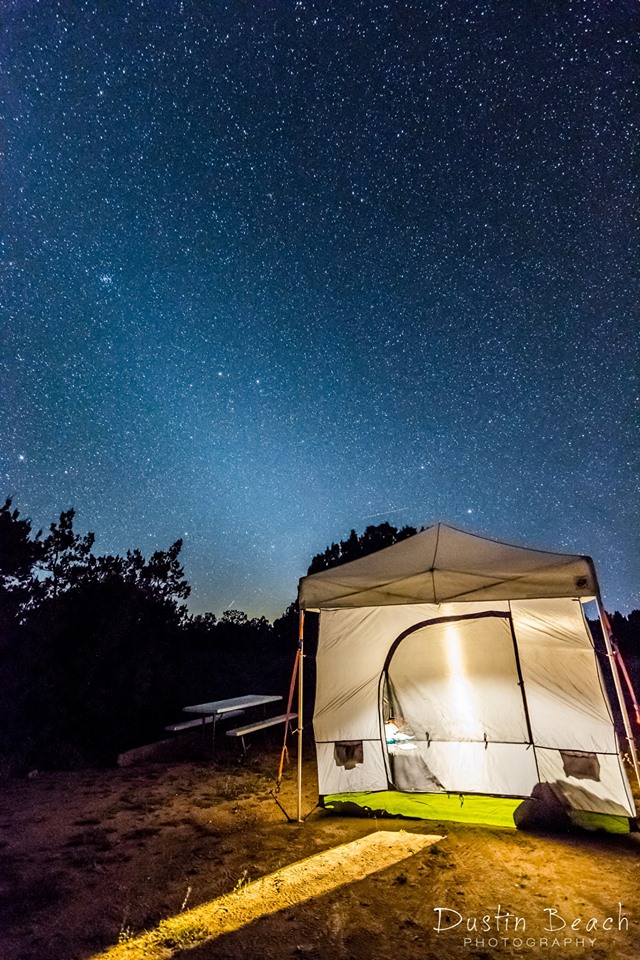
Mid July of 2019 had me visiting parts of the Great Basin NP in Nevada. Generally in an area around Ely, Nevada. In the Cave Lake area. I camped there one night. Then moved on to parts higher in elevation.
This part of Nevada is mostly desert to some degree. The lower elevations are too hot to comfortably summer camp. It is miserable to even sleep outdoors at night.
My second night I moved on to Wheeler Peak and spent the night at an elevation around 10,000 feet. What a welcome relief. It dropped down to 55°F at night. Wheeler Peak is near Baker, Nevada. 70 to 80 miles or so from my last camp.
I left mid morning and stopped briefly in the valley below to jump out of my vehicle, walk about 10 feet off the road and snap off some photos.
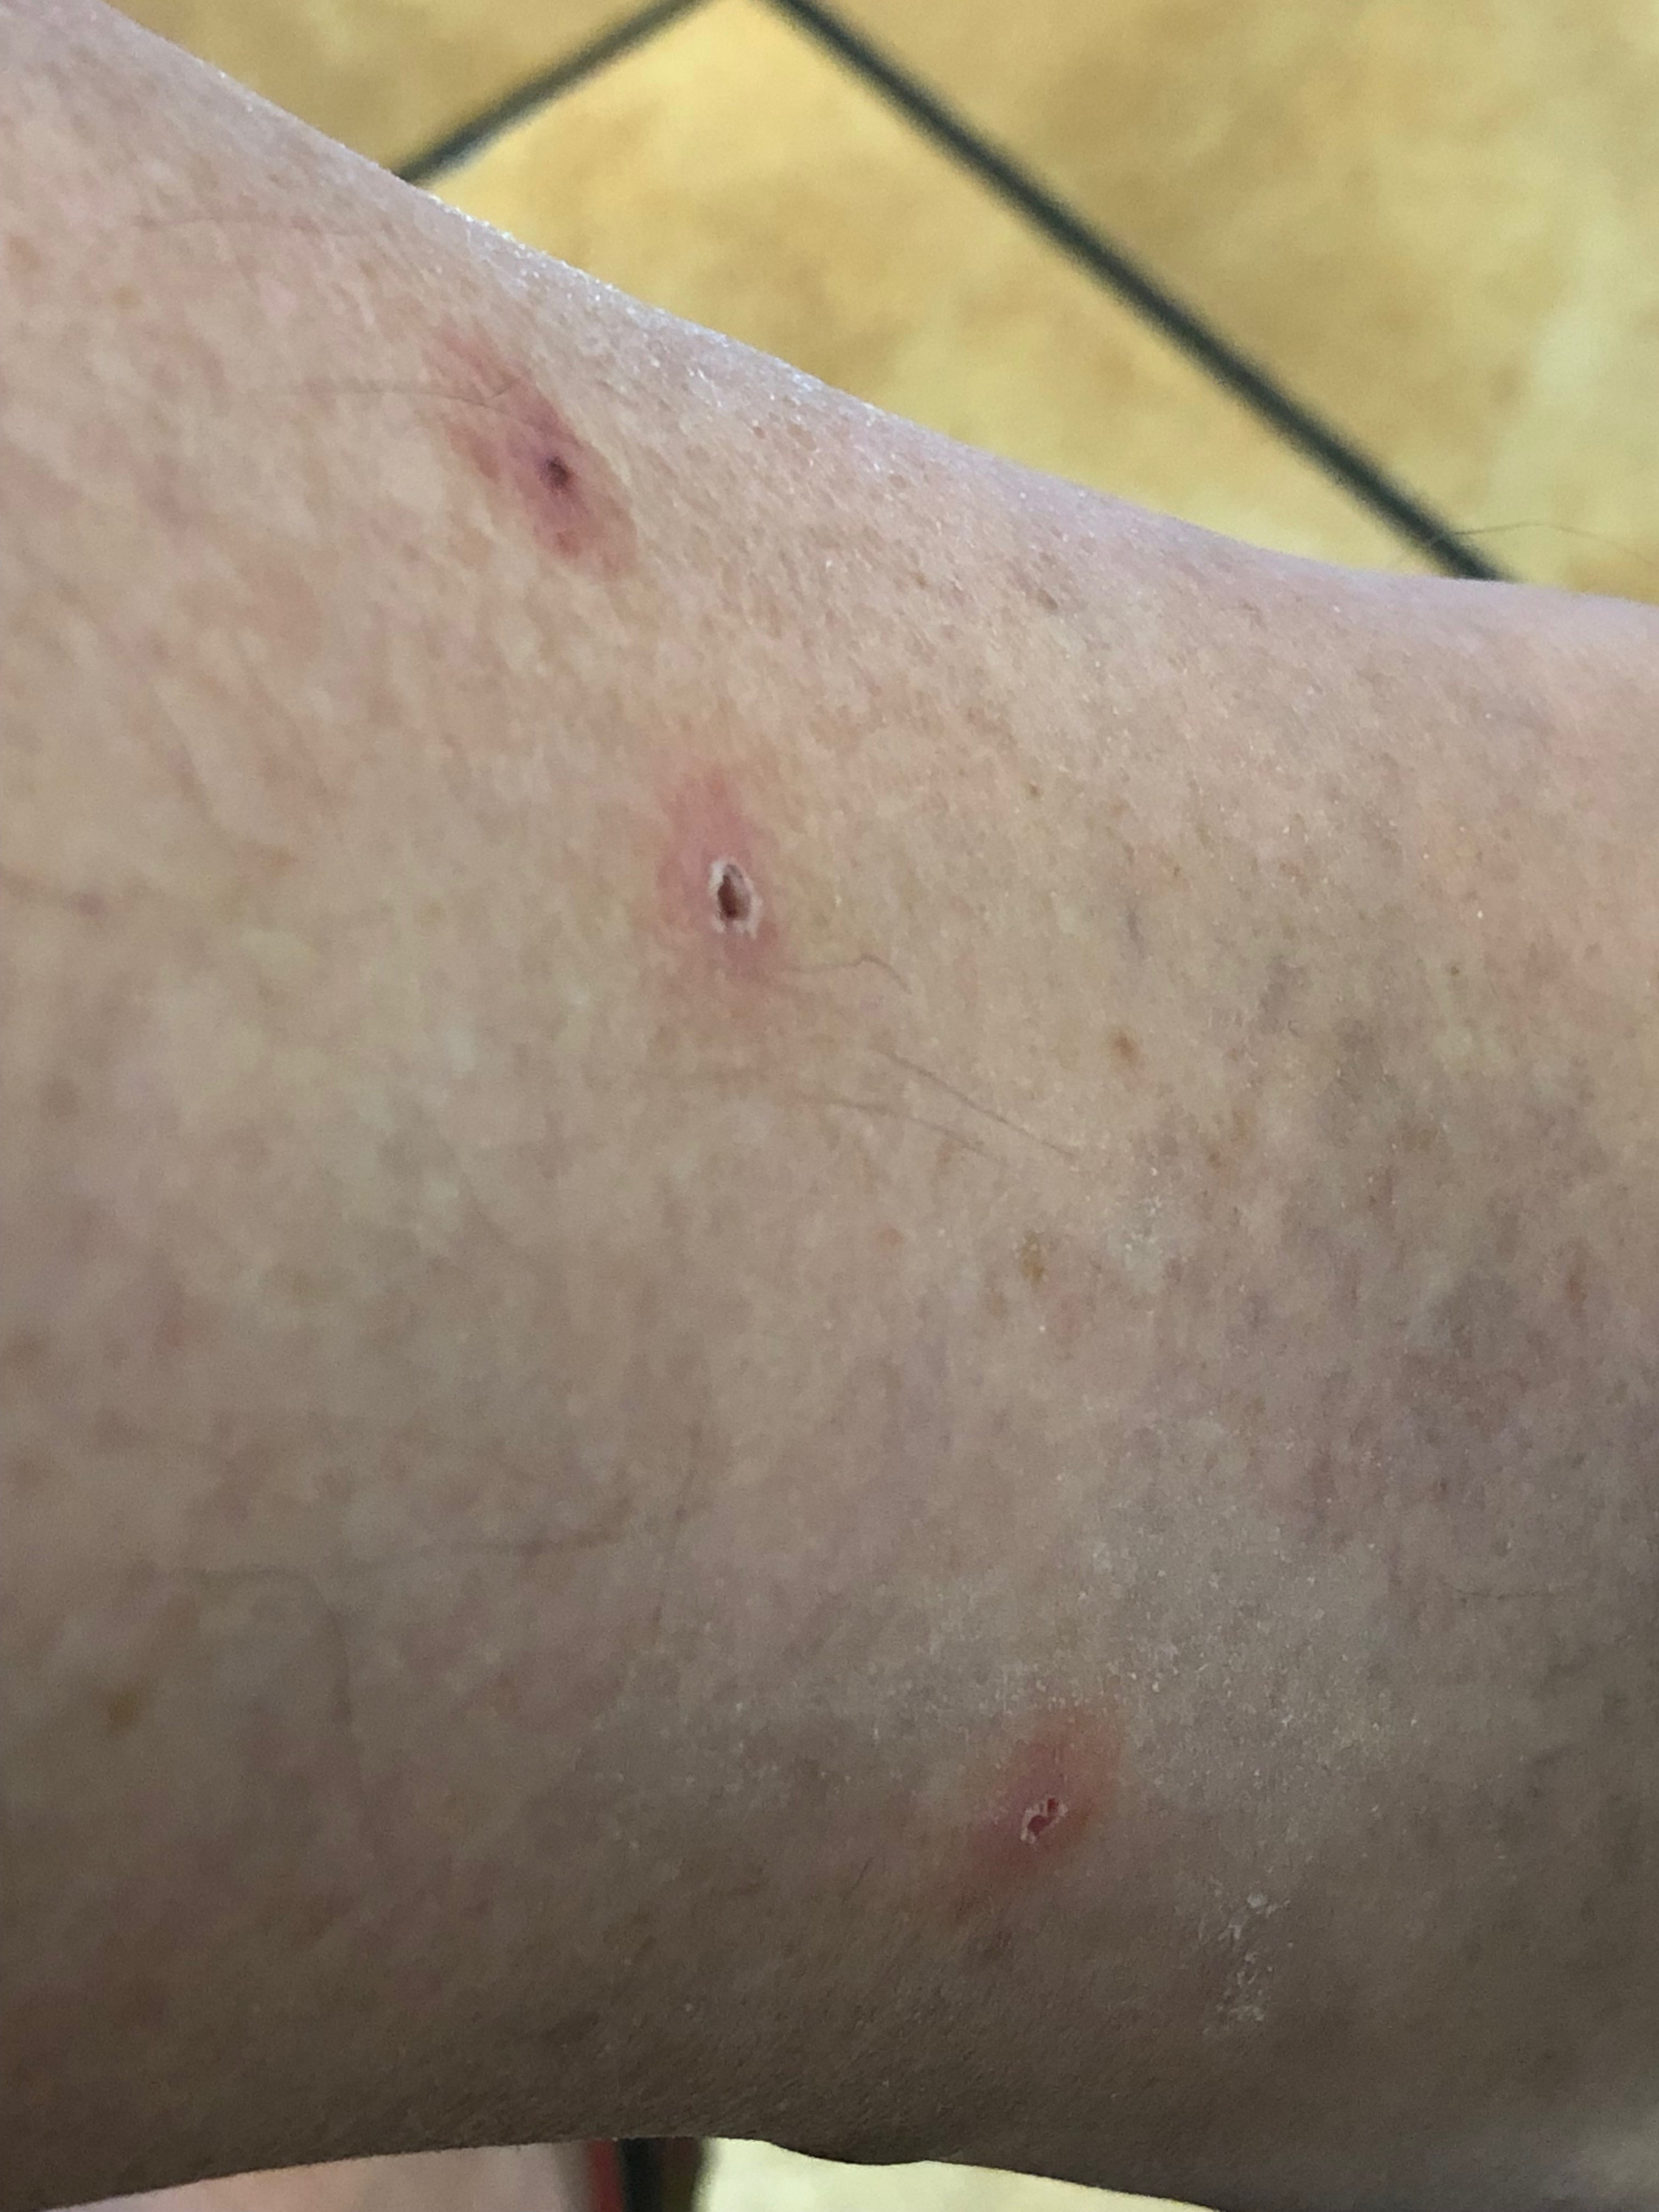
I list all of the three above because about 4 hours after my stop to snap some photos. I started itching around my ankles just above my sock line. I had about 15 bites surface that itch beyond any mosquito bite I ever had.
I read on the internet the itching normally goes away in a couple of days. For me it continued on to 7. I am not sure it is completely over. Benadryl Cream hardly touches it. A prescription Steroid doesn’t seem to aid any either.
I am worried I infected my vehicle with the critters and am half afraid to use the sleeping bag I used on the trip.
For an insect so small you really can’t see them. I have to say they have been the most unpleasant pest I have ever encountered while camping. I wish I knew which of the 3 locations I visited when I picked up these critters. I would leave that part of the world all to themselves!
Final preparations are going on for me today. Loading the trailer and taking inventory of camping gear and cooking utensils. We are cooking in competition associated with out sister website TheDutchOvenCook.com and the facebook group Las Vegas Dutch Oven Enthusiasts
This coming weekend is the annual Cathedral Gorge Dutch Oven Cookoff (Saturday September 16th, 2017). Sponsored by the Nevada State Park and surrounding businesses. The weather is looking to be near perfect.
This cookoff is a big deal. At least for the competitions we normally attend. There are normally around 50 cooks, and some of those preparing multiple recipes. We have seen crowds of people (250+) showing up to taste, vote on their favorite, and just plain enjoy the day.
If you are in the area, be sure to come out and support the event. Enjoy the food, enter the raffle, and enjoy the beautiful Nevada State Park.
For those of you travel a portion of old RT 66 in northern Arizona. Between Kingman, Arizona and Seligman, Arizona. Grand Canyon Cavern Campgrounds offers an opportunity to camp. Also do a Cavern tour, eat in their restaurant, or stay in their hotel.
This location will accommodate the backpacker type, vehicle tenting camper, as well as the Trailer/RVers.
The name is somewhat confusing if you think this is anywhere near the South Rim area of the Grand Canyon National Park. Drive time that NP area is about 3 hours away. But when RT 66 was the route before Interstate 40 came along. You would have definitely been passing this location on the way to the Grand Canyon….at least coming from locations west of the park such as Kingman, Las Vegas, or California.
Traveling this route offers lots of back road scenery, and fun stops such as Hackberry, Arizona. Also Seligman, Arizona if you passing through there as well. Both are great photo op stops.
The Grand Canyon Caverns Campground entrance is a few miles east of the RT 66 & IR 18 intersection. The view from the road side appears as an old run down gas station, and a small cafe. Some old vehicles staged around the parking lot up by the buildings. We stopped in the cafe and the friendly staff pointed us to the road/drive, that snaked around the back of the cafe, and up over a small hill. We almost got nailed by the cops tucked in behind a tree (Old black & white cop car staged along the road).
The campground is about a mile down this road that winds through low growing evergreen trees. You eventually come to the restaurant first. This is some distance off the main road RT 66 and not visible from the main road.
Don’t expect RV resort accommodations. Though they do have power pedestals on many sites. The campground is typical high desert and appears not well kept. Sites are dirt. Some have picnic tables, some do not. There are rough graded roads and ample sites tucked into out of the way places if you want to enjoy some privacy. We saw no site numbers. Once you pay you simply have squatters rights to any open place you want to make your camp. Bathrooms/Showers…..not the best. But they are centrally located at the front not too far from the restaurant building.
We made reservations at the last minute, the night before. Mid May there were plenty of sites. The grounds are large enough I would think you would not have trouble at any time? You might not get a level site, or one with power, but I think they would be able to accommodate you.
We had a picnic table and lots of 15ft Pinyon Pine or Ceders that offered wind breaks and some privacy. We didn’t have time to check out the Cavern tours. That might be another story for another day.
We arrived around 6pm and took advantage of the restaurant that looks like it is open until 8pm. We can both recommend the Pulled Pork/BBQ sandwich. We washed those down with several ice cold brews and had a very relaxing visit. It sure beat driving over in the middle of the night tempting fate driving in the dark.
We tried to set up minimal gear to head out right at first light. It was a very cold night for sure. I believe more so because of the higher altitude. We survived the cold, and packed gear about 4am to take off. Several others must have had the same idea because two other groups took off right before us.
So our recommendation is to allot the time to make this your stop. Enjoy the restaurant the night before. Even come early enough to check out the Caverns.
Summer time may be different, due to heat. Camping could become unpleasant? Be sure to check things out in advance of your date(s). Plan accordingly.
Twice a year we have a local group out of Las Vegas that camps at one of Nevada’s Ghost Towns. Our spring event will take place May 12 through the 15th, 2016. The core group camps with anything from RV’s, Teardrops, to Tents. RV spots are limited to 11 and normally all get reserved. There are also a limited amount of rustic cabins for rent. There is endless dry camping where you can camp out of your car and set up a tent.
We also have an October trip scheduled for October 13-16, 2016.
If you want the experience and car camping is your thing. This would be a unique opportunity to attach to your Havasu Falls trip if you are coming in through Las Vegas. Or just join us and have a fun weekend.
This is paved roads the entire way. You can travel here with the family car or a rental with no fear of needing an off-road vehicle.
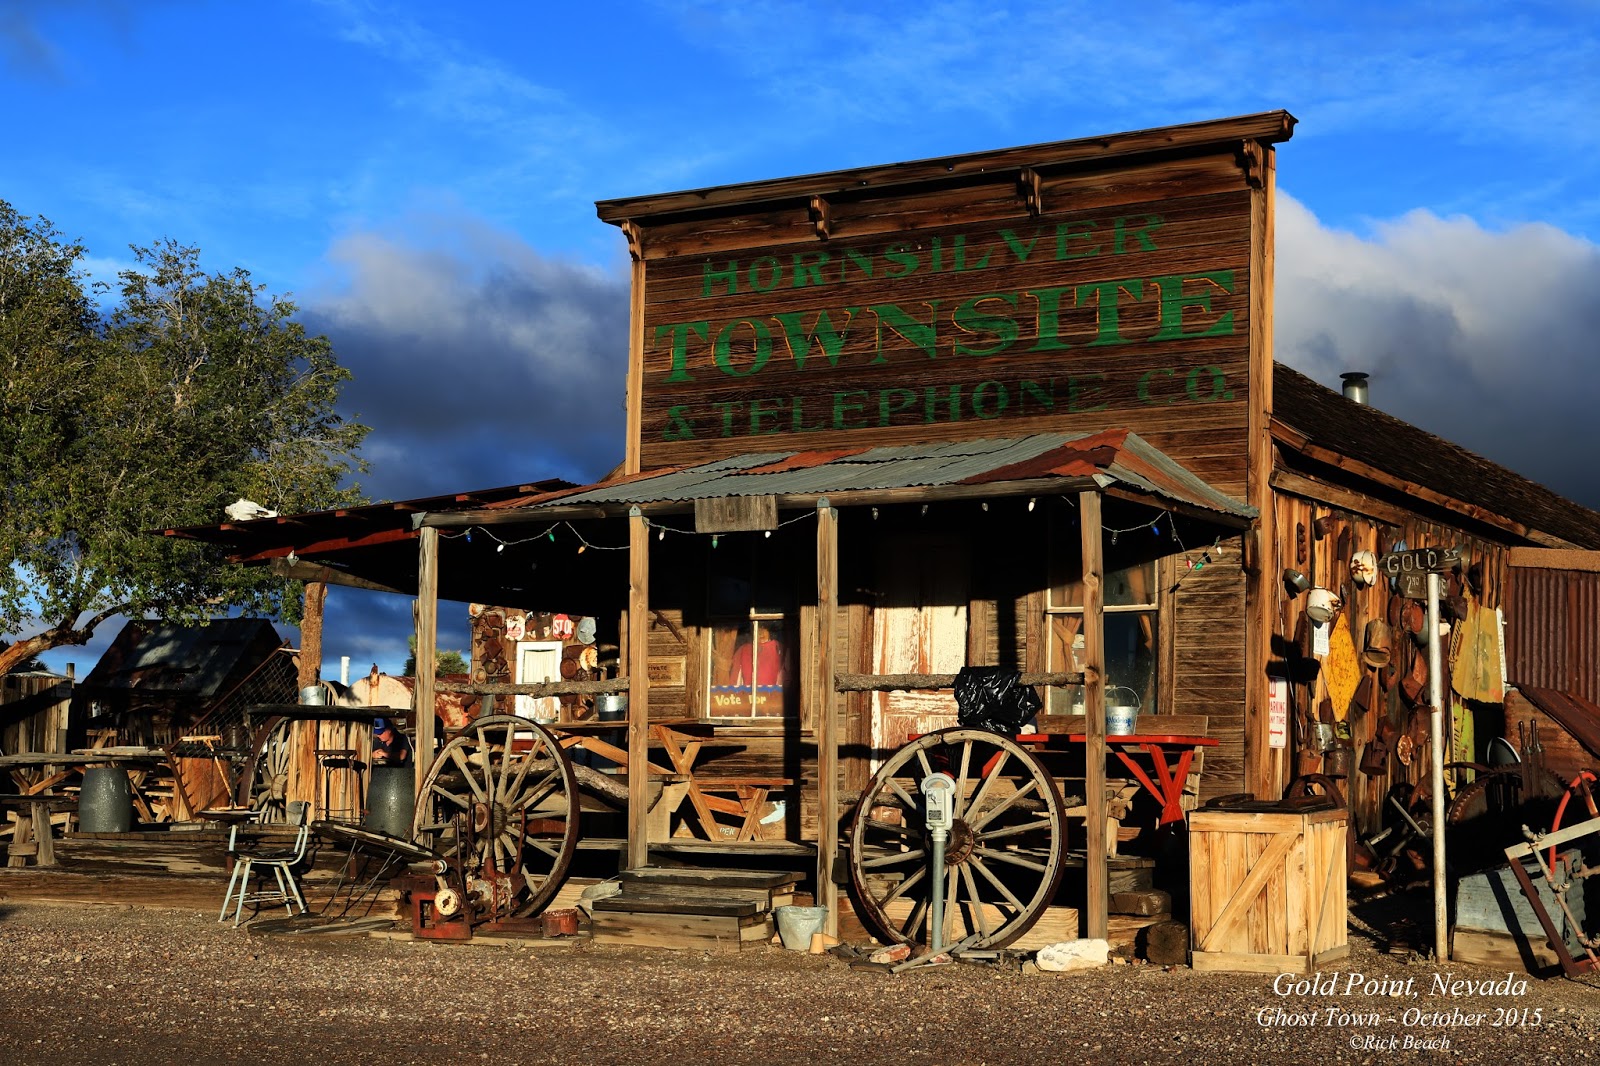
Gold Point, Nevada is about a 3 hour drive north out of Las Vegas. It is remote but offers a rewarding experience. The Saloon is opened for our group. There are also some prepared meals available for purchase, but head count must be given.
This is rustic camping for the most part. Pit toilets, but there is a shower. No tables. No tree’s. Don’t expect comforts and you won’t be disappointed. A shade/rain fly is recommended but not necessary. As is a folding table.
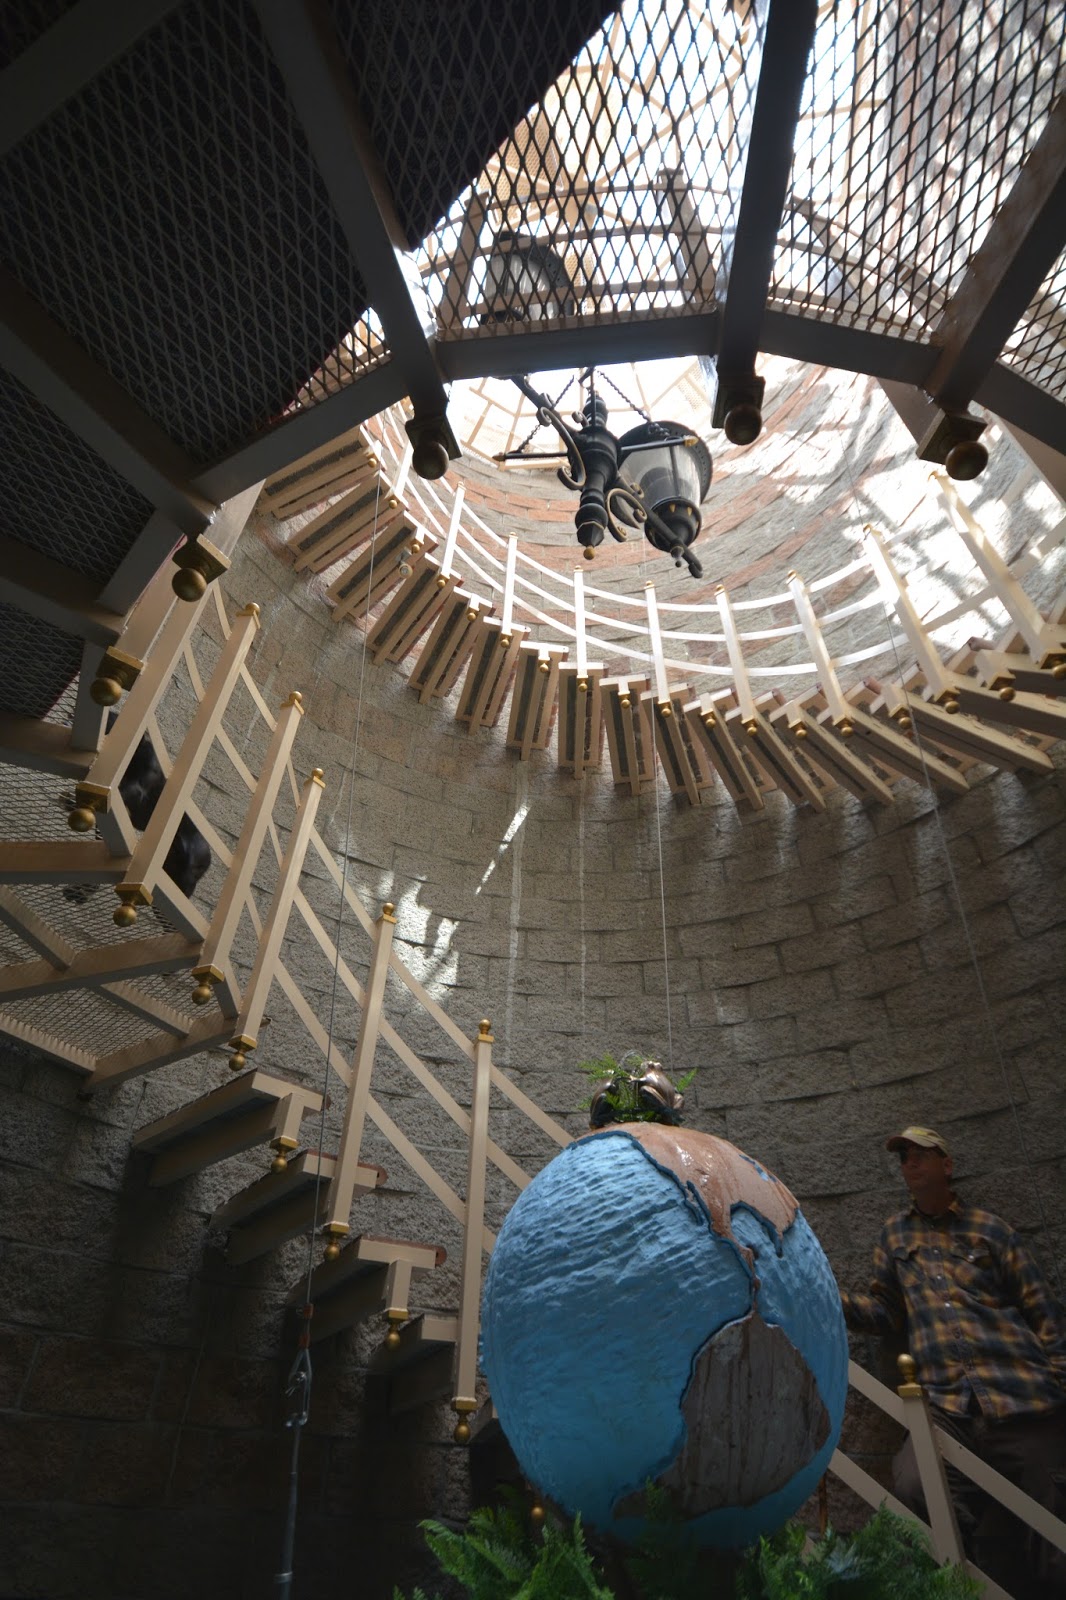
Hard Luck Mine Castle
There are no services or store. The nearest small town is about 40 miles away. Be sure to bring everything you need. Water is available.
The area is full of photogenic buildings, old iron, mining equipment, and machinery. A handful of people live in the town and are restoring buildings while maintaining the old dilapidated look.
The town sits at an altitude just above 5000 ft so during spring and fall expect chilly nights and pleasant days. Some years its rained and we spent the day in the saloon sitting around the wood stove with a roaring fire.
One of the Las Vegas Dutch Oven cooking groups does a Saturday Potluck. Cost of admission to the potluck meal is to bring a dish or food of some sort.
There are endless gravel roads going off into the mountains in all directions. One snakes over a hill to another Ghost Town called State Line…though 4 wheel drive may be required for that one.
Or head over to the Hard Luck Mine Castle. If you can get the owner to give you a tour (donations required) you will be amazed at what someone built in some very unforgiving terrain and on top of the old Hard Luck Mine shaft.
The Ghost Town of Rhyolite, Nevada is about a hour and a half drive one way from Gold Point (On paved roads). It is another photographers dream. Totally awesome at sunrise or sunset!
You are pretty much on your own as far as food. Though some meals can be arranged in advance. Sheriff Stone (one of the proprietors will do breakfast, lunch, and dinner if arranged for in advance)
Winter seems to put a damper on many traditionally summer-time enjoyed outdoors activities. Dutch Oven Cooking is one such activity. Though many of us do cook throughout the year. Perhaps on the Patio or in the shelter of an open garage? Others do not let anything get them down.
I get a personal annual invite to join in with about 30 other friends and acquaintances to make a 3 day Kayak/Canoe/Dory adventure that takes place the month of January. This is not one of my own organized events. This takes place on the lower Colorado River. Somewhere roughly in an area between Blythe California, and Yuma Arizona.
It is enjoyable to be a participant rather being than the person attending to the details. My many thanks to the person that puts this all together….and you know who you are! I would really like to put a plug in for the organizer of all this fun, but I am not sure all the details can go public?
You have to be a special breed to enjoy such an adventure. It can be cold. Almost guaranteed to have cold nights. Easily dropping in the twenty degree Fahrenheit range. Some years the days are delightfully warm. Other years its hard to squeeze 40°F out of the daytime highs. Winds can be unpredictable and brutal trying to paddle the miles to the take out point.
This is a lonely and for the most part, a very desolate stretch of country. Even 4-wheel drive type roads can be many miles away. So once you commit, you are pretty much on your own for 3 days. But the water, the waterfowl, birds of prey, and the reed lined banks of the river, pass by at such and enjoyable pace. It allows you to slow down and decompress from the stress we call the “normal” today.
It is definitely not all about the paddling, or enjoying the Colorado River. Or all the beauty nature offers along the way. Interestingly enough the river in this area is pretty much as it has always been. There are some additions a lifetime ago, perhaps several lifetimes ago, You can explore several old miners shacks up on the banks, and an old mining area/town that once was.
Cast Iron Dutch ovens are hauled along in any fashion that works. There is warm food, and warm friendship around the campfire. One evening is set aside for a “Trash Can” cooked turkey. That evenings feast comes with all the fixings. Foil-packed veggies and potatoes, are fire roasted in the coals. All the goodies a laid out Thanksgiving spread would have.
Often the campfire evening is enjoyed around the fire with someone picking a guitar, and all of us become the best singers you ever heard. Though I am not sure why that good singing gets the coyotes howling….hmmm.
The morning sunrises will knock your socks off. Though your thoughts might focus more on enjoying the warmth of your sleeping bag. The sunrises are something to have you jumping up for. Just put on the coffee and enjoy God’s gift as it unfolds in front of you. On a brisk morning the warming rays of the sun on your face is better than perhaps that cup of coffee. Having them both from the comfort of a folding camp chair, while the birds start singing….well it just doesn’t get much better than that!
Please check back for the follow-up article on the January 2016 trip. We will talk about some of the highlights and new memories created in 2016
My ARB 82qt Fridge Freezer unit arrived about 3 days ago and I was able to put it through some initial testing. I had a Dutch Oven competition event out in the heat, that provided some initial “real world” testing. My intent is to provide some initial feedback to other people that are doing research before buying a 12 volt powered “Fridge”
I want to apologize in advance if I seem to be harping on the fact there is a whole range of 12Volt “Coolers”, not “Fridge” units, out there that are just plain useless for normal camping. I have bought and attempted to use such units. My frank opinion…..don’t waster your money. If you want to listen to those claiming they work then don’t waste your time reading through this material. I am just trying to help you avoid falling into pitfalls I have encountered.
Currently there is not a magic bullet that will provide safe refrigeration cheap. Nothing in the range of $100 -$200 dollars. If someone convinces you there is, keep dreaming. Running off 12VDC you better plan on something over $500. $500 will get you a dinky unit that most people won’t consider large enough to store camping food supplies.
These actual “refrigerator” units, and comparable units of other brands are not cheap. For the size I purchased (82qt), expect to pay over $1300 by the time you get into tax and any shipping. This factor alone makes doing your own investigation very important. It is a sizable investment that makes buying ice, seem like a more economical alternative.
With decades of camping under my belt, I can assure you I have wasted my money on nearly everything out there. Trying to keep food cold is no exception. If you are considering a 12VDC food “Cooler” that seems cheap in price, you really need to read through this material. Otherwise you will only be throwing away at least $100 and perhaps more. There are only 2 or three brands out there that can effectively “refrigerate” your food. Be prepared. As I said they aren’t cheap in price.
12VDC Refrigerator or 12VDC Cooler
I put these devices into two categories. “12VDC Refrigerators” or “12VDC Coolers”. Both of these in many models will also work off 110VAC.
The people using the inferior “12VDC Cooler” types. Those rated for only cooling 30-40°F below ambient temperatures. Then saying they work great. Aren’t using them in conditions I camp in. To me these are not “refrigerators“, but simple “coolers“.
But in the past I followed some peoples advice and tried the “Cooler” type. Yep….wasted my money. To me, ice chests actually perform better than the 12VDC Coolers. Ice Chests are actually more safe since they have a visual indicator (the melting ice) of when temps are getting to the point of affecting your food quality and safety.
Then I love the people that say “add ice” and it works great. Hmmm….why would I buy it in the first place? I learned to shut up on that one.
If you want safe, and for all conditions, you need to step up to a 12VDC Refrigerator.
People that recommend using these “12VDC Coolers” must have them stashed in the air conditioned car while driving down the road? Or in cooler outside air temperatures. In situations they might maintain their spec ratings of internal temperature of 30-40°F below ambient. Turn the air conditioning off, or park the vehicle in the sun to do some sight seeing, and cooling capacity could easily go into an unsafe range.
You may not even realize its in an unsafe range. A situation were you are away from the vehicle a length of time, jump back in and start driving again, then the food is re-chilled. Re-chilled bad food at this point. I have tried several of these units. All a waste of money in my opinion. The hard way to find out about these is to buy several models and find out for yourself. But some people learn by doing trial and error, rather than listening to someones actual experience.
Power consumption on these “12VDC Coolers” is also high. Stay away from a vehicle too long, while the 12VDC Cooler is running in an attempt to cool in a hot vehicle….expect to come back to a battery that won’t start your vehicle. Attempting to boondock a weekend strictly off a battery? Forget about it.
Why Buy a 12VDC Refrigerator?
I spent most of the winter researching specs, reading reviews, and analyzing pros and cons. I had narrowed it down to several brands on the market. I was tired of the junk I had tried.
I really wanted a portable 3-way (110V AC-12VDC-LP Gas). There are a few on the market but they did not pass the review tests I looked at, nor my spec requirements.
I actually considered buying a 48 inch RV 3-way unit and building a fiberglass housing with wheels to accomplish what I wanted. If you can do a permanent installation the 3 way absorption fridge is really the route to go. But I wanted portable. At least semi-portable.
My objectives were to have a unit that was able to have a set “cold” temperature. Capable of getting to 0°F if necessary. Also maintain that set temp regardless of outside ambient air temperature. There are many units out there making lots of claims, and reviews supporting some claims. But when you start reading the actual specs, many units spec aren’t capable of living up to what some people claim they will do. In actual use, I found those less inexpensive “Coolers”, do not adequately perform either.
The simple math of their listed cooling capacity has to add up. Almost all of the inferior units will list in their specs they drop the internal temperature 30°F to 40°F below ambient air temperatures. Read the fine print before you shell out several hundred dollars. How can subtracting 40 from 100°, 90°, or even 80°”s be safe food temperatures?
I also wanted to run my device off of solar in the very near future. So amp/hour power consumption was important.
I even considered buying a kit and building my own. I have seen some super efficient fridge/freezers on sailboats. There are kits available from Marine suppliers. If you consider this option, look for the kits that have a Danfloss Compressor. After thinking through creating a watertight unit, the fiberglassing work involved, size issues, and lid issues, I thought my better option would be the largest commercially pre-built unit I could find.
I live in a desert and camp nearly all year off and on. Often times I am traveling or camping in heat well over 100°F. Coolers closed up in a trailer while driving down the road, or parked in a parking lot, could be sitting temps well over 100°F. More like 150°F. Or what happens if your cooler is sitting outside while you are off hiking and it ends up in the sun for an hour or more?
So the units that indicate they can only maintain temps 30 to 40°F below ambient temperatures were crossed off my list. I wasn’t buying another worthless box. I consider these convenience “coolers” for use while on a road trip. Great to keep keep your bottled drinks cold. Great if sitting inside an air conditioned vehicle that the ambient air temperature is in the 70’s° F range. (70-40=30°) That’s if it operates at the max of its specs.
They have their place and use for some people. But it doesn’t do me any good to have food sitting at an internal temperatures that could inch up to 60°F or 70°F…. or perhaps higher, given time. It is not worth getting sick or worse. If I have to add ice as some suggest, then I might as well stick with an old fashioned ice chest.
My preference would have been for a high end LP 3-way portable. But I could not find any that met my specs. The very few out there were not of my size requirement, or complaints were many.
So I opted for several higher end 2-way 110VAC – 12VDC models. There are only about 3 brands that met my specs concerning cooling capacity. ARB, Engle, and Whynter. Once I started looking at amp draw at 12VDC, the ARB brand was the only one to survive the cut.
Specs, good reviews and a couple personal recommendations led me to go to the ARB brand. I contemplated size for a while after that. I ended up selecting the largest, the 82qt. I nearly went with the next size down. I was apprehensive the whole time waiting for it to be shipped and delivered. When it arrived and I saw the unit up close and personal, I was very pleased with the internal capacity. It is just what I wanted and needed. I consider it a semi-permanent installation since empty this unit tops 70lbs. I intend to mount mine on a hand dolly so I can roll it up and down the rear ramp of my trailer. Full of food, two of us were able to move it around with the units end handles. I wouldn’t even attempt to lift it by my self, if full of food.
What about Plugs and Wiring?
I had pre-installed weatherproof 12V cigarette type outlets in my trailer. The type of outlet/socket found at auto parts stores and some large box stores. I had intentions of using the unit as soon as it arrived. It came a day before an important event. If you are reading this, STOP before buying outlets or wire and making several of the mistakes I did. Read on through this article.
Standard 12V cigarette lighter type outlets, regardless of how heavy duty, are not the route to go. Secondly I suggest you use #8 wiring that is fused at the source connection. #8 on both the +Positive power lead, and the -Negative ground conductor.
The cigarette lighter type outlets may or may not work. Mine wouldn’t. Plus even if they make electrical connection your fridge cord male connector may vibrate loose if used in a moving vehicle. The Fridge does come with a cord that has a conversion adapter plug on the end for use in the standard cigarette lighter type of outlet. So your vehicle outlet might work. But also check your wire gauge.
Factory vehicle outlets are often wired with 16ga. I suggest you use the ARB type mini 2 prong outlets, and the #8 wire.
You can unscrew the 12V cord male plug adapter and remove the cigarette type plug. This reveals a mini 2 prong plug. You do need the special 2 prong outlet from ARB. The outlet 2 prong female base is also threaded. The Male 2 prong plug on the end of the cord has a threaded sleeve that matches up with the base inside the outlet. Once the 2 prongs are inserted in the outlet the sleeve is screwed on to lock the plug into the outlet. There is no way this is going to vibrate loose.
The outlets are about $9 each. Better yet you can get a 20ft length, two conductor, #8 wire, with fuse holder, plus the outlet…all for about $43 for the kit.
P/N 10900028 Surface Mount Single Mini 2 prong Female Outlet $9.00
P/N 10900027 Kit with 20ft #8 wire, fuse holder & includes the Mini 2 prong Female Outlet $43.00
This all leads to a couple negatives I encountered. Not with ARB but with other outlets or parts I used. My 12V standard cigarette lighter type outlets (auto parts store/non ARB) are made for a very small diameter end pin on the plug that is inserted. The ARB plug with the standard adapter attached has a very large diameter tip as shown in the image below. That tip bottomed out on a plastic ridge inside my female outlet (Auto Parts Supply Outlet). That ridge prevents the plug and outlet from making an electrical connection on the positive+ voltage. I can’t remove the ridge of plastic because it retains the metal contact inside my outlet. As a quick fix I drilled and drove a small screw into the bottom/center of the outlet. The head of the screw made contact with the ARB cord adapter plug. That was a temporary measure. I have since removed and replaced the Auto Parts Supply outlet, with the ARB locking outlet.
Ironically the ARB plug does work in my vans factory cigarette lighter outlet….but that is on 16 gauge wire. This is all a mute point for me personally because I ended up buying and installing the ARB mini 2 prong type and re-running the wiring with the #8…. and ripped out the #12 wire I had installed. In my van I ran one of the kits to a more convenient location than my dash mounted factory cigarette lighter outlet. Just something to consider if you wish to add outlets ahead of time.
My auto supply 12V standard cigarette type weatherproof outlets – That did NOT work with the ARB adapter plug
The second part of the negative issue is I went to the 3 ARB authorized dealers in my city (called them rather than physically driving there). None of them stock the ARB mini 2 prong outlets, or the wire harnesses kit that come with the outlet included.
Retailers on-line seem to be gouging on price or shipping. I hope as this brand gets more popular, the range of local availability of parts and accessories increases. I would think in Las Vegas this would not have been an issue. Since they don’t stock accessories locally they missed out on another $200 of my business. They didn’t have the Fridge either. So the locals lost out on a good chunk of change. I purchased mine off Amazon. It was at my door in 2 days.
I have to say the negative of these outlets also turned to a positive for me. I immediately saw the potential of the standard cigarette lighter style plug vibrating out while traveling down the road. I wondered about this before I found out all this additional info. After contacting the ARB sales department I had some outlets with wire harness being shipped direct to me. The person I talked to was super knowledgeable and discussed at length solar connections and solar controllers for use with the ARB fridge/freezer too.
During this call I also found there is a new device on the market for the latest generation of ARB fridge/freezers, which I have. On the rear of the fridge there is a small connector in the plug-in cord area. This small connector is about the size of a USB port. I didn’t look close…it may even be a USB.
ARB is coming out with a wireless remote that displays the conditions of the Fridge/Freezer, temp, etc. So while purchasing 3 harness/outlet kits, I also purchased the wireless remote. That way I can monitor my fridge sitting in my trailer while I am driving down the road. I also wanted to test out the remote and give some honest feed-back here on the blog.
This should be an interesting test since my tow vehicle is a full size van. My trailer has a metal exterior. The wireless signal will have to send from the fridge in my trailer, to my dash area of my van. From where the cooler will ride in the trailer, the signal will need to travel about 30 ft.
The ARB specs shown on-line for this unit state that it provides 100ft line of sight transmitting technology. The interrupted transmitting capabilities is 50ft. As with myself I a betting most of use will fall in the “interrupted” category. I just hope these are over engineered, rather than under engineered.
Check further down this article to see if I have updates on how the remote works. I will be adding that info the first chance I get to see it in action.
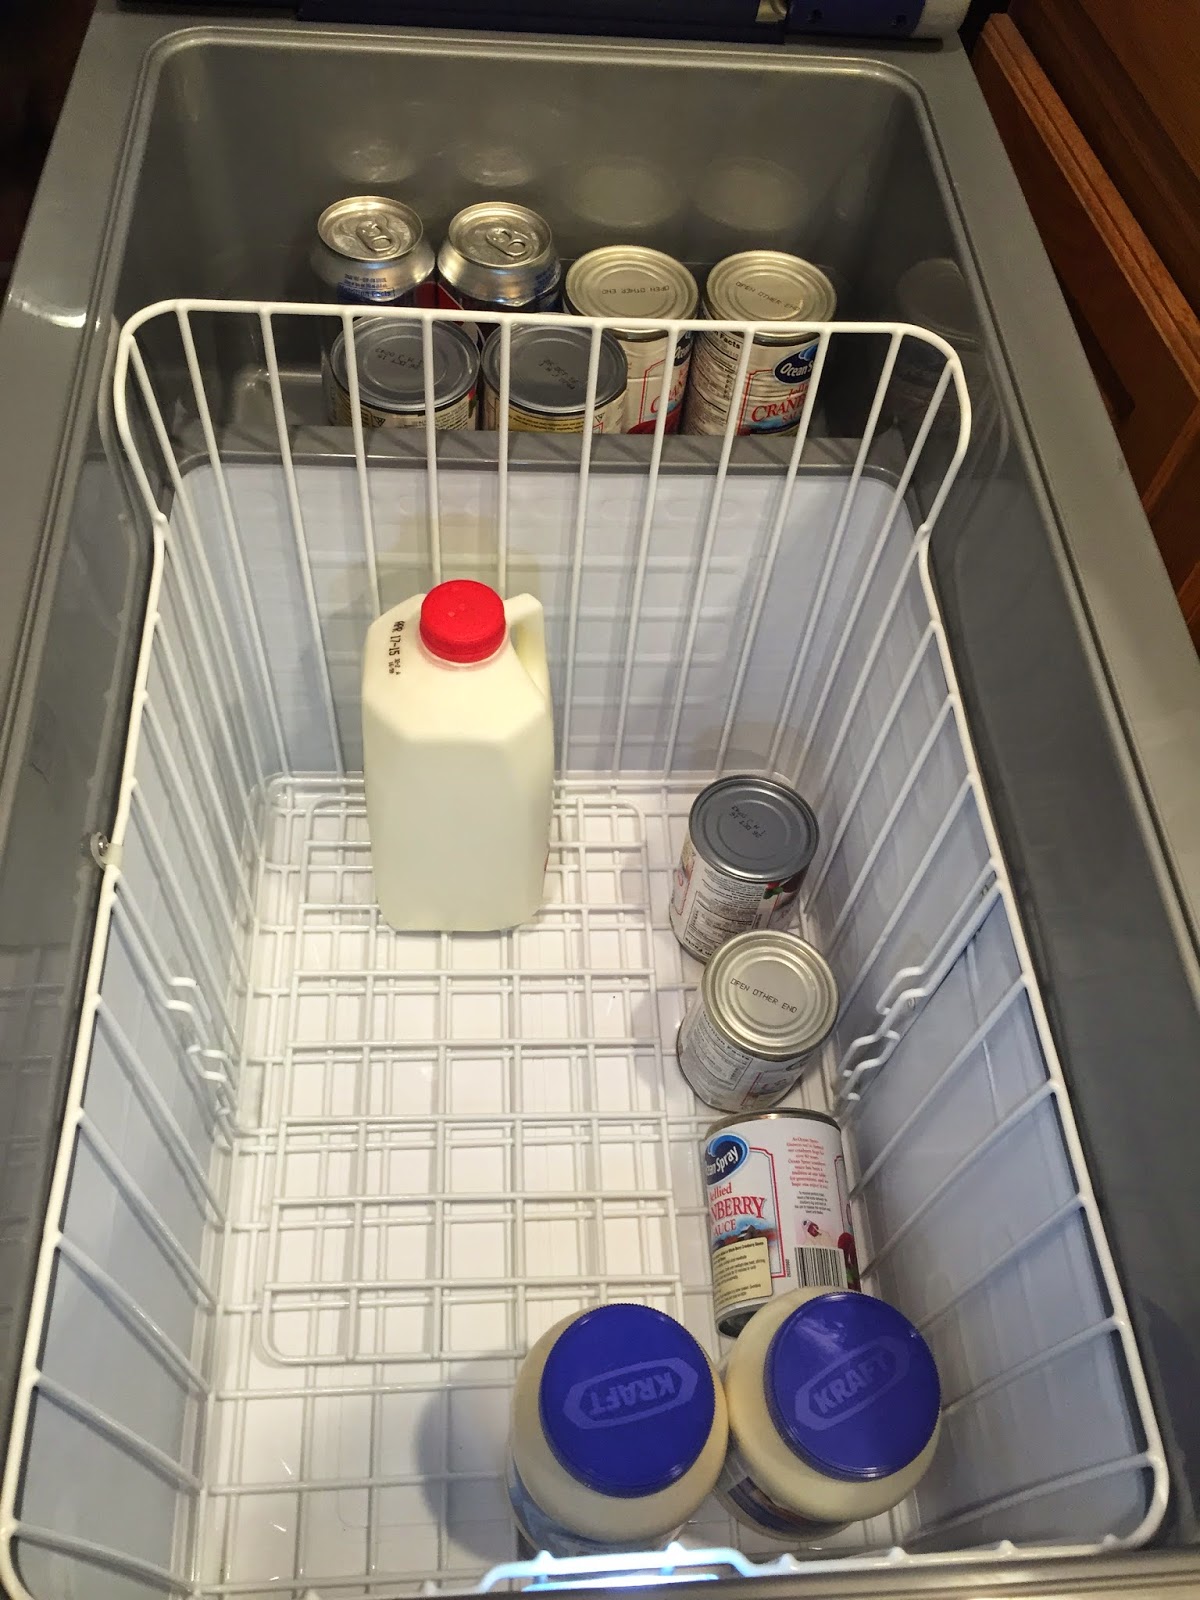
When the Fridge/Freezer unit arrived I plugged it into 110V AC (standard house outlet) and set the unit for 27°F. At a little over 30 minutes the fridge was at that temp. The outside air temp was at 80°F. I was impressed. I loaded it up that evening for an outdoor event the next day. I couldn’t use my 12V DC outlet in my trailer due to the outlet incompatibility issue I stated above. So I ran it off the 12V DC port of a portable jump start unit. My power source was a charged up Schumacher XP2260 Jumper starter unit. These only have about 20 amp hours worth of juice. I was blown away it powered my ARB for 6 hours while sitting under my EZ Up tent/awning in 80-85°F air temps. The XP2260 meter read 60% at the point the ARB Fridge shut down.
This ARB fridge/freezer has 3 programmable battery monitor settings. To cover those settings first allow me to quote some battery tech stuff for those not knowing battery specs. This might help you wrap your brain around this info. A fully charged 12V battery (your car battery or marine deep cycle battery ….a new/good battery….normally has a “standing” voltage reading of 13.5V DC. “Standing” means what the voltage settles out to when there is no load drawing any current/voltage.
With normal batteries, and most likely the type you will be using, you never want to discharge them more than half way. Ideally not less than 60%. Otherwise damage and a very shortened life may be the result. Some might think 50% means half of 12 volts or half the full charge of 13.5 volts? Putting 50% in the neighborhood of 6 volts. That is incorrect. A battery that is 50% discharged will have a “standing” voltage reading of about 12 volts. 60% is at about 12.2 volts. This means discharging your battery below 12 volts will more than likely result in damage or reduced life.
What does all the battery spec info have to do with the ARB fridge/freezer monitor setting? ARB allows 3 user programmable settings on how much energy you withdraw from your battery before it shuts off the ARB fridge/freezer. Remember this is to protect your battery, not your food. The factory setting is Medium
LOW =Shuts off at 10.1 volts
MEDIUM =Shuts off at 11.4 volts
HIGH =Shuts off at 11.8 volts
The ARB LOW setting would run the fridge/freezer the longest. On most battery usage charts this would discharge the battery well into the danger zone of causing damage to your source voltage battery charge. But it will protect your food the longest. It could be a sacrifice of battery to protect a chest full of food?
The ARB Medium setting would run the fridge/freezer for less time than the low setting. On most battery usage charts this would discharge the battery into the marginal or caution zone of your source voltage battery charge. Well below what I feel comfortable discharging my batteries. But again a sacrifice might need to be made to protect your food.
The ARB HIGH setting would run the fridge/freezer for the least amount of time. On most battery usage charts this would discharge the battery right around 50%. To protect you battery life this is a better setting.
Update May 18, 2015 (Info on the Remote Monitor)
I finally had the chance to test out the ARB Remote Monitor. During a 5 day trip I used the Remote to monitor my fridge/freezer that was riding in my trailer. It performed flawlessly. Though I found installing the sending unit to be a bit difficult. Difficult being I was afraid of causing damage.
The system consists of a sending unit that is mounted on the fridge, and plugged into a port on the rear of the fridge. This sending unit has a short screw-on antenna. The receiving unit is plugged into a 12V electrical outlet (cigarette lighter) to power the receiver. While it would be nice not to have to plug this in, it does get the job done.
Let me address the sending unit installation. The unit comes with a short ribbon cable that is soldered to the remote sending unit. The ribbon cable is less than 2 inches long with a flat female multi-pin connector attached. This connector is about the size of a USB connector though it is not USB. The ARB fridge male connector is built into the fridge and is covered with a rubber cover.
The remote sending unit I received had extremely little slack to allow plugging in before mounting the remote to the fridge with the provided screws. The male connector pins on the fridge are very small and these could easily be bent over. I was so afraid I would damage these pins or pull the ribbon cable loose on the remote. I turned and tried over and over. There was not room to get my fingers in to line up the connector, then press it in. I don’t know if I happened to get an overly short cabled one or if this is the normal? This definitely needs addressed by ARB before people start damaging those pins.
I managed to get the connector plugged in and then I mounted the remote on the fridge. Even during mounting I could feel the pressure of the strain on the wire trying to get the remote lined up with the factory drilled holes on the rear of the fridge. Though things worked I have it in the back of my head this connector might eventually work loose?
Aside from the short ribbon cable everything worked. I have a full size van towing a 16ft trailer. With the tongue distance I estimate the remote sending unit was positioned about 30 to 35 ft away from the receiving unit.
I followed the instructions that came with the remote. Both for installing the sender, and also the set up procedure for selecting the channel, etc. The instructions are pretty straight forward and not complicated.
My van and trailer both have metal skin. The signal never failed. Though I found after the receiver was unplugged for a couple days I had to go through the setup procedure again for my return trip.
It was great to be driving down the road and have the ability to see the temperature of the fridge riding in the trailer behind me. I am happy with the remote unit and highly recommend making it an accessory you purchase when you buy your fridge.
Actual use Testimonial
June 2015. Wow….I just put solar on my trailer. It runs the ARB Fridge with no problems. If you are reading this because you are researching/shopping for a 12V Fridge that can function in the heat…..well let me give you a testimonial.
I tested my Solar set up for 7 days. Along with the solar I also ran the ARB 24/7 for seven days. Outside air temps reached 112F°. The air temp inside the closed trailer peaked at 108°F. Most of the time the ARB was set at 25°F. Even sitting in the hot trailer it had no trouble. So for 2 days (a 48 hour period) I set the ARB at 0°F. I wanted to see what it could really do. It maintained the 0 temp despite the fact the air temperature around it was over 100°F hotter. This ARB is no cheap unit. Read the fine print on the cheap units out there. Most specs on the cheap ones state only cooling 30°F below ambient air temperature. If I were using a cheap unit, my food would be at 80°F in this heat. Talk about food poisoning!
My ARB was dropping the internal temp at 100°F difference….talk about making ice in the desert heat. It can do it. Once the compressor gets up to speed after the few seconds of start up the amp draw on my batteries measured -1.1amp. It rarely runs half the time. Running all night only drew down my batteries by 4% on the worse day with the 0° setting. Most nights the drain was only 3%. These readings also included the drain from a CO detector as well as a Propane detector that are always on. So I rate the 82qt ARB as drawing 1 amp while running. 0.5 amp/hr consumption over all since it runs only half the time. Even these numbers are very conservative.
I intend to post more personal practical experiences after I use this unit more. So check back often.
Ever since covered wagons the Chuck Box has been a common term. Before that, I am sure migrating people had a means to transport some of their precious spice items that were not easily obtained foraging natures surrounding supplies.
If you have camped many years you have probably changed out your own method of carrying your own staples. Having your items with you, rather than being dependent on an inconvenient source to purchase (forage) your own items while camping.
My current method is below. We hope people viewing our blog take the time to forward us photos of your own “tried and true” method. We want to add them to this article. So tell us a little about yours and about yourself. Ours does not have the “coolness ” factor of a handcrafted wood Chuck Box, but ours is highly functional. The boxes have been along on multi-day canoe trips, Dutch Oven Cooking events, and regular campground camping. We have ours loaded so we are not wanting of anything.
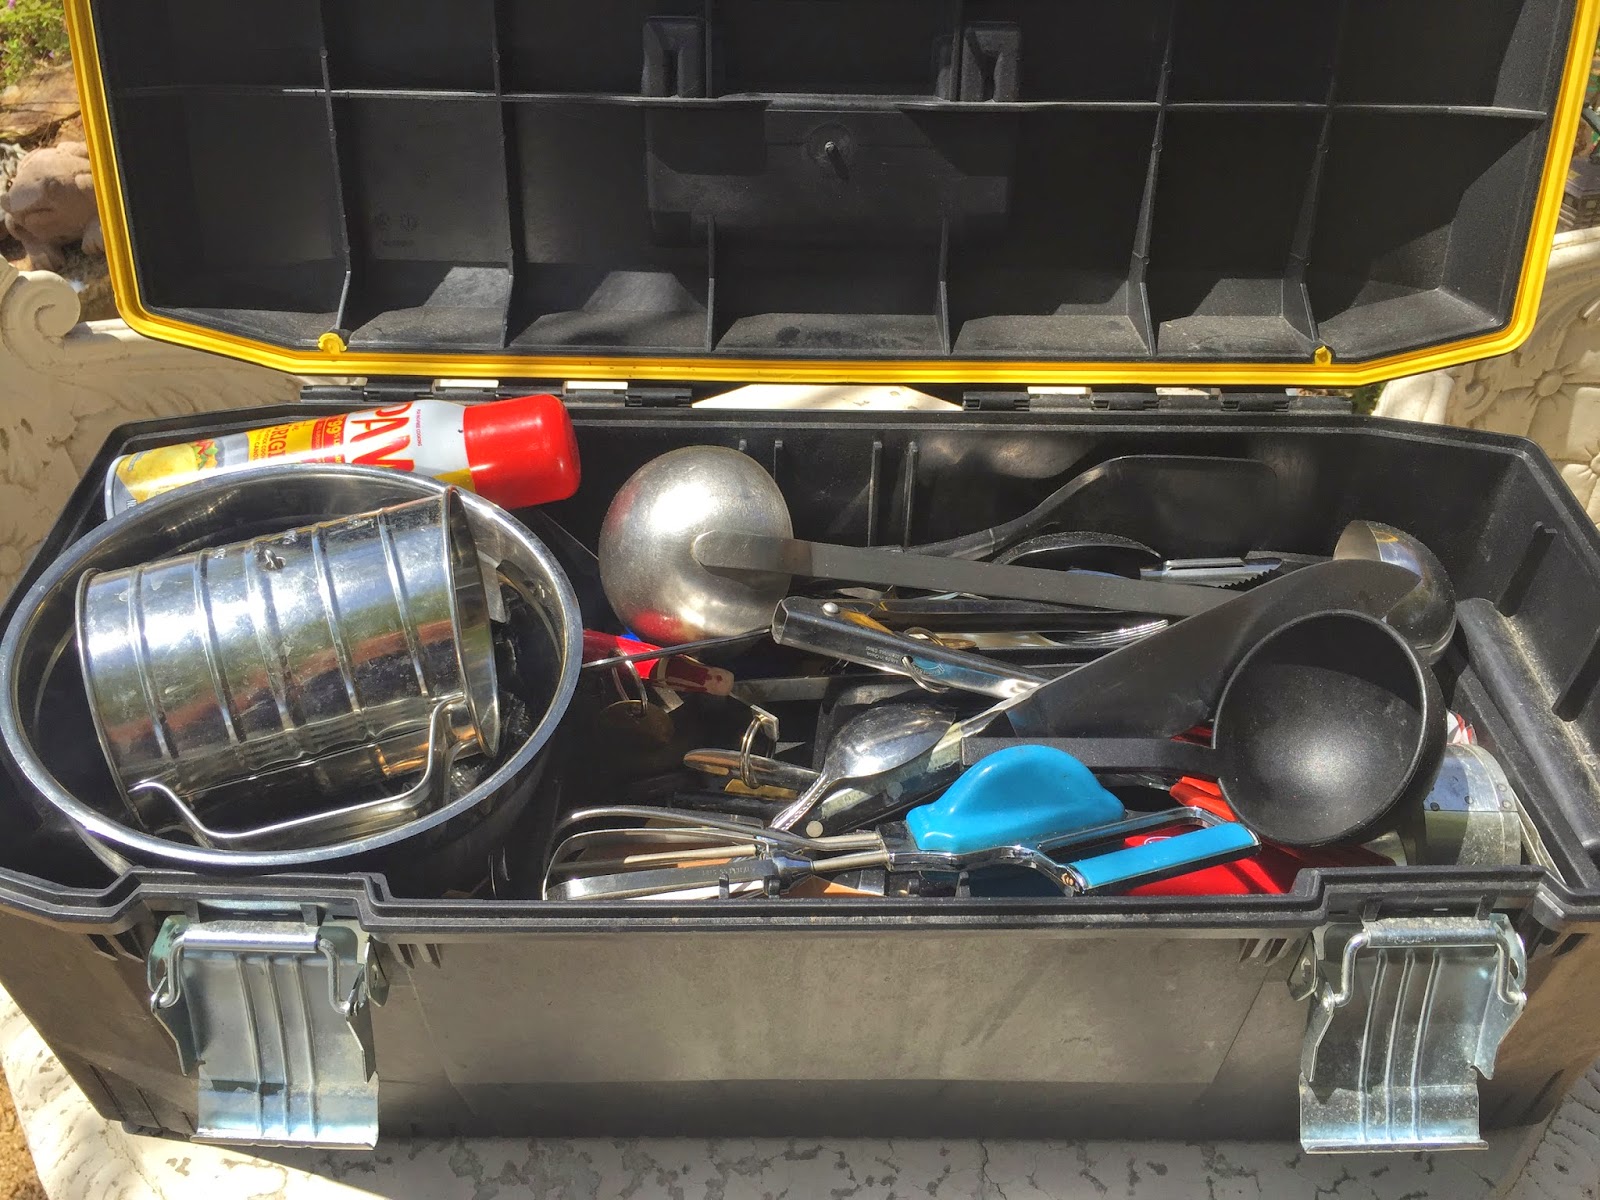
We use 2 Stanley Fat Max plastic tool boxes. They have a rubber seal, and latches. We leave them on the picnic table at all times (unless in bear country) and have never had the critters get in them. They also sit out getting rained on at times. When we return home the used items are replenished and kept inside so they are always ready to go for the next trip. Dry Ingredients such as flour, pancake mix, etc is rotated when we replenish. We dump the unused portion out on foil. Refill the used portion from new supply in the house, then dump the older ingredient now on the foil, back in on top to fill our camp container.
The cooking ingredient box has individual screw lid containers that contain flour, sugar, coffee, etc arranged in the bottom. Cheap containers found at your local dollar store. The tool tray sits on top of those and contains all the spices. The larger containers in the bottom have all their lids labeled with what is inside.
The utensil box holds all of our cooking tools. Knives, Sifters, Mini Cutting Board, Mixing Bowls, Whisks, Serving Spoons.
Here is a list of items in my two boxes. I cook with large groups and can cook or bake anything with what I carry.Adjust your items to suit your needs.
Spice/Flour Box
(2) Containers of Flour
Sugar
Coffee
Brown Sugar
Vanilla Coffee Powder
Buttermilk powder
Oatmeal
Cornmeal
(8) 1/4 Cup containers of Crisco
Spray oil
Salt
Pepper
Cilantro Flakes
Garlic Powder
Onion Powder
Italian Seasoning
Paprika
Corn Starch
Baking Soda
Baking Powder
Nutmeg
Cinnamon
Ginger ground/powder
Nutmeg ground/powder
Clove ground/powder
Burger Seasoning
Chili Powder
Cumin Powder
Vanilla Extract
Sage
Dry Milk
Cayenne Pepper
Bay Leaves
Vegetable Oil
Dry Yeast
Recipes on index cards in a small plastic zip lock bag
After having several cheap versions of the EZ-Up style canopies damaged because of wind, I set out to get a better canopy, and to fabricated a set of heavy duty stakes. Not something that would break the bank in the process.
I live in a desert and the soil is often a mixture of compacted sand and gravel. Any of the normally supplied stakes just would not work. Even some of the longer ones found at sporting good stores were ineffective. I know many of you stake down EZ-Up tent shade, and Chuck Wagon type canvas shelters. I also went to a commercial grade EZ Up brand canopy with straight legs. Even at places like Costco or Sam’s these commercial grade 10X10 canopies are in the $200 range.
These were put to the test on their first trip out. They were driven at an angle at the four corners. Then ratchet tie down straps were attached at all four corners of the EZ-UP, and tighten down. In the evening a storm blew in quickly. One of my friends EZ-Up’s stakes pulled out…that resulted in a mangled mess of aluminum uprights and ribs. Blowing around attached to the side of his trailer. His canopy went into the trash. Luckily his trailer wasn’t trashed in the process.
I couldn’t get my EZ Up down with that wind blowing. Nor did I think I could fold it for storage while working alone. I just made sure the straps were tight. The EZ-Up rode the storm out unscathed.
A set of four stakes will cost about $24 to fabricate (not counting paint and welding material). I happen to have a Mig wire welder which makes quick and clean work of the project. Gas welding/brazing would probably work just fine. If you are a good stick welder that will do too. Start to finish took me 45 minutes, including a quick coat of paint on the top end. These aren’t fancy, and I am not the greatest welder…but they certainly work.
These are made from Concrete Forming stakes and a few other common hardware items. I store and carry these in a old tent bag that has a zipper, and has 2 web handles.
Material:
(4) ¾”X24” Round Concrete Forming Stakes (The type with holes for nailing through)
(4) 3/8” nuts
(4) ¾” Flat Washers
(4) 1 ½” Steel Rings
Optional Fluorescent Orange Spray Paint
Tools:
Grinder or file
Welder or Brazing Torch
Bolt Cutters or Hacksaw or cold chisel and sledge
Channelocks, Visegrips, etc
Start by grinding or filing the round flat end of the stakes, and partially down the stake. This is to provide a shiny clean surface to weld. Also grind a small patch at the second hole down to provide a clean welding surface for the nut. Lastly grind about one inch at the point end if using an Electric Welder. Your welder grounding clamp will attach to the ground point end.
Cut the 4 rings with a bolt cutter, hacksaw or chisel. I did mine at the factory weld. Bend these cut ends slightly past each other and set aside.
Place one flat washer on a flat surface such as a brick. Hold the stake flat end down, inserted in the washer. Weld 360° around the stake end to attach the washer.
Flip the stake and weld the top of the washer seam were it meets the end of the round stake end.
With pliers or vise grips position the nut over the second hole which you have previously cleaned up with a grinder. Tack with the welder. Align and remove the vise grips holding the nut. Finish welding the nut to the stake. Be careful not to fill the nut hole with weld.
Slip the ring through the welded nut. Re-bend the ring to line back up. Weld the ring cut ends back together. Tack on one side, tack again at 180°. The ring should slide freely through the hole of the nut. The ring does not get welded to the nut.
Normally with a Mig your welds are not rough enough to need grinding. But clean up any sharp or poking points that might be protruding. The welds on the end of the stake at the washer will get hammered. They will soon flatten on their own.
I shot the top end with fluorescent orange paint so I can see them in the dark. Take a tennis ball (florescent) and slit it part way. These can be slipped over the stake after the stake is driven in. They are a great safety addition to help avoid a trip hazard, especially if kids are around.
DIY Project: Sliding drawer storage for Express Van
The objectives of this project were to first create Sliding Drawer storage in the rear of a Chevy Express van. The drawers are to ride on roller bearings to support lots of weight and for ease of use.
Additionally there will be a 30 gallon fresh water storage tank. This will be wired and plumbed to a 12 volt RV water pump to provide pressurized water.
Lastly the deck over the drawer space will be fitted with foam cushions and provide a comfortable sleeping area over 6 feet long and about 5 feet wide.
With some minor modifications this drawer system could be adapted for a pick up truck with a camper shell covering the truck bed, or various other SUV’s.
The project was started by creating some anchors for the wood deck. Electrical strut was attached to the van floor using eye bolts and the original seat latching pins that are in a Chevy Passenger van.. This provided a means to secure the wood to the van floor, and allows leveling with carpet shims out at the ends of the strut.
Two floating pieces of strut were attached to the underside of the far ends of the bottom plywood, at areas that have no seat floor connectors. These floating pieces of strut were shimmed to level using nuts and washers underneath. This installation allows the drawer box to be removed and the van returned to original, without drilling any holes in the floor of the van.
Right off the bat problems started. The threads of the eye bolts did not go far enough on the bolt shaft. It took 3 fender washers to make up the difference. I ended up pulling all the eye bolts out and used a thread cutting die to cut threads further down the shaft. After that these worked out with one washer as originally planned. This washer and nut will be recessed in the ¾ inch drawer box bottom panel. I did not want them sticking up any higher than necessary. I could have left the eye bolts floating, and eliminated that set of washer and nut. With the bolts rigid in place, it made dragging the drawer box assembly a lot easier…. to do the lining up, and dropping over the vertical bolts. A second fender washer and nut gets spun down on top of the drawer box bottom panel. This secures the box to the floor.
Positioning layout of water storage tank and RV On demand water pump. The tank and pump were already mounted in the van previously. It was originally mounted vertical, the long way, behind the 3rd row seat. (2nd & 3rd row rear seat have now been removed). Though the tank show here is flat on the wide side, it actually was installed with one of the narrow sides face down on the plywood. That way it took up less space I wanted for drawers. I did leave enough room to install the 12V RV water pump, and a full size AGM Battery. I also figured in a bulkhead and bottom stringer for that, using space in the water tank compartment.
Be sure to figure the passenger side clearance so that the vehicle jack compartment can be accessed, opened, and you can get the jack out.
At this point the assembly is about too bulky and heavy to handle by one person. Once I have the water tank positioned, the cross bulkhead panel, and attaching stringer locations were marked. This would eventually sectioned off the water tank area.
The shown assembly was then marked to saw cut out some sections of the bottom deck to lighten the load too. 4 dead areas of the wood plywood decking were cut out to reduce weight, but retain strength and leave material to attach all vertical partitions.
The assembly was pulled back out of the van. (Notice the protruding anchor bolts with no washers or nuts yet)
The cross bulkhead panel was installed to create the water tank chamber. A vertical center divider was run perpendicular to the bulkhead panel and attached to the bulkhead and the floor to create (2) drawer chambers about 22-23 inches wide. The end cap with drawer openings was then built and attached.
All panels are being screwed together in case this ever needs to be removed from the vehicle. Once the bottom panel was cut to lighten, the bulkhead panel attached, and the vertical divider screwed into place, this assembly was re-inserted in the van. The anchor bolts then have fender washers and nylon lock nuts spun down against the plywood deck. The excess threaded bolt lengths were ground flush with the top of the nuts.
The remainder of the wood construction will be complete inside the vehicle.
Roller bearing drawer guides were then installed on the inside of both sides of the box, as well as both sides of the vertical center divider. These will be skate board bearings part number 608-2RS. These are 8mmX 22mmX 7mm. Or about 7/8 inch OD X 5/16 ID hole X 5/16 wide. Some places want $4 to $6 each for these. I found them on eBay for about 40 cents each with free shipping, if ordered in lots of 100. I thought I might need 150 of them. So three days later my package of 200 arrived at my door step.
The drawer sides each have a 1×1 square steel tubing attached to both sides. This side tubing became the drawer rails. This tubing rail will ride on a long row of roller bearings, as well as a row of 4 on top (4 toward the drawer openings) above the tubing to support the extended drawer weight.
A removable “End Stop” needs installed through the very end of each rail after installing the completed drawers. (Drill a hole through the top end of the rail toward the very end of the rail toward the front of the vehicle. Weld this nut on the inside of the tubing end lining up the nut threads with the hole you drilled. After installing the completed drawers, screw a short bolt down into the threads of the nut. This will catch one the first of the top roller bearings and prevent the draw from pulling all the way out.
Next I needed to fabricate (4) 1X1 steel drawer rails. These would be mounted on the sides of the drawers, and ride on the roller bearings. I preferred to side mount mine. The steel tubing would true up the sides of the long drawers. Sigh….it is so hard to find straight lumber any more….even plywood.
I cut my steel tubing to length and marked off bolt placement. My design would require drilling thought the tubing with a 5/16 inch bit. Once all holes were drilled in the tubing I laid these out on my drawer sides. They were clamped into place, marked with bolt direction, marked top, and which side of which drawer these mated up with. Then I drilled through the holes in the tubing, and on through the side of the drawer. This was done because no matter how well you mark and drill the tubing, none of the holes would be consistent. The clamps were removed and brazing of the bolts was next on the agenda.
Carriage bolts were used to make sawing the heads off easier than using a standard hex head bolt. I insert the carriage bolts through the hole, brazed the bolt on the thread side. Then power hack sawed off the bolt head. Once the bolt head was removed I brazed this flush cut end to the tubing…finishing off that side by hitting it with grinder to make it flush and smooth.
Here I have 4 complete rails. They were matched up with the corresponding drawer side. Using a rubber mallet the bolt ends were pounded into the pre-drilled holes in the drawer sides. A flat washer and a nylon locking nut secured all bolts. The excess threads were sawed off and ground smooth with a grinder.
Not shown are the welded nuts inside the end of the tubing to act as drawer stop mounts.
Roller bearing placement was marked.
(4) on top starting 2 inches in from the drawer face opening, then every 5 inches on center.
(4) on the bottom exactly lined up with the four on top. Then bottom bearings every 12 inches. Toward the back add a couple that are spaced every 5 inches to carry the load when drawers are closed and you are traveling.
You want these two rows to be precise. Almost creating a clamping action between the top and bottom row, to secure the metal rail in between. You want no slop. Ideally when traveling down the road, the rail will have no room to bounce up and down. You do not want it to rattle or squeak.
The roller bearings are mounted using 5/15 inch bolts, nuts, flat washers, and nylon lock nuts. Those in the center are mounted on a common threaded 5/16 rod using lock nuts, flat washers, and nylon locking nuts. Excess threaded ends are cut off and ground smooth.
You may want to install more bearings on the bottom row depending on your intended load. The top row you want just the 4 shown, or your “stop” bolt will not allow the draw to come out far enough.
Shown above the drawers were rough fitted and work great. The drawers inside measurements are about 56 inches long, 20 inches wide and about 15 inches deep. ¾ inch sides and ½ inch bottoms. These are heavy duty. Made with 3/4 plywood.
At this stage, the drawers are roughed in and actually functional. I was able to test them out over a 3 day camping weekend. I loaded them full. There were Cast Iron cooking skillets, pots, tools, camp stove, etc. All this gear was heavy stuff. The intent was to really test out the drawers. The drawers worked great, even minus the drawer fronts, handles and trim.
I spend most of a day wiring and rough plumbing the fresh water storage tank. The fill tube and faucet are plumbed to the side door for easy access. Shown here you see a fill tube, pressurized faucet, vent, and a tank drain faucet. All the lines are run including the pump and connection to the 12V RV pump. As I said these are at the side door and overhang the step which has a plastic step liner. The backboard where the faucets protrude will be covered in tile, stainless, or aluminum. That way any drips or spray will end up on the step, and not on the carpeting.
Plumbing and wiring all hooked up. Tank partially filled. Pressure tested to make sure there are no leaks.
Shown below is the same area covered with white cracked ice finish FRP Wallboard. This is a non porous polyester resin material available from Home Depot. This was scrap left over from another project. It was applied with contact cement.
The images below show the completed drawer fronts. Pull handles installed. Also each drawer has a locking deadbolt latch to prevent the drawer from rolling back and forth during vehicle stopping or accelerating. I use a rubber “Door Handle Stop” on the front end of the drawer where it nearly touches the bulkhead. The Door Handle Stop acts as a rubber cushion or shock absorber. I have to apply slight inward pressure on the drawer handle to enable me to drop the deadbolt in place. This keeps the drawer from making back and forth noise, or deadbolt rattle, while driving.
The deck was fitted with individual hinged access doors over each drawer, the water tank area. Two dead spots along the sides that provide further storage, had drop in deck lids made. Finger holes were drilled in the hinged doors and slide in lids to allow easy access from the top too.
A 3 inch foam mattress on top of the deck was made in 3 sections. It provides an oversized bed. Configured to allow opening access to one half at a time (A drawer top or a compartment slid in top). Or access only to the water tank/pump/battery compartment.
The vertical panel facing front was covered with gray carpeting. Corners trimmed with ¾ inch aluminum angle. Exposed drawer fronts are to be painted charcoal gray to match the vehicle interior.
For about $100 one of these portable jump start units might meet your portable power needs when camping or off grid for a couple days. Some now have built in 110V AC inverters. So not only will they provide an emergency jump, they offer other 12V DC options as well as 110V AC to run small household powered devices.
We tested the Schumacher XP2260 that has the following features:
Its own internal rechargeable battery
12V DCJump capabilities
12V DC Output ports (Cigarette lighter type connector)
Internal battery powered 110V AC Inverter rated at 600 watts/1200 watt peak surge
Standard household 110V AC Output ports powered by the internal inverter
USB charging ports for phones, tablets, etc.
Digital display to monitor battery status and charging
Emergency light
Air Compressor
XP2260
I used and tested a Schumacher XP2260 portable jump start unit. It has a built in 110V AC Inverter rated at 600watts/1200watt peak surge. It also has a couple 12V DC connectors and a couple USB Charging ports. In addition it has a compressor, emergency LED white light, and digital monitoring of the power. Not to mention its main purpose of being able to jump start a vehicle (If the charge is full)
The XP2260 is rated at 22 AH (Amp hours) which is about one forth the rule of thumb for a 80 watt solar panel and one battery solar set up. While this device can’t power a microwave, or a dorm room sized fridge, it can do many other things. Also bear in mind that the 22 AH capacity is not the usable Amp Hours. You should never discharge less than 50% and some say it is better to never discharge less than 60%. For easy math we will use the 50%. So 50% of the 22 AH capacity=11amp hours of usable power.
I recently ran my laptop playing a DVD. It played the whole movie. The meter said I had 54% of a charge left. I am not sure it was fully charged when I started so more testing is needed. This device easily charges off a 400Watt inverter I have plugged into the cigarette lighter of my tow vehicle while I am driving. I am thinking this XP2260 could probably power a DVD and a newer Flat screen TV (they use less power) through at least one movie. I am planning on testing this theory out on one of my next outings in which I am unable to sit around a campfire.
Another fun test on the XP2260 would be to connect a solar panel and controller that outputs 12V DC to the input of an inverter, say a cheap 400 Watt type. That also might require a battery in between the solar controller and the inverter input? Then plug the XP2260 into the inverter 110V AC output to charge the XP2260? You then have portable power to use through the night to charge up digital devices via its USB ports, use the 12V sockets to power those types of devices, and with the built in 400 Watt inverter also have 110V AC for lower load type household devices.
TESTING OF THE XP2269 10/24/14
We performed a Test of the XP2260 in powering a 110V AC TV, and a 110V AC DVD player. The XP2260 was fully charged (13.6 Volts) just prior to commencing with the test. We wanted to prove the XP2260 would power both devices that are normal household voltage (110V AC). The XP2260 was used in the “Inverter” mode and not connected to any other power source during testing. We took the ratings off the sticker on the back of both the TV and the DVD player.
32 inch Flat Screen rated at 1 AMP
Blue Ray DVD Player rated at 3 AMP
______
Total Calculated AMPs per hours 4 AMP
Estimate length of Play time 3 hours
We ran the TV and DVD continuously to watch a movie for 3 hours. We found an Actual AMP meter fluctuated between 2.8 and 3.4 AMPs during play. Our findings are the actual AMP hours used, was more like an average of 3 AMPs per hour. Not at the sticker rated values that indicated it would be 4 AMPs per hour. We were pleased with that fact.
We further calculate the numbers for the 3 hours of play time
Calculated AMP usage for 3 hours X 4 AMPs = 12 AMPs
Actual AMP usage for 3 hours X 3 AMPS = 9 AMPS
After disconnecting all load devices from the XP2260 at the end of the 3 hour movie play, the XP2260 meter indicated there was still an 80% charge. The fully charged voltage of 13.6 volts was now down to 12.5 volts. Since the XP2260 is rated at a maximum storage of 22 AMPs, we were surprised the reading wasn’t closer to 50%. It is quite possible the depletion rate when using the built in inverter, under load, accelerates faster toward the end of discharge? We plan further testing on a longer duration to provide those results as well.
The conclusion of the test we set out to satisfy is this. The XP2260 is quite capable of providing enough stored energy to power both the TV and DVD we used, play for 3 hours, and have plenty of power left over.
Our next test will be to play two movies, back to back, to test the endurance for that length of play.
Be aware that you should never discharge the battery lower than 50% to maintain the longest life of the rechargeable battery.
Note/Warning. I am sure the inverter in this unit is not pure sine. I am guessing it puts out square wave AC power that may damage some electronic devices. So use the Inverter 110VAC with items you can afford to damage.
I did not follow my own advice. Further note about the Inverter 110VAC side of things. In later use I had a new flat screen TV plugged into this power source. Something in the TV fried, and I ended up needing to buy a new TV. I further do not recommend it for sensitive electronics you can’t afford to have damaged.