RETIREMENT DIY – Changing a Brake Light Switch with a dose of humor

The joys of retirement. No money, but lots of time. Do stuff yourself you say. Save money!…..seems like a great plan!

I had to change my brake light switch today. It was messing up my cruise control and activating my trailer brake controller & trailer brakes. It would happen when the brake pedal was normal, driving down the road.

Seems like a simple enough repair on the surface. There was a $125 diag fee, plus parts and labor, to have this repair done. I already knew what the problem was. Not parting with $200-$300 seemed like a good DIY trade-off.

The $12 part came today off Amazon. A simple thing. Remove 1 bolt and a retaining clip, pull the switch out of position. Unplug the wiring harness connector. Reverse the process and call it done.

Now this is where it gets good. About the time you say its a 30 minute job, its not!

The bolt….no problem. The retaining clip….well this could be used for a measurement in an IQ test. I might add this is in a van, up under the dash, in the dark, and in a very awkward location. My arms would not bend that way. And that clip was not clearly visible.

I added a flash light, a stick to hold a major wiring harness out of the way. Knelt on the ground….couldn’t see….couldn’t bend my hands where I wanted them…

Contemplated the fact if I popped this thing off would I ever get it back on?

Now I am upside down on the drivers seat…head and neck on the floor trying to still figure out that retaining clip….the flashlight falls and rolls. Did I mention I am not 20 years old and can’t bend like I used too? Well I guess I still can but it doesn’t come without pain. Either immediate, or perhaps the next day. Time to try something else.

Thoughts of parts and labor not so out of line….LOL

I drag out the extension cord and a regular light….Tried the upside down seat thing again….did I mention when you get older your eyes don’t focus as well as they did at one time…kept knocking my glasses caddy-wompus and had to re-adjust my upside down seat position so I could bend my arms to fix my glasses. I swear 40 some years ago this stuff seemed easier.

Deep breath and slow sigh…..This required a new tactic. I moved to lay across my two front seats and slipped down between the seats and the center engine hump, on my side, facing forward…..remember this is a van. More later on why a retired, more plump person, might find out later this would result in a new problem to solve.

Hey I found out how to remove the retaining clip. It took 2 seconds once you move through that learning curve. Being able to see from this crammed up vantage point certainly helped. Clip off, switch off, harness unplugged, didn’t even break the cheap plastic harness connector lock! Those snap in locks that always break and really cause a problem…..reversed all steps and bolted the switch on, no problem. 5 Minutes.

The next problem (one that wasn’t planned on) was getting myself off the floor and back on the seats. Squirming around while making the repair, had eased my body completely onto the floor. It was actually quite comfortable down there.

But I couldn’t get back up! I was nearly pinned in there. One arm and hand up grabbing the steering wheel trying to pull myself up….the spare arm up above my head, trying to maneuver that spare arm up under my body to help push up. Several times my steering wheel hand accidentally blowing the horn. Feet thrashing the air trying to get them up on the passenger seat…hoping to get some leverage to help with the body lift.

I mention all of this because I found humor in myself and what I must look like if someone was watching. I started laughing. Had to rest and start over.

I did manage to get free just as my neighbor pulled up. I said “Hi”. He made some remark in question format like “Are you laying down on the job again?” He obviously did not see the flailing feet through the windshield.

What could I say? Busted! I just laughed. He had no clue what had just gone on.

I just chock this up to the joys of retirement. Now I have the time to fix stuff. But not the money to hire it done. The list seems endless. Every day is an experience! Some are just a little more humorous.

GHOST TOWN CAMPING & COOKING

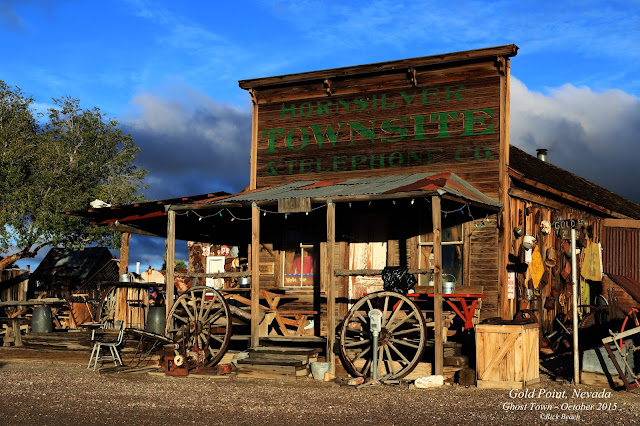
Twice a year we have a local group out of Las Vegas that camps at one of Nevada’s Ghost Towns.  Our spring event will take place May 12 through the 15th, 2016.  The core group camps with anything from RV’s, Teardrops,  to Tents.  RV spots are limited to 11 and normally all get reserved.  There are also a limited amount of rustic cabins for rent.  There is endless dry camping where you can camp out of your car and set up a tent.

We also have an October trip scheduled for October 13-16, 2016.

If you want the experience and car camping is your thing.  This would be a unique opportunity to attach to your Havasu Falls trip if you are coming in through Las Vegas.  Or just join us and have a fun weekend.

This is paved roads the entire way.  You can travel here with the family car or a rental with no fear of needing an off-road vehicle.

Gold Point, Nevada is about a 3 hour drive north out of Las Vegas.  It is remote but offers a rewarding experience.  The Saloon is opened for our group.  There are also some prepared meals available for purchase, but head count must be given.

This is rustic camping for the most part.  Pit toilets, but there is a shower.  No tables.  No tree’s.  Don’t expect comforts and you won’t be disappointed.  A shade/rain fly is recommended but not necessary.  As is a folding table.

Hard Luck Mine Castle

There are no services or store.  The nearest small town is about 40 miles away.  Be sure to bring everything you need.  Water is available.

The area is full of photogenic buildings, old iron, mining equipment, and machinery.  A handful of people live in the town and are restoring buildings while maintaining the old dilapidated look.

The town sits at an altitude just above 5000 ft so during spring and fall expect chilly nights and pleasant days.  Some years its rained and  we spent the day in the saloon sitting around the wood stove with a roaring fire.

One of the Las Vegas Dutch Oven cooking groups does a Saturday Potluck. Cost of admission to the potluck meal is to bring a dish or food of some sort.

There are endless gravel roads going off into the mountains in all directions.  One snakes over a hill to another Ghost Town called State Line…though 4 wheel drive may be required for that one.

Or head over to the Hard Luck Mine Castle.  If you can get the owner to give you a tour (donations required) you will be amazed at what someone built in some very unforgiving terrain and on top of the old Hard Luck Mine shaft.

The Ghost Town of Rhyolite, Nevada is about a hour and a half drive one way from Gold Point (On paved roads).  It is another photographers dream. Totally awesome at sunrise or sunset!

You are pretty much on your own as far as food.  Though some meals can be arranged in advance.  Sheriff Stone (one of the proprietors will do breakfast, lunch, and dinner if arranged for in advance)

Come joins us around the campfire!

Sponsored by: “TheDutchOvenCook.com”

Loading

WE NEED YOUR ARTICLES, PHOTOS, VIDEOS

TOPONAUTIC BLOG INFO

Do you write or shoot photos professionally, as a hobby, or just a passion in your off time?

TOPONAUTIC actively seeks blog material from our readers and those wishing to publish outdoor related articles and photos.  We have several outdoor related blogs.  Publish with us, and use us as a reference to help or start your career.  Or send your material just for the pleasure of seeing your work online?  At the same time you will help us help others.

We have one specialty blog on “Backpacking Havasu Falls”.  For that blog we need articles, photos, and videos specific to that area.

We currently strive to offer free content to our readers.  With your support as a writer or photographer, you allow us to continue this service.  Without your generous contributions we could not offer this service or even exist.  All of our time and labor is donated.

We are not a group of professional writers or photographers, so don’t feel that you need to be.  Those of you that are professional, we gladly accept and encourage your donations of writings and images.  We give credit to authors and photographers of all levels.  If requested we will not only include your name, but links to your website, email or other contact information.

We accept anything outdoor related such as trip or trail reports, travel destinations, hiking spots, and more.

We have a large following that is interested in Dutch Oven & Outdoor Cooking.  We particularly enjoy recipes that are accompanied with photos of the food.  These recipes will eventually be combined into a cook book and published.  Those people submitting recipes will be offered a discounted first printing.  We are currently exploring a version we can offer as an eBook to keep the cost low.

We also accept Outdoor related “Upcoming” events.  Car Shows, Dutch Oven Cook-Offs, Chili Cook-offs, BBQ Events, Street Fairs, Rodeo’s, Farmer Markets,  Charity Events, Fund Raisers, and more.

Contact us if you are interested in Commercial Ad space.  First Month Free with no obligation to continue.  No set up, or hidden fees.

Email material to info@toponautic.com with a statement stating you release the media for use by TOPONAUTIC.  Photos with recognizable people must have a release from each person, and each identified in the photo.  Contact us for release form.

Email to:

info@toponautic.com

Loading

SLAW

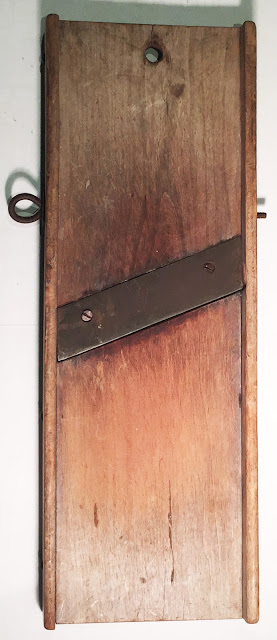
Slaw Cutters & Buttermilk Coleslaw

2 cups mayonnaise (real mayonnaise, not Miracle Whip)

1 cup buttermilk

1 1/2 tablespoons Agave Syrup

1 teaspoon celery seed

1/2 teaspoon ground black pepper

1 tablespoon lemon juice

½ to full Head of Cabbage sliced on a slaw cutter

In a large glass bowl, whisk and combine the mayo, buttermilk, agave, celery seed, pepper, and lemon juice.

Add sliced cabbage and stir well to coat with the combined mixture. Refrigerate for several hours to let the flavors blend before serving.

Here is a way to produce your own wholesome Buttermilk full of beneficial probiotics.

Put your vintage kitchenware/cookware to good use.

Loading

COLLECTING CAST IRON Wagner and Lodge

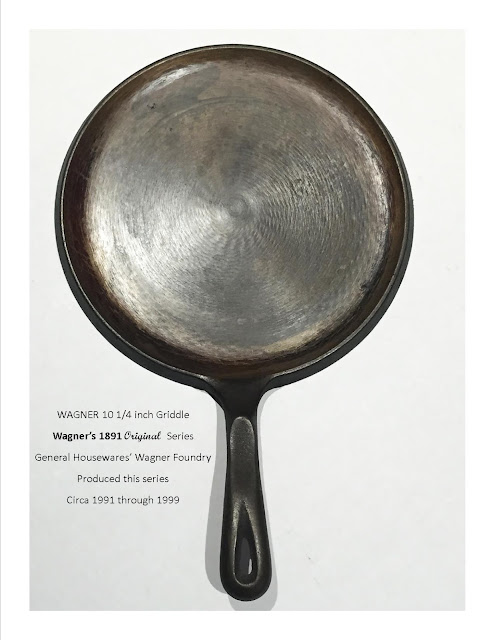
Both these pieces of Cast Iron where recently picked up at an Estate Sale.  I considered them priced at a premium, nearly retail.  But when they come in the condition these were in, I am willing to pay a little higher.  All the picker, antique, and flea market shows, have made these items really popular.  Look on eBay at some of the prices.  Some of us that have been collecting for years think people are out of their minds.

Both of these are nothing special or vintage.  Common and easily found.  The 10 1/4 inch round skillet (Wagner’s 1891 Original  Series) is often found at garage sales or flea markets in the $5 to $10 range.  Expect double that at an Estate Sale.  No they are not from 1891.  This series of cast iron cookware was produced at the General Housewares’ Wagner foundry from 1991 until 1999… until the foundry closed in 1999.

I like the square LODGE Skillet Griddle.  Both of these pieces will be seasoned several times and then put in my kitchen for everyday use.  I intend to use Crisbee’s Seasoning product that I tested for a previous review.  I like the finish it produces.

You can follow this link on Reconditioning & Re-seasoning cast iron if you are looking for tips or methods.

Loading

Hackberry

Hackberry’s General Store is a trip destination in itself.  If you have the time, travel an old section of Route 66 heading northeast out of Kingman, Arizona.  This old Route 66 service station has featured photos appearing in numerous advertisements.  It is known worldwide and is a favorite stop for many enjoying a trip on old Route 66.

This is a popular stop on any trip people are making to Havasu Falls for backpacking trips.  Just allow yourself some extra time for this stop.

Stop in and browse the inside.  The place has an old time staged soda fountain.  The bathrooms are hilarious.  There are dollar bills plastered on the ceiling and walls by travelers from all over the world.

Bring your camera because the building and all of the “old iron” scattered around, is a photographers dream.

Address:

11255 E Hwy 66

Hackberry, AZ  86401

Visit their official website for more info http://hackberrygeneralstore.com/

Loading

Sauerkraut Balls

Posted for New Years celebration.  Combining pork & Sauerkraut to bring you a year filled with good luck.

Sauerkraut Balls

I grew up in NE Ohio and these are favorite in that area

Rick Beach

1lb       Sausage (bulk ground)

½         Onion Sweet type chopped

1 Cup   Sauerkraut (drained)

4 oz      Cream Cheese

1          Egg, Beaten slightly

1 Tbsp  Flour

1 tsp    Dry Mustard

1 tsp    Cilantro (Dried Flakes)

¼ tsp    Celery Seed

Salt

Ground Black Pepper

2 Cups Milk

3          Eggs beaten slightly

2 Cups Dried Bread Crumbs

Oil for frying

In a skillet Brown the sausage and onions breaking up the sausage as it cooks.

Drain any grease.  Add Sauerkraut, Cream Cheese, Egg, Flour, Mustard, Celery Seed, Salt & Pepper. Combine well.

Roll in 1 inch balls.  Place on cookie sheet and place in freezer until partially frozen

In a bowl combine the milk and eggs.  In a second bowl place the dry Bread Crumbs.  Dip each ball into the milk/egg liquid mixture, and then roll in the bread crumbs to coat.

Deep Fry or skillet fry, in oil, the balls about 5 minutes.

Serve skewered with a toothpick as an appetizer, with your favorite dipping sauce.

Loading

Chuckwagon Supply Cook Table

Gear Review:  Dutch Oven Cooking table from Chuckwagon Supply

We love gear reviews that our readers submit or allow us to share with you.  Tom from 1960HikerDude graciously allowed me to re-post his video. If you are in the market for a Dutch Oven Cooking table this certainly needs your review.  This table has options you won’t find on others.  I particularly like the high wind screen and the collapsible side tables.

Please check out other video’s from Tom from 1960HikerDude 

You can click here to follow to the Chuckwagon Supply Website.

Loading

One if by Sea – Dutch Oven Cooking on the water

Winter seems to put a damper on many traditionally summer-time enjoyed outdoors activities.  Dutch Oven Cooking is one such activity.  Though many of us do cook throughout the year.  Perhaps on the Patio or in the shelter of an open garage?  Others do not let anything get them down.

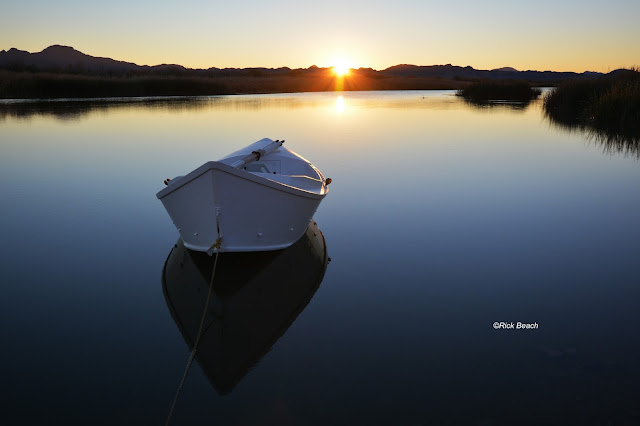
I get a personal annual invite to join in with about 30 other friends and acquaintances to make a 3 day Kayak/Canoe/Dory adventure that takes place the month of January.  This is not one of my own organized events.  This takes place on the lower Colorado River.  Somewhere roughly in an area between Blythe California, and Yuma Arizona.

It is enjoyable to be a participant rather being than the person attending to the details.  My many thanks to the person that puts this all together….and you know who you are!  I would really like to put a plug in for the organizer of all this fun, but I am not sure all the details can go public?

You have to be a special breed to enjoy such an adventure.  It can be cold.  Almost guaranteed to have cold nights.  Easily dropping in the twenty degree Fahrenheit range.  Some years the days are delightfully warm.  Other years its hard to squeeze 40°F out of the daytime highs.  Winds can be unpredictable and brutal trying to paddle the miles to the take out point.

This is a lonely and for the most part, a very desolate stretch of country.  Even 4-wheel drive type roads can be many miles away.  So once you commit, you are pretty much on your own for 3 days.  But the water, the waterfowl, birds of prey, and the reed lined banks of the river, pass by at such and enjoyable pace.  It allows you to slow down and decompress from  the stress we call the “normal” today.

It is definitely not all about the paddling, or enjoying the Colorado River.  Or all the beauty nature offers along the way.  Interestingly enough the river in this area is pretty much as it has always been.  There are some additions a lifetime ago, perhaps several lifetimes ago,  You can explore several old miners shacks up on the banks, and an old mining area/town that once was.

Cast Iron Dutch ovens are hauled along in any fashion that works.  There is warm food, and warm friendship around the campfire.  One evening is set aside for a “Trash Can” cooked turkey.  That evenings feast comes with all the fixings.  Foil-packed veggies and potatoes, are fire roasted in the coals.  All the goodies a laid out Thanksgiving spread would have.

Often the campfire evening is enjoyed around the fire with someone picking a guitar, and all of us become the best singers you ever heard.  Though I am not sure why that good singing gets the coyotes howling….hmmm.

The  morning sunrises will knock your socks off.  Though your thoughts might focus more on enjoying the warmth of your sleeping bag.  The sunrises are something to have you jumping up for.  Just put on the coffee and enjoy God’s gift as it unfolds in front of you.  On a brisk morning the warming rays of the sun on your face is better than perhaps that cup of coffee.  Having them both from the comfort of a folding camp chair, while the birds start singing….well it just doesn’t get much better than that!

Please check back for the follow-up article on the January 2016 trip.  We will talk about some of the highlights and new memories created in 2016

Loading

Bread Rolls & Artichoke Spinach Dip Bake


Recipe & photos by:  Rick Beach

By combining two of our favorite recipes you can bake this fabulous Dutch Oven treat.  This creation is great as an appetizer.

Use:
Old Fashioned White Bread Recipe
Artichoke Spinach Dip

Use a 14 inch Dutch Oven that has been well greased.  Grease up a relatively straight sided bowl to be placed right side up in the center of the Dutch Oven.  Size it properly to get 2 rows of finished rolls.  The dip will fill this space created by the bowl once removed.

Preheat oven to 375°F  if using the kitchen oven.

The rolls are from our OldFashioned White Bread recipe.  Use 1 Tbsp Agave or 1 ½ Tbsp white sugar in the recipe where it calls for Agave.  Follow the recipe through the first rise of the dough.  Turn out on a floured board and divide into 24 – 28 equal chunks of dough.  Tuck each piece of dough into itself to form a roll.   Arrange two rows of buns between the bowl and the side of the Dutch Oven.  Spray the tops with cooking spray such as Pam, or brush with melted butter.

Cover the Dutch Oven with Plastic wrap and set in a warm draft free area (top of the pre-warming stove) to allow the dough (now rolls) raise the second time.  This can take anywhere from a 1/2hr to 1hr.  Allow the dough to double in size.

In the meantime prepare the ArtichokeSpinach Dip up to the point of baking.  But do not bake it.  Refrigerate the dip while waiting for the buns to rise.

If baking with charcoal start your coals 15 minutes prior to the following steps.

Once the buns have risen, heat the dip until warm using a sauce pan or microwave.  Just to the warm point.  Do not cook it.

Once the dip is just warm, gently slide the bowl out of the center of the rolls.  Spoon the dip into the center hole the bowl created.  Pack the dip up against the raised rolls circling the interior of the Dutch Oven.  The center hole should now be filled with dip about 1 ½ to 2 inches deep.  Do this gently so you don’t make the raised rolls deflate and go flat.

In a standard kitchen Oven bake uncovered at 375°F for about 40 minutes or until the rolls become golden brown.

Baking with charcoal, bake covered; applying more heat to the 14 inch Dutch Oven lid, and less underneath to get 375°F (Generally 19 coals on the top lid.  11 coals underneath the Dutch Oven.  Arranged coals just inside the outer perimeter –  If using a different sized Dutch Oven adjust accordingly)  Bake around 40 minutes or until the rolls are golden brown.

Per the Artichoke Spinach Dip recipe remove from the heat and garnish with Mozzarella Cheese and Fresh Ground Pepper.

Serve hot.

Loading